Friday, July 30, 2021

Ellen Hutson | Summer of Stamping: Week 3 -- Pretty Pink Posh: Summer Circles


I'm back with more Ellen Hutson Summer of Stamping inspiration and this time I'm featuring the July 26th Release! Pretty Pink Posh designed the Summer Circles Combo which is a beautiful set of summery images in circles and the coordinating dies turn them into suns. It's so fun to colour these beautiful images and I had a really hard time deciding what colours and mediums to create with the sun die.


I started by stamping the flip flop image with Memento Tuxedo Black ink and colouring it with Copic markers. You can find all those colours in the supply links below. Next, I die cut the image using the coordinating dies and die cut the sun from several colours of cardstock, as well as silver glitter cardstock before settling on the gold foil cardstock. I preferred the foil over glitter since it shows the stitching detail on the die.


Next, I used the Happy Birthday Hot Foil Stamp with gold foil on Neenah heavyweight in the Gemini Foilpress and Gemini Junior die cutting machine. Then I die cut it using the coordinating Big Scripty Happy Birthday Die.


I just love the way the two types of gold foil complement each other! To provide a contrast, I cut a 4" x 5.5" panel from Bazzill Robin's Egg cardstock to match the flip flops and added texture to it using the A2 Piercing Plate. I love this plate so much, I could use it on everything.


I added a strip of patterned paper to the bottom of the card base before attaching the pierced panel and die cut elements. I popped the stamped image on with foam tape and used liquid glue to attach everything to the front panel, including the gold crystals which I thought looked like sparkly sand.

Thanks so much for stopping by!

Supplies

Saturday, July 24, 2021

Spellbinders | July 2021 Clear Stamp of the Month


Today's pairing features both the July 2021 Clear Stamp of the Month and the July 2021 Small Die of the Month from Spellbinders. The sentiments and images from the Clear Stamp of the Month work perfectly with both the Small Die of the Month and the Large Die of the Month. Most monthly kits work well together and you can find a list of all the value kits HERE. If you subscribe by July 24, 2021, you will receive this month's featured kits which means today is the last day to grab these particular kits!


If you missed my previous inspiration with the July 2021 Small Die of the Month, you can find it HERE. Once again, I used it differently than intended on both these cards by using only part of the die to keep the focus on the July 2021 Clear Stamp of the Month.


I used a variety of cardstock brands here. On the first mini slim card, the base was cut from white linen cardstock. The top layer was cut from pale rose cardstock and lined with opal glitter cardstock and the flowers were heat embossed on the card base with halo embossing powder to match the glitter cardstock. The sentiment was heat embossed on sea salt cardstock.


On the second mini slim card, the base was cut from pale rose cardstock, the top layers were cut from sea salt cardstock and lined with silver glitter cardstock and topped with smooth white cardstock. To finish, I heat embossed the sentiment and single roses above and below, framing the sentiment with white silk bows.

Here's a list of kits I share each month and some of the value kits:

Thanks so much for stopping by!

Supplies

Friday, July 23, 2021

Spellbinders | July 2021 Large Die of the Month


Today's inspiration for Spellbinders features the July 2021 Large Die of the Month. Although I didn't feature it here, this month's kit also comes with three dies to create a custom envelope for this mini slim card design and the July 2021 Clear Stamp of the Month includes a shaped label that works with the envelope die. Most monthly kits work well together and you can find a list of all the value kits HERE. If you subscribe by July 24, 2021, you will receive this month's featured kits.


Just like my feature card for the July 2021 Small Die of the Month, I didn't do any stamping on this card. I simply used the dies included in the kit to create the birthday sentiment. There are eight dies alone just for the mini slim card and the patterns on the shapes alternate with each layer.


I used beautiful cardstock from Simon Says Stamp and the colours are, from largest to smallest: Blue Violet, Island Blue, Mint, Peacock Teal, Audrey Blue, Surf Blue and Sea Glass.


For the flowers, the greys are also from Simon Says Stamp and the colours are, from light to dark: Fog Gray, Smoke Gray and Slate Gray. The silver pieces behind the sentiment and in the flowers and leaves are from the Sizzix Silver Opulent Cardstock Pack.


I used a tape runner to stack all the layers on to a white linen card base. Then I used Bearly Arts liquid glue to assemble the flowers. I used foam tape to pop up the flowers and mini glue dots to attach the leaves.

Here's a list of kits I share each month and some of the value kits:

Thanks so much for stopping by!

Supplies

Thursday, July 22, 2021

VIDEO | Taylored Expressions | Merry Blooms Card Kit

Hello, crafty friends! I'm excited to bring you another video for Taylored Expressions, this time featuring two holiday cards using the festive Merry Blooms Card Kit. The kit has a fabulous Merry Blooms cling/clear/stencil trio, a full 4" x 6" Joyful Season sentiment stamp set, Perfect Poinsettia dies and a pot of red and gold drip drops (additional supplies are linked below). There's also the option of add-on Joyful Season Dies for the sentiment set and you'll be given this option when you go to the website and add the kit to your cart.


My first card design is more traditional and I used the Merry Blooms cling/clear/stencil trio to create the background. I stamped the background on Sugar Cube cardstock using Sweet Basil ink, stencilled the poinsettias using Watermelon ink and added the veins for the flowers using Mulled Wine ink and veins for the leaves in Sweet Basil ink


I stamped the sentiment from Joyful Season directly in the centre of the panel using Oreo ink and die cut it using the add-on Joyful Season Dies.

Using the same Joyful Season sentiment die, I also cut out the shape from gold glitter cardstock. I trimmed a Mulled Wine card base and adhered the panel to it.

I used my favourite Bearly Arts liquid glue to insert the gold glitter die cut into the negative space and popped up the stamped sentiment with foam tape.

To finish this card, I added gold drip drops in the centres of the poinsettias and a couple more around the sentiment.

My second card features non-traditional colours for a brighter, more dimensional card. I started by stamping the Merry Blooms background on Toffee cardstock using Sugar Cube pigment ink.

On a separate Sugar Cube panel, I used the Merry Blooms stencil to create ink blended poinsettias with Dijon ink. Then I used a trick with vellum and the Perfect Poinsettia dies to cut out those stencilled poinsettias, as well as additional vellum poinsettias which were then stacked with Bearly Arts liquid glue.

I stamped the veins of the white leaves with Toffee ink and I stamped the veins of the poinsettias with Sweet Basil ink and the centres with Mulled Wine ink. I attached the panel and flowers to a Sweet Basil card base. To finish, I gold embossed the sentiment on Mulled Wine cardstock and off-set it on a coordinating die cut from Oreo cardstock.

Thanks so much for watching!

Supplies

Spellbinders | July 2021 Small Die of the Month

Today's inspiration for Spellbinders features the July 2021 Small Die of the Month. This month's Clear Stamp of the Month (shared previously HERE) also works beautifully with the Small Die of the Month. Most monthly kits work well together and you can find a list of all the value kits HERE. If you subscribe by July 24, 2021, you will receive this month's featured kits.

The July 2021 Small Die of the Month is sized for a mini slim card that measures 3.25" x 6.25" but I've used it here in a #10 slimline design to show you its versatility. This month's kit consists of five dies that allows you to layer and create die cuts that range from simple to fully intricate. I love all the different layering options!

At first, I thought I would create a horizontal design and use the die cut sentiment in the centre, with ribbon or strings tying the two pieces to the sentiment but decided to play with the angles a bit once I decided on colours.

Once again, I used beautiful cardstock from Simon Says Stamp and the five colours featured are: Orange Peel (solid base), Sunshine (triple die cut overlay), Lemon Chiffon (sentiment base), Mint (die cut sentiment overlay) and Fog Gray (for the card base and the inner frame).

Since the designs are so intricate, I wanted to keep the dimension minimal and the card easy to mail so I simply used Bearly Arts liquid glue to stack the layers and my guillotine trimmer to remove the overhanging pieces.

Here's a list of kits I share each month and some of the value kits:

Thanks so much for stopping by!

Supplies

Monday, July 19, 2021

Ellen Hutson | Summer of Stamping: Week 2 -- Essentials by Ellen Release IG Hop

Ellen Hutson's Summer of Stamping continues with a brand new Essentials by Ellen release available  NOW and the Brand Ambassadors are celebrating with an Instagram Hop to bring you inspiration using these fabulous new products! While appreciated, comments left here are not eligible for the $25 gift certificate. Please head to Instagram for all the details! 


For this release hop, I had the joy of playing with the It's a Jungle stamp set and coordinating dies. The set is so fun and has a great combination of Tiki-inspired images. I love the Polynesian masks so I used all three and, when I put together my scene, I realized I needed a slimline card to fit in all the amazing images.

The large tropical plants on either side of the masks are from the Aloha stamp set and coordinating dies, which is another super fun set designed to be used with the new Tilt 'n Rock interactive die. You'll definitely want to check that out!

I wanted my watercolours to be bold and vibrant so I got out my set of Gansai Tambi watercolour paints. I own the 36 colour palette but Ellen Hutson also sells 13 of the 15 colours I used in individual pans and you can find all those colours listed in the supply links below.


I created the background by using a wide, flat paint brush and blending five colours seamlessly across the length of the slimline watercolour panel. I set that aside to dry while I stamped and heat embossed the images, and watercolored them with the remaining colours.


I loved colouring all the foliage in different shades of green and purple! The masks have so many little details and it was fun making them so colourful. I love the different shapes and expressions which gives them so much versatility, even the option of colouring them all one colour (plain wood carvings).


Before stamping the sentiment, I arranged the images on the card to make sure the sentiment would fit without being covered by part of the foliage. Then I also heat embossed the sentiment to match the images. I popped all of the images, except the two smaller masks, on to the panel with foam tape and adhered the remaining masks with glue dots.

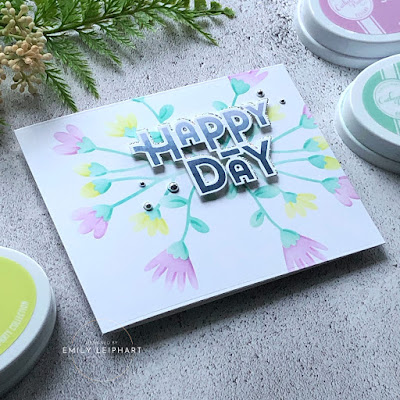
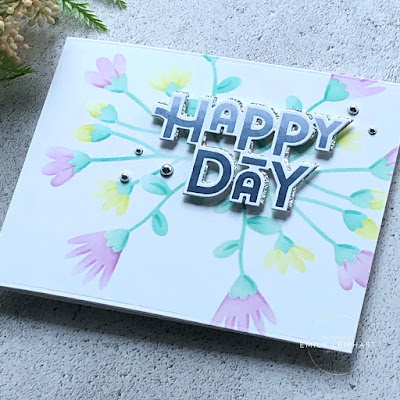
To finish the card, I added a few sparkling clear sequins in four different sizes - 3mm, 4mm, 6mm and 8mm. If you haven't already hopped along, be sure to click HERE or on the image below to head to Instagram and begin the hop for your chance to win a $25 gift certificate to EllenHutson.com!


Also, today is the LAST DAY to take advantage of the Gift With Purchase! If you missed my inspiration card using the Trippin' stamp set, you can see it HERE. There's no better time to shop!

Thanks so much for hopping along with us!
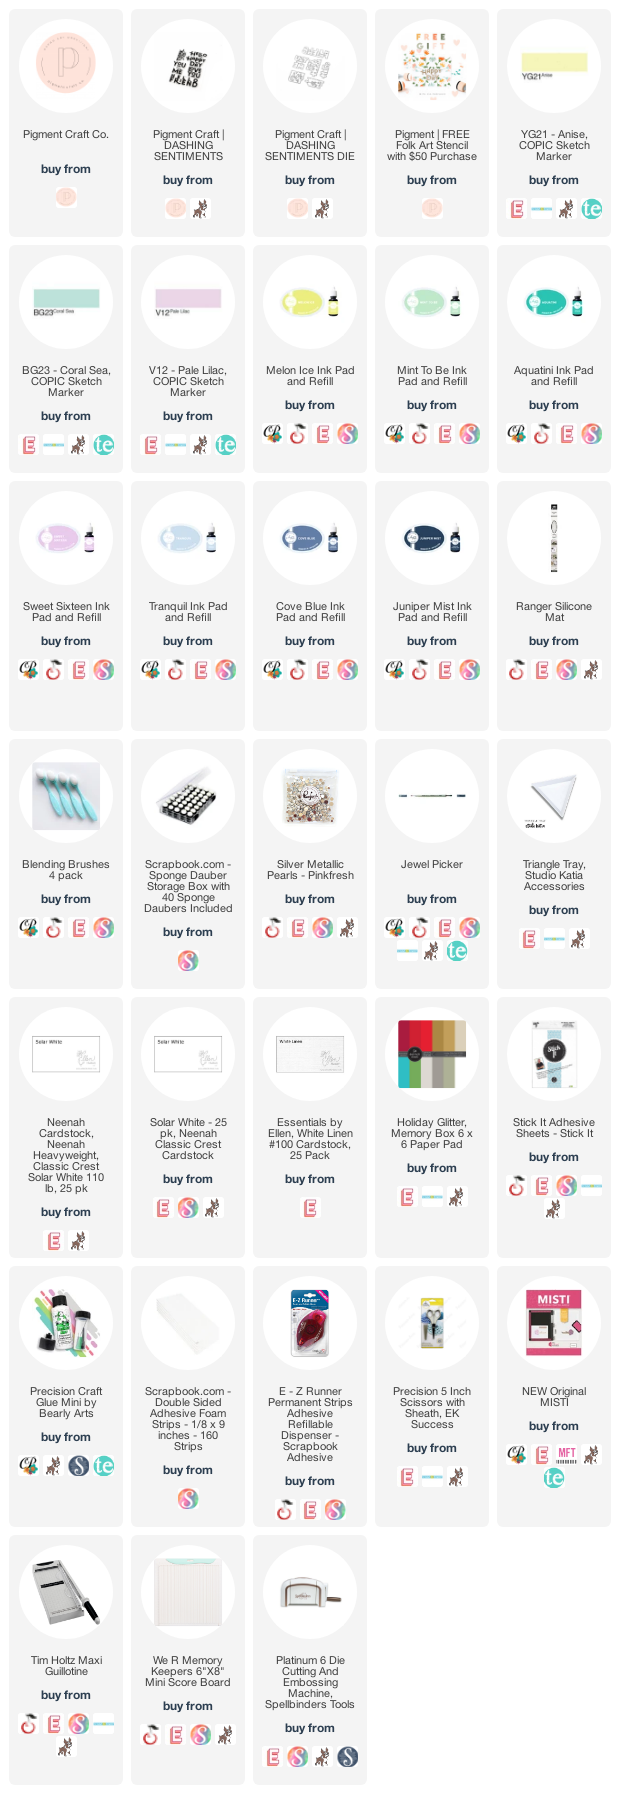
Supplies

Sunday, July 18, 2021

Pigment Craft | Happy Day


Hello, crafty friends! If you shopped at Pigment Craft Co. during the Canada Day Video Hop, you would've received a free Folkart Floral Stencil FREE with your $50+ purchase. I sat down in the middle of the night to play with mine because I knew I wouldn't have been able to fit in some playtime otherwise. I really should've gone to bed but sometimes you just have to follow your mojo. Plus, I still had wine to finish so that's my real excuse. LOL


I started by choosing four of my go-to Catherine Pooler ink colours for the stencilling - Mint To Be, Melon Ice, Aquatini and Sweet Sixteen. The stencil is a three-step stencil so you can use the same colour for all the blooms or mask off the four blooms and ink them up with different colours.


I stencilled the Folkart Florals twice, as mirror images, on a 7" x 7" piece of white cardstock and added details using Copic markers. I stamped the Happy Day sentiment from the Dashing Sentiments stamp set in Tranquil, Cove Blue and Juniper Mist to create an ombre effect. Then I die cut it using the coordinating die, and also die cut a second piece from silver glitter cardstock.


I cut down the stencilled piece to fit the A2 card base and attached it using a tape runner. After stacking the die cut sentiments with double-sided adhesive, I added foam tape to the back and popped that on to the card. To finish, I embellished the card with silver pearls.


Thanks so much for stopping by!

Supplies