Monday, November 28, 2011

A Cozy for Koko

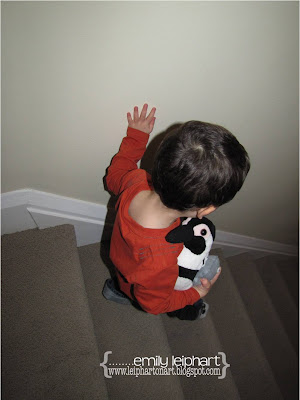
My son's first exposure to Chuggington was at the mall shortly after we moved into our house. We were there to stock up on Halloween candy and we had popped into the bookstore because I was looking for a specific issue of Paper Crafts Magazine. I didn't have any luck finding my magazine there but my son noticed Chuggington: Chug of War on the shelf and couldn't leave without it because it had magnets. He has a gazillion Thomas trains and quite of a few Thomas books including one with magnets. It was sealed so we couldn't actually read the story and we didn't know the Chuggington story so I didn't want to buy it.

"No, I want it!
Please, please, please?
Come on... (groaning voice)
Just pay for it..." (dejected voice with shoulders slouched and head hanging down)

It was hilarious because he carried it to the cash and put it on the counter! He was just too cute and my husband said that it would be nice for him to have since he was behaving. We've always rathered he have more books than toys. So then I decided to let him watch the show and now we all love it! While we were potty training, I discovered that I could bribe him with Chuggington trains and it worked so now he has quite a few of them. They fit on the Thomas wooden tracks which is a bonus.

Koko was the first Chuggington train he wanted and my best friend sent him the Over and Under Starter Set which includes Koko. Instead of letting him keep two Kokos, we decided that he would give his cousin the extra Koko. He'll realize that there should be two trains when he opens his gift at Christmas so we bought Irving (one of the other trains he wants) and put it in Koko's place in the box.

My niece loves the usual girly toys but she also has a big love for cars and trains. In fact, my sister admits her daughter chooses cars over dolls, not that there are necessarily boy or girl toys. That is just something that is learned, right? After all, I loved playing with G.I. Joe and Transformers when I was a kid! My niece was so thrilled when she received this gift today, along with the helicopter she requested, and I wish I got better photos of her carrying the little bag around. She really loved it! My son opened the catalog we gave them, since my sister doesn't know anything about Chuggingtons, and explained who all the characters were. Hilarious!

Since there was no box for Koko, I decided to make a little holiday bag for it. My niece will be able to carry her new train in it or use it for whatever she wants. I was able to pull felt from two sources and match Koko's colours. The Chartreuse felt (handles and flower) is from Felt on the Fly. The Violet Sky and Baby Pink felt is polyester made from recycled plastic bottles by The Kunin Group. I used Lil' Inker Designs' Holly Jolly dies to cut the Christmas tree from the front of the bag. Then I used Fringe Flower die to make both the handles and flower at the top of the tree.

***

In honour of yesterday's Pinguini post, Felt on the Fly is offering free coordinating Mama and Baby Seahorse felt die cuts with every order! All you have to do is mention PINGUINI in the 'Notes to Seller' at Checkout. Head on over to the shop HERE!

Thank you for stopping by to enjoy this post and for your support of Felt on the Fly. :)

Sources: Felt on the Fly Chartreuse felt; The Kunin Group Violet Sky & Baby Pink felt; Lil' Inker Designs Holly Jolly & Fringe Flower dies; Gutermann thread
Sunday, November 27, 2011

A Fish for Pinguini

*Warning: This is a long post with a lot of photos!*

English: Penguins
Italian: Pinguini

First the story and then the project. ;) It all started when we took my son to the Toronto Zoo this past summer to celebrate his third birthday. We had taken him to the Zoo the previous fall but we missed the penguins. This time we spent some time there watching these little guys. We saw a lady win a petting session with the penguins.

Then we saw this little guy wander off by himself. I think my son really wanted to take him home.

When it was time to leave, we went to the gift shop to let him pick something to take home.

"What would you like?"
There was some quiet thinking then, "I want one (of) those black guys!"
"You mean a penguin?"
"Ya!"

He marched straight over to the penguins and grabbed one off the shelf. Then he proceeded to hand my husband one and me another saying, "One for me, one for Baba and one for you, Mommy!" LOL Oh, how I would have loved to buy three of them! But we knew it would only be special if he had the only one.

After an exhausting day at the Zoo, he actually fell asleep in the car and he never sleeps in the car! I think this photo of him cuddling his newest friend is just the cutest. This penguin which he has aptly named Pinguini (even though he's just one) is so loved. Then early this month, he told me that Pinguini needs a fish friend. I asked him if Pinguini needed food and he said, "No, he (will) not eat him! He need(s) a friend," giving me a look like I should know better. LOL So off I went to make Pinguini a fishy friend.

Oh, boy, did I ever wish I had the Spellbinders Nested Fish! I may get these dies yet but this time I settled for my own hand-drawn version in a similar shape. I cut Pinguini's friend out of grey felt from Felt on the Fly.

I'm not really a button person but these white Stampin' Up buttons from Sunghee really came in handy as pretty eyes. After stitching them on securely (before sewing the fish together and stuffing it), I glued in black centres using black felt die cut with the small berries from Lil' Inker Designs' Holly Jolly dies.

The fish's pectoral fins were created using both the Mini Pinwheel and Pinwheel dies from Lil' Inker Designs and they were cut from white and black felt from Felt on the Fly. I secured the fins by stitching them facing forward, then folding them back and stitching them again to hide the holes.

And finally, Pinguini's new friend is ready for his close up. Squee! Look at those kissable lips. LOL

This all occurred one evening when, after making dinner, my son became adamant that Pinguini have his fish that night. I relented and had my husband eat with him while I went downstairs to make it. My son wanted a white fish but my husband and I knew that would get dirty quickly so all three of us agreed to make it grey with some black and white parts. It took me 45 minutes but it was worth the rush. Not to worry, the marionette strings were required for photography but removed before the hand-off. My son was so happy to meet his new fish!

Then, of course, Pinguini had to make his acquaintance. Awww! Look at him tucking the fish under Pinguini's wing. How sweet!

And, of course, they are both now carried together everywhere.

This photo is just so endearing, it makes me want to squeeze all three of them! Teehee. :D

***

In honour of this post, Felt on the Fly is offering free coordinating Mama and Baby Seahorse felt die cuts with every order! All you have to do is mention PINGUINI in the 'Notes to Seller' at Checkout. Head on over to the shop HERE!

Thank you for stopping by to enjoy this post and for your support of Felt on the Fly. :)

Sources: Felt on the Fly Grey, Black & White 100% merino wool felt; Lil' Inker Designs Holly Jolly, Pinwheel & Mini Pinwheel dies; Stampin' Up buttons; Gutermann thread; Fairfield polyester fiberfill

Saturday, November 26, 2011

Season's Greetings

Today I'll be sharing 18 cards with you. 18 of the same cards, that is. ;) This is my third official corporate commission and I seem to be adding one every year. At this rate, I may not be able to keep up! LOL This project has been about six weeks in the making. First, I had to dream up a design that incorporated the essence of the company as well as their corporate colours. Then I had to order the stamps, estimate all the measurements and get the logo die cut. That's where having an incredible bloggy friend like Meg came in handy. I got to use her Silhouette from 1600 kilometres (or 1000 miles) away!

At first the company requested a dozen cards so I ordered 16 of their logo. I even asked Meg to make a few extras but the company added six more cards to their order which left me with two short. I contacted Meg again and she knew what to do. She sent me plenty of extras just in case. Let me just say that it would've been faster to drive to Alabama and back but thankfully we had plenty of time! Meg, you're the best. :)

Once all the logos were in my possession, I went to work. I completed these in stages, sometimes with several days in between each stage. Just stamping the Formula Fun math background 18 times was a lot of work and my fingers and forearms were sore afterwards! The rest of it wasn't so bad, 'til I got to the rounding of the corners. Can you imagine punching out 72 corners? I must've been out of my mind to do it all in one go. The absolute worst part? Adhering those die cuts! LOL I won an Xyron last year and haven't used it much because it leaves globs and webs of glue in the little spaces and I have to use an X-acto knife to clear out every single space. Is it me or does anyone else have that problem? After adhering the first one, I walked away and dreaded completing this project. Eventually, when I felt like I had more patience, I went to work and completed all 18 cards. I don't think the company knew exactly what they were ordering but I heard they were impressed. They're already talking about next year's order so I guess that's good, right? ;)

I hope you're all having a splendid weekend!

Sources: Gina K Designs pure luxury Soft Sand, Black Onyx & white cardstock; SU Tangerine Tango cardstock; Hero Arts Formula Fun; Papertrey Ink Stylish Sentiments: Holiday; Tim Holtz for Ranger Pumice Stone distress ink; Memories Black ink; We R Memory Keepers corner chomper; The Twinery Mandarin baker's twine

Friday, November 25, 2011

Jane's Doodles {Merry Christmas}

Happy Friday! I hope those of you who celebrated Thanksgiving yesterday had a wonderful time with your family and friends. My sister is up for the weekend with her husband and two kids so I'll be spending the better part of my time with them. I'm also going to do some holiday shopping at the One of a Kind Christmas Show and Sale. It is the most amazing place for unique handmade gifts and I've been going every fall for as long as I can remember! And, now, a holiday card made with Jane's Doodles' Vintage Christmas clear stamp set.

Jane's hand-drawn lines on this Santa are so amazing that I literally stared at it wondering if I should colour or paper piece him. Then I decided to show off the beauty of those lines by leaving it black and white. I created a drop frame for the sentiment. I purposely offset the frame so that it's heavier at the top than at the bottom. It draws the eye from the Santa to the sentiment. A simple card like this only needs a simple bow of holiday twine, from Divine Twine. (Please note: I've linked to the (k)Not spools because Whisker Graphics is sold out of the original single spools in this colour. You can still purchase the holiday twine at other stores such as Ribbon Carousel and from various sellers on Etsy.)

Don't forget! Jane's Doodles is having a 20% off sale on all clear stamp sets until November 30th. Check 'em out HERE!

Happy weekend to you all! I hope it's filled with good food, stamping and shopping. ;)

Sources: Gina K Designs pure luxury white cardstock; SU Certainly Celery cardstock; Jane's Doodles Vintage Christmas; Memories Black ink; Spellbinders Nestabilities Labels 14; Marvy-Uchida 1/8" long reach circle punch; Divine Twine holiday twine; foam tape

Monday, November 21, 2011

Warm Holiday Greetings

I hope you all had a super weekend! Mine was super busy getting things ready for next weekend when my sister and her husband drive up with the kids for their long weekend. We did some cleaning up at my parents' house where they're staying and we skipped the Santa Claus parade because the little one said he'd rather stay home and play Legos. :) I've also officially gone into 'sublication hibernation' so you'll see a bit less of me here until the current Paper Crafts call is over. I missed several calls during and after my move so I'm more determined than ever to get back into the swing of things!

That being said, I decided to take a little break and create another tag for the Hero Arts November Contest. Once again, I combined all the categories in this month's contest. I used more of my new goodies including burlap string (or jute twine) which I bought in every colour available. I've been seeing it everywhere and now that I've started playing with it, I wonder how I ever crafted without it! LOL At first it drove me crazy with all the fuzz, kind of like a mohair sweater, but I do like the traditional warmth it gives to my projects.

To create this tag, I first stamped the kids from Warm Holiday Greetings in pink and blue and painstakingly fussy cut them. I had thought to myself that I would make several of these but after I finished one, I nixed that idea! The tree was die cut from glitter cardstock using the medium tree die from Holiday Cheer. The snowflakes stamped in chalk ink and the sentiment are from the same set. The glittery white tree skirt was made using an oval punch. The light blue felt at the top of the tag is from Felt on the Fly and the burlap string is by May Arts. It's so much fun playing with new goodies!

Well, it's back to the grind for me. Don't worry, I won't let too much time pass before popping in again to say hi! If you miss me, you could always join me in sublication hibernation. ;)

Sources: Gina K Designs pure luxury kraft & white cardstock; DCWV green & white glitter cardstock; Hero Arts Warm Holiday Greetings & Holiday Cheer; Memento Rich Cocoa ink; Hero Arts Snow chalk ink; SU Pink Pirouette & Bashful Blue ink; Papertrey Ink Tag Sale #3 die; SU/EK Success large oval punch; Ranger Diamond Stickles; Felt on the Fly 100% merino wool felt in Aquamarine; May Arts ivory & brown jute twine/burlap string

Thursday, November 17, 2011

Paper Smooches SPARKS Challenge {Nov 17th - Nov 30th}

A new Paper Smooches SPARKS Challenge begins today! Kim has chosen another stunning photo which is sure to inspire something amazing from you all over the next couple of weeks. I used the colours, flower theme and textures to create my card. I immediately pulled out Perky Plants and went to work.

I made masks of the flowers because I wanted them to be one complete piece. I stamped the flowers using the masks, lightly shaded them with Copics and traced a green outline around the entire image. Then I fussy cut it in a single piece. I trimmed the card so that the overhanging petals on both sides makes it the perfect A2-sized card.

The 'grass' was made using the Fringe Flower Die from Lil' Inker Designs. I stitched the two grey rows on the blue panel before adhering it to the base. Then I just pulled some of the 'blades' forward to create dimension in the grass.

This Paper Smooches SPARKS Challenge runs until November 30th so I hope you will play along with us! As always, there are fabulous stamps to be won and, if you don't have any Paper Smooches stamps yet, you can always grab the free digis that Kim offers every month. I look forward to seeing how you interpret this photo!

Sources: Gina K Designs pure luxury white cardstock; SU Certainly Celery & Pool Party cardstock; SU textured Basic Gray & Going Gray cardstock; Paper Smooches Perky Plants; Memento Tuxedo Black ink; Copics; Lil' Inker Designs Fringe Flower die; Gutermann grey thread; foam tape

Wednesday, November 16, 2011

My Memories Suite Giveaway Winner

I've been delinquent in announcing the winner of My Memories Suite Giveaway featured HERE. I used Random.org to choose a winner from the comments left in that post and the lucky lady is...

Congratulations, Lisa! Please email me and I will provide you with the coupon code you can use to pick up your free copy of My Memories Suite. The coupon itself expires November 30, 2011 so you have until then to claim and download it.

Thanks to all who were interested in this giveaway! If you are still interested in giving digital scrapbooking a try (the papers are also wonderful for cardmaking) and would like to purchase the program for $10 off, please use the discount code at the bottom of my sidebar. Remember, My Memories Suite offers a lot of free downloads and new ones become available all the time!

Monday, November 14, 2011

'Tis the Season

It's a card! It's a gift! It's both! I used one of Lil' Inker Designs' newest releases, Holly Jolly Die & Stamp Set, to create a card with a removable ornament. It's a card for this year and an ornament for many years to come! It's a great way to send a small gift that doesn't break the bank.

Isn't that the sweetest little felt tree? I die cut two trees and two trunks, stitched around the trunk and zig-zagged down the centre of the tree after inserting the twine hoop. Here's how the card came together:

I punched a slit at the top of the white panel, pushed the twine loop through to hold the ornament on the card and adhered the white panel to the card base with foam tape. The recipient can just pull the ornament through the slit and off the card for a keepsake.

The tree is embellished with the large berries from the Holly Jolly Die & Stamp Set and accented with clear rhinestones. The beautiful felt is from Felt on the Fly, one of my newest finds. What's not to love about a great product and fantastic customer service? I can't wait to make more of these!

Sources: AC textured cardstock; Lil' Inker Designs Holly Jolly Die & Stamp Set; Memento Rich Cocoa ink; Felt on the Fly 100% wool felt in Spring Green, Red & Acorn; SU Basic Rhinestones; Gutermann thread; The Twinery Honeydew baker's twine; SU slit punch; foam tape

A Few Cards from Friends

I'm grateful for my friends! What can I say? I love receiving handmade cards. It's not just the thought but the time and materials involved in the creation of one and also the postage. I appreciate all of it!

This sweet Halloween owl is from Lindsey. She knows I love her embossing and of course twine! You can read all about this card on her blog HERE.

Next up is this gorgeous card with a Paper Smooches sentiment from Lynn. Those hexagons, pearls and misting are amazing! She blogged about this card HERE.

You may think you've seen this awesome autumn card before and you're right! You've either seen it on Meg's own blog HERE or you recognize its other half that I blogged about HERE (and now I realize I photographed it in the wrong direction). I solicited Meg's help with a project that I will show you later this month and she had to mail me more parts, hence this card. ;)

Up next is a stunner from Lisa. My jaw hit the floor when I pulled this one out of the envelope and then I laughed at her note inside. She sent me this card for many reasons! You can read all about this card and watch the video on her blog HERE.

Finally, a gem from Jessi. I love how she personalized this card. The stickers are so cute! You can read more on her blog HERE.

Thank you, sweet friends! I love that my home is overflowing with your beautiful work. Now I need to get more of my own in the mail. :)

I'll be back shortly with another Lil' Inker Designs project!

Saturday, November 12, 2011

Holiday Cheer

This past week, I received packages from Felt on the Fly and Simon Says Stamp. I love getting new craft supplies! One of the new stamp sets I bought was Holiday Cheer by Hero Arts + Sizzix. I may or may not have squeal a bunch of times over this set. In fact, after playing with it, I highly recommend that everyone own this set for your own squealing pleasure. LOL I had so much fun using these stamps and coordinating dies. Imagine if every stamp set came with its own dies! I'd be in heaven.

I desperately needed to play with my new goodies so I decided to play along with the Hero Arts November Contest. Originally, I was just going to make something for the colour challenge but then it turns out I used blingy cardstock and it happens to be a tag so I ended up covering all three of the categories without realizing it. It was purely unintentional! I'm thinking that I might be mailing some people gift tags in lieu of cards this year. ;)

The trees and hills were adhered directly to the tag and the reindeer is popped with foam tape. I coloured in the sweater with Atyou Spica glitter pens and added enamel accents to the reindeer's eyes. The papers are from Echo Park's Holly Jolly Christmas and the ribbon was die cut from the stash of felt I bought from Felt on the Fly. Now that I can make my own felt ribbons the possibilities are endless. If you're looking for good felt that die cuts cleanly and doesn't fuzz up, you'll love the assortment of colours Felt on the Fly has to offer. Based on a couple of recommendations from crafty friends, this was my first time ordering from Janet and her customer service was exceptional! I will definitely be ordering from her again.

I hope you're all having a lovely weekend! See you again soon. :)

Sources: DCWV glitter cardstock; Gina K Designs pure luxury white cardstock; Echo Park Holly Jolly Christmas paper pad; Hero Arts + Sizzix Holiday Cheer; Memento Tuxedo Black ink; Tim Holtz for Ranger Worn Lipstick distress ink; Copics; Atyou Spica pens in Clear and Blossom; Ranger Inkssentials Enamel Accents; Papertrey Ink Double-Ended Banner & Tag Sale #3 dies; Felt on the Fly 100% wool felt in Light Green; The Twinery Blossom & Caribbean baker's twine; foam tape

Friday, November 11, 2011

Jane's Doodles {Believe} + Honouring Our Veterans

Just popping in to share a Jane's Doodles holiday card using the newest Vintage Christmas release. I love this snowman! The way Jane drew him with his arms outstretched almost makes him look so appreciative of snow. I love how relaxed and peaceful he looks, too, which is why the 'Believe' sentiment is so perfect for it. I just got the Echo Park Holly Jolly Christmas papers and I thought the falling snowflakes and chevron 'hills' would be perfect backdrops for the snowman. I wanted him to have the layered look but not so much that this card couldn't be mailed easily so I used mini Glue Dots instead of foam tape.

***

Honouring Our Veterans

Since it was Remembrance Day here in Canada and Memorial Day in the U.S., I'd like to take a moment to reflect on this important day. On the news tonight, they remarked that this is was one of the rare Remembrance Days in which Canada is not involved in a war which is pretty incredible. I believe in peace. If my mom hadn't escaped from the Japanese in China during World War II, I would not be here today. Every year, I wear a poppy pin for two weeks from Halloween through Remembrance Day. I didn't have time to make a poppy card this year but you can read my post from last year if you like. That is still one of my favourite cards. Thank you to all who have served and serve today to protect our freedom.

***

Sources: Gina K Designs pure luxury white cardstock; Echo Park Holly Jolly Christmas paper pad; AC textured white cardstock; Jane's Doodles Vintage Christmas; Spellbinders Nestabilities Classic Ovals Large; Memories Black ink