Showing posts with label ribbon. Show all posts

Thursday, November 23, 2023

Stencilled Holiday Cards | Waffle Flower + Giveaway!


Please comment on my Instagram Post
to participate in this GIVEAWAY!


Hello, crafty friends! I've partnered with Waffle Flower Crafts to give one lucky winner a Waffle Flower Shade Brush PLUS Sampler Pack! These brushes are the cutest, so ergonomic and wonderful to use on stencils with small spaces. I really didn't know what was missing until I was gifted these to try and now I must buy a lot more for all my inks!
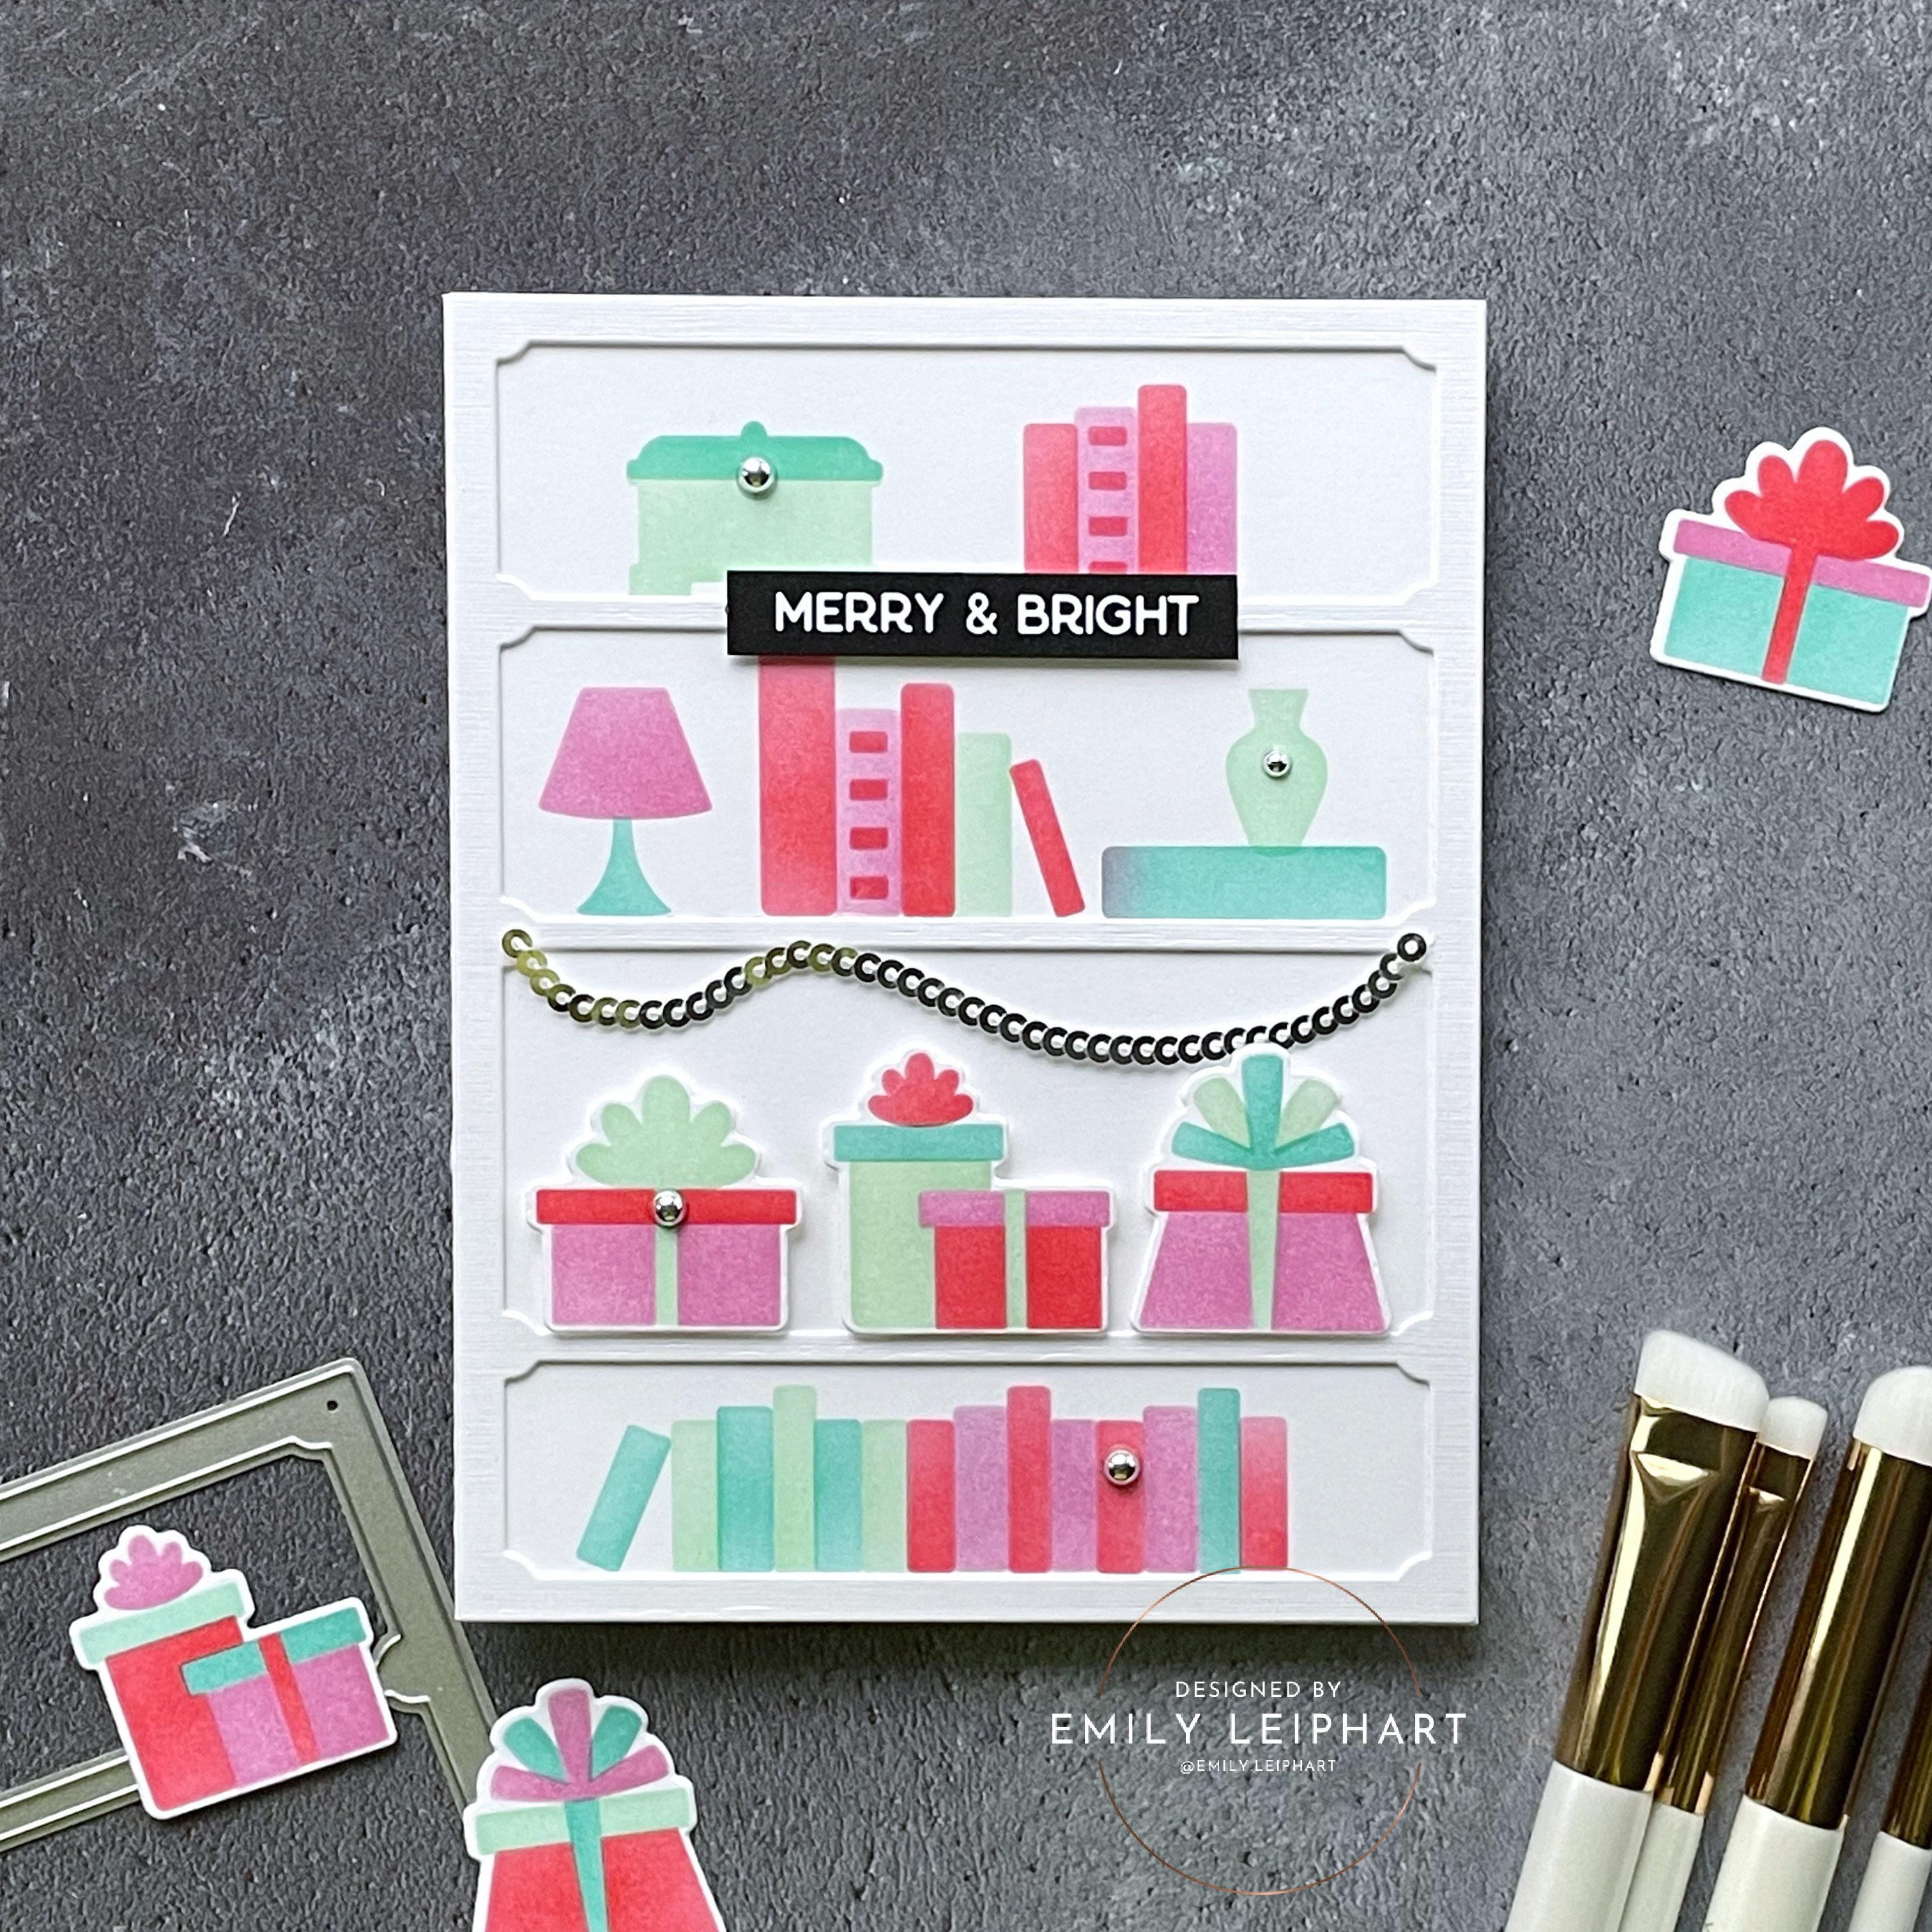

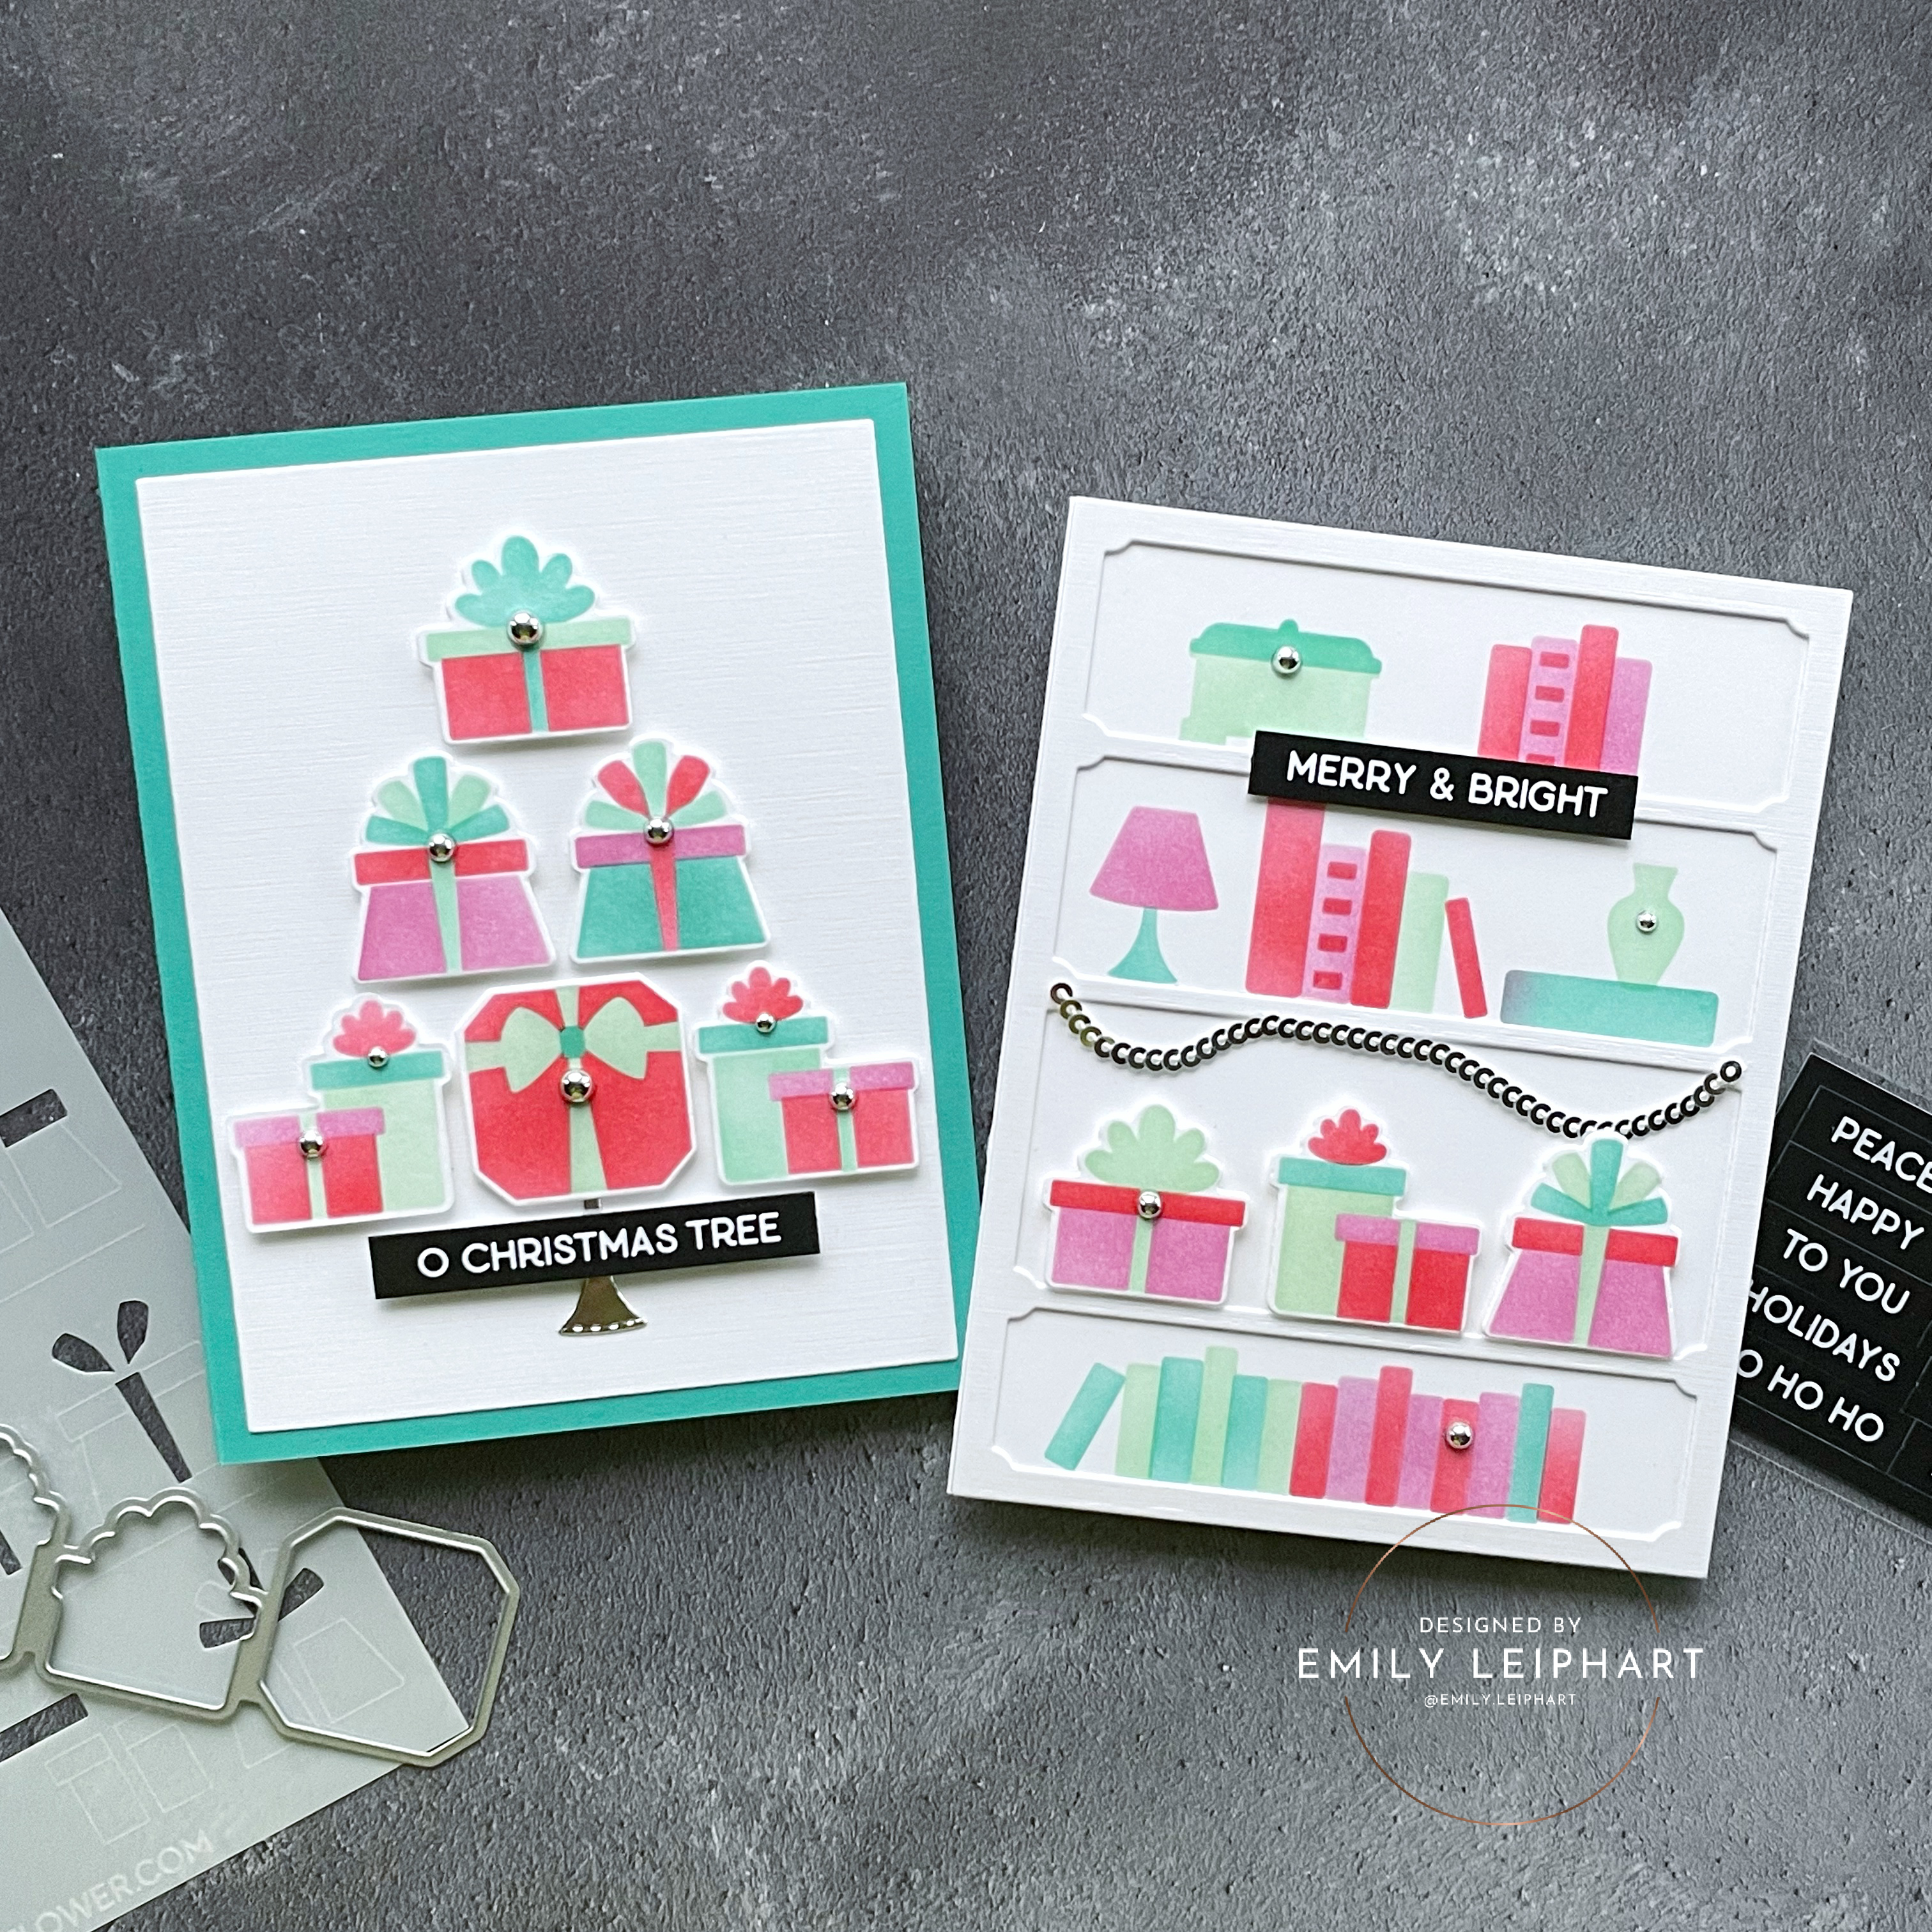
The five products featured in this post were gifted to me and I'm excited to share them on these two cards. It's no joke that Waffle Flower was feeding my book addiction when they sent me the Simple Shelves Die and Simple Shelves Stencil Duo. 


I love that the shelf fills an A2 card front and you can pretty much put anything on it. Imagine my delight when I discovered that the gifts from the Multiple Presents Die-n-stencil fit perfectly on the third and largest shelf!


I used Catherine Pooler inks to do all my stencilling for these two cards and the colours featured are Sparkling Berry, Samba, Minted and Aquatini.


I cut two layers of the Simple Shelves Die from Neenah linen white cardstock for a bit of dimension and texture. Then I popped the gifts on with foam tape since they're the highlight of this bookshelf.


Since this card is indeed Merry & Bright, I used one the perfect sentiment from the Subsentiments Christmas Tree Diecut Sheet. Using a trick I learned from Michelle Short, I used a black Copic marker to blacken the edges of the die cut so it looks bolder and cleaner.


To finish, I embellished the shelf with some silver sequin ribbon and silver metallic pearls.


For my second card, I decided to use the gifts from Multiple Presents Die-n-stencil to create a Christmas tree and I'm thrilled with the results. It's so cute and since I stencilled four sets of these gifts by rotating the four colours, I have a lot of extras to mass-produce this design.


On the bottom row, left side, I had to make a reverse set of gifts to make the tree symmetrical. I created a mirror image of the gifts on the right side by flipping the stencil 180 degrees and recreating it. To use the same die on this mirror image, I simply held up the die on the back of the stencilled image in front of a lamp and place vellum over the image so the lines on my cutting plate wouldn't impress on the front of the image. Then I used a bone folder to round off the edges of the die cut since the sharp edge was showing and I wanted it to match the other die cuts.


For the base of the tree, I discovered that the lap from the Shelf Add-Ons Die worked perfectly (see more inspiration using this set HERE). However, it was too short so I cut two of them from Spellbinders silver foil cardstock and used another perfect sentiment from the Subsentiments Christmas Tree Diecut Sheet to cover the break in the middle.


I assembled the tree on a panel of Neenah linen white cardstock cut from Spellbinders Precision Layering A2 B Dies and glued that on a card base cut from Teal Topaz cardstock.


To tie in the silver from the base of the tree and the previous card, I embellished the gifts with and assortment of silver metallic pearls.


I hope you enjoyed these cards using some really delightful products from Waffle Flower Crafts. Which card is your favourite? My son likes the book shelf! Don't forget to comment on my Instagram Post for a chance to win a Waffle Flower Shade Brush PLUS Sampler Pack.

Don't forget to check out Waffle Flower's amazing Black Friday and Grab Bag Deals, on now through November 27th and November 30th, respectively.
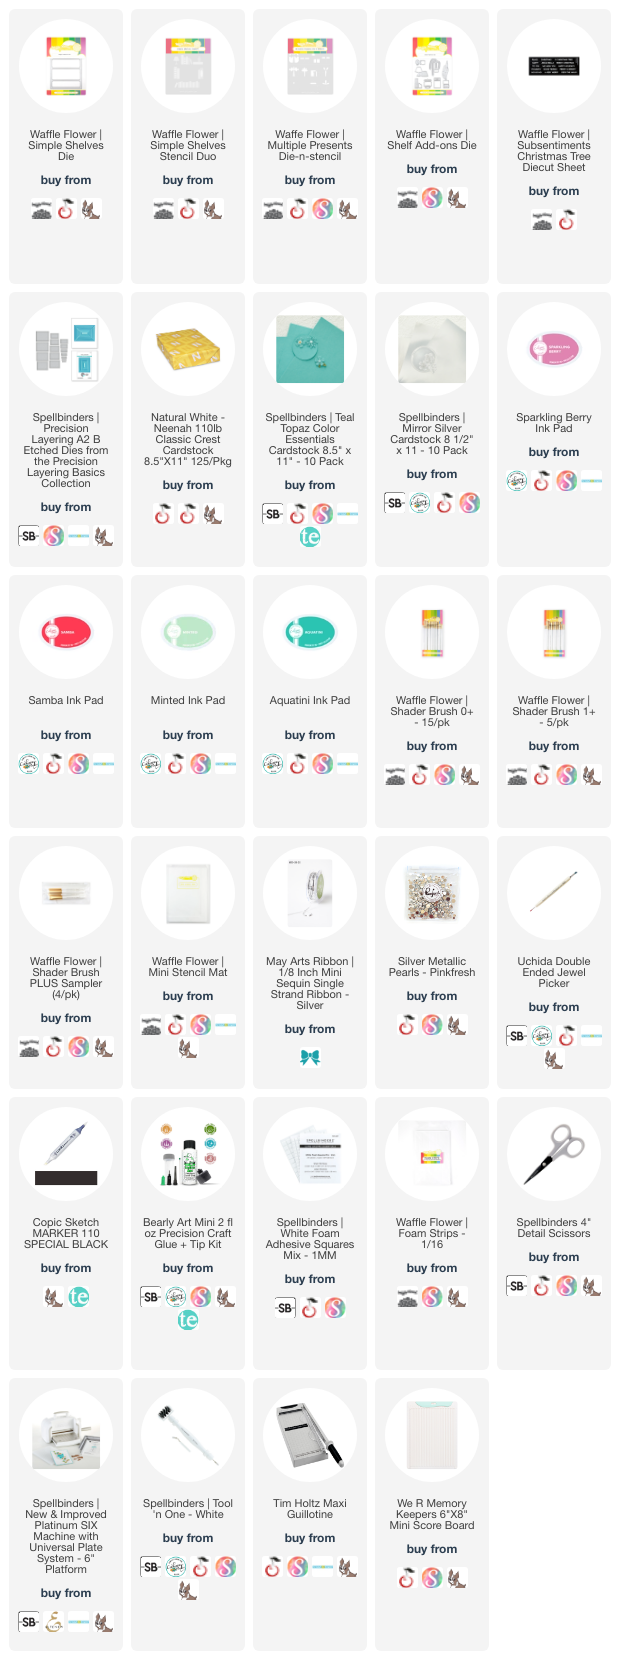
I hope you enjoyed today's projects. I appreciate you stopping by and, if you're inspired, please shop my affiliate links below. Thanks so much for your continued support!

Supplies: 
Friday, October 27, 2023

Holiday Tag Set feat. Spellbinders 3D Embossing Folder of the Month | October 2023


Today is the last day to grab the Spellbinders October 2023 Club Kits and today's projects are a set of holiday tags featuring the 3D Embossing Folder of the Month - Flowering Christmas Tree Burst, along with the Glimmer Hot Foil Kit of the Month -- Bouquet Full of Joy. 


The Flowering Christmas Tree Burst embossing folder has floral Christmas trees all over it and I decided to make tree tags using the Fluted Classic Rectangles. I love that there are three sizes with both inside and outside rectangles. I used the medium size for these tags and cut them from Alabaster, Rainforest, Fern and Glacier cardstock.


I used my distress sprayer to mist all the cardstock panels before running them through my Platinum 6 with Universal Plate System to get the most detailed impression of the Flowering Christmas Tree Burst. I love how different it looks in the four different cardstock colours.


Next, I used the Glimmer Hot Foil Kit of the Month -- Bouquet Full of Joy with Aura Hot Foil on Rainforest and Fern cardstock; and Pewter Hot Foil on Alabaster and Glacier cardstock. Then I distributed the bows and tags on the embossed backgrounds so that all four cardstock colours were featured on each card.

(click on any photo to enlarge)

I attached each round tag to the bows with a glue dot and popped each pair on their respective tags with a foam square. Next, I used a slot punch at the top of each tag to attach black and white chevron ribbon with gold metallic cord.

These tags came to gather so quickly and I think next time I would add an extra layer at the back of the tag to strengthen it for the ribbon and even allow it to open for an inside message, versus writing one on the back.


Be sure to check out all of the amazing deals during Spellbinders Scary Good Sale, now through October 31, 2023. There are many items on my wish list that are 50% off!


Thanks so much for stopping by!

Supplies: 

Thursday, February 17, 2022

VIDEO | Taylored Expressions | Easter Tags feat. Spring Squad Die & Clear Combo


Hello, crafty friends! I hope you're all well. We're heading into a four-day weekend here and I'm looking forward to chilling out and getting a lot of crafty deadlines met. If you loved the Snow Squad Die & Clear Stamp Combo, you're sure to love the new Spring Squad Die & Clear Stamp Combo from the Easter Release by Taylored Expressions.


I love these adorable springtime animals and look forward to mixing and matching them with the previously-released bear, penguin and snowman, even if they might not normally hang out in real life. LOL


I wanted to create tags that open up for a message so I die cut two each of the largest Pierced Tag Stacklets 2 Dies from Mint Julep, Sprinkles and Guava cardstock. I partially die cut the top tag to make it shorter in a design that would allow the sentiment to show at the bottom.


I die cut the Tag Reinforcements from the same three colours and rotated them so that all three colours would be represented on each tag.


Using Cherry Pop, Guava, Peaches 'n Cream, Pineapple, Potato Chip, Sugar Cube and Sea Salt cardstock, I die cut all the parts for each of the animals and used corresponding Peaches 'n Cream, Pineapple and Sea Salt ink and Bitty Blender Brushes to add depth and dimension to some of the larger pieces.


Before popping up the animals with foam tape, I die cut the Build a Scene - Rolling Hills from silver glitter cardstock. Then I heat embossed the Mini Strips - Easter sentiments on Poppy Seed cardstock and die cut them with the Mini Strips - Asymmetrical Die.


Be sure to check out the rest of the Easter Release and take advantage of the class with purchase and other freebies!


Thanks so much for watching!

Sources: 

Wednesday, February 9, 2022

Catherine Pooler | At Home Collection | Release Day!


It's Release Day over at Catherine Pooler and the At Home Collection is now available for purchase! All products are live and today's card combines products from the Every Minute Bundle. 


This time, I stamped one handled-clock from the Every Minute Stamp Set in Garden Party, Uptown and Pucker Up. I rotated the colours and styles of the hours and the hands so all three colours would be represented in each clock. I layered the front of the clock using the coordinating Every Minute Dies and set them aside.


Next, I cut a piece of striped patterned paper in Cummerbund from the Wallpaper Patterned Paper pack and cut it on an angle. I adhered it to the card base and stamped one of the sentiments from Moments in Time Sentiments directly on the patterned paper. Also using Midnight ink, I stamped the large scripted word and die cut it twice using the coordinating Moments in Time Dies.


I looped silver cord to the three clocks and attached them to the card base. I also added a few sequins from the Tinseltown Sequin Mix to tie in with the silver cords.


All of these colours coordinate with the new Date Night Minis, also being released this month. If you missed any of my inspiration featuring the At Home Collection, you can find those posts below:


Thanks so much for stopping by!

Sources: 

Thursday, February 3, 2022

Catherine Pooler | At Home Collection | Sneak Peek #1


Catherine Pooler has another fantastic release coming next week and the Every Minute Bundle might be my favourite yet! If you didn't know this about me, I've always had an obsession with clock stamps and had many cards published with them. The At Home Collection will be available to StampNation members at 12pm EST on Tuesday, February 8th and for General Ordering at 9am EST on Wednesday, February 9th. New product links will go live then and, as always, existing products are available for purchase now.


Today's card is a mini slimline, sized 3.5" x 6", cut from premium cardstock. I trimmed two sheets of cute flowers and gingham from the Wallpaper Patterned Paper and stamped a sentiment from the Every Minute Stamp Set before adhering both to the card base.


I stamped the timeless clock in Cummerbund, the hours and minutes in Serenade, the flowers in Pucker Up and the hands in Midnight ink. I layered the clock by stamping a second layer and using the additional face die from the Every Minute Dies to add dimension. Then I tied a cute little white silk bow and glued it to the card.


All of these colours coordinate with the new Date Night Minis, also being released this month. I'll see you again soon for more sneak peeks and inspiration for the At Home Collection. Thanks so much for stopping by!

Sources:

Thursday, December 16, 2021

Ellen Hutson | Final Day of 12 Tags of Christmas Challenge + Essentials By Ellen Sale


Today is the last day to link up your entries for the 12 Tags of Christmas Challenge to win a $100 gift certificate, as well as comment on all the Ellen Hutson blog posts for your chance to win one of three $25 gift certificates to the Ellen Hutson store. All of the Essentials by Ellen products I used on these tags are 25% off until 11:59pm PST tomorrow, December 17th using code EBEDEC2021.


These Shaker Globe tags were inspired by the following songs for the 12 Tags of Christmas Challenge: Day 4 -- Let It Snow, Day 5 -- I'll Be Home for Christmas, and Day 12 -- Holly Jolly Christmas.


I die cut these Shaker Globe tags from Juicy Pear, Easter Grass and Caramel Apple cardstock. Then I curved two sentiments from Merry Little Christmas and stamped them on the base of the globes.


Then I stamped images from Merry Little Christmas on the backs of two shakers and a sentiment from Retro Holiday Greetings on the third.


The holly tag features images from Holiday Sprigs, stamped with Rockin' Red, Martini and Spruce inks. The snow tag features the Snowflakes Dies in Peppermint and silver glitter cardstock, which is also bannered across the base of each globe and at the ribbon attachment. To finish, I filled each shaker with three types of star sequins and tied them off with ribbon and white twine.

Click on the links below to link up your 12 Tags of Christmas entries for a chance to win and to shop the Essentials by Ellen Sale!


Thanks so much for stopping by!


Sources: