

Please comment on my Instagram Post
to participate in this GIVEAWAY!

Hello, crafty friends! I've partnered with Waffle Flower Crafts to give one lucky winner a Waffle Flower Shade Brush PLUS Sampler Pack! These brushes are the cutest, so ergonomic and wonderful to use on stencils with small spaces. I really didn't know what was missing until I was gifted these to try and now I must buy a lot more for all my inks!
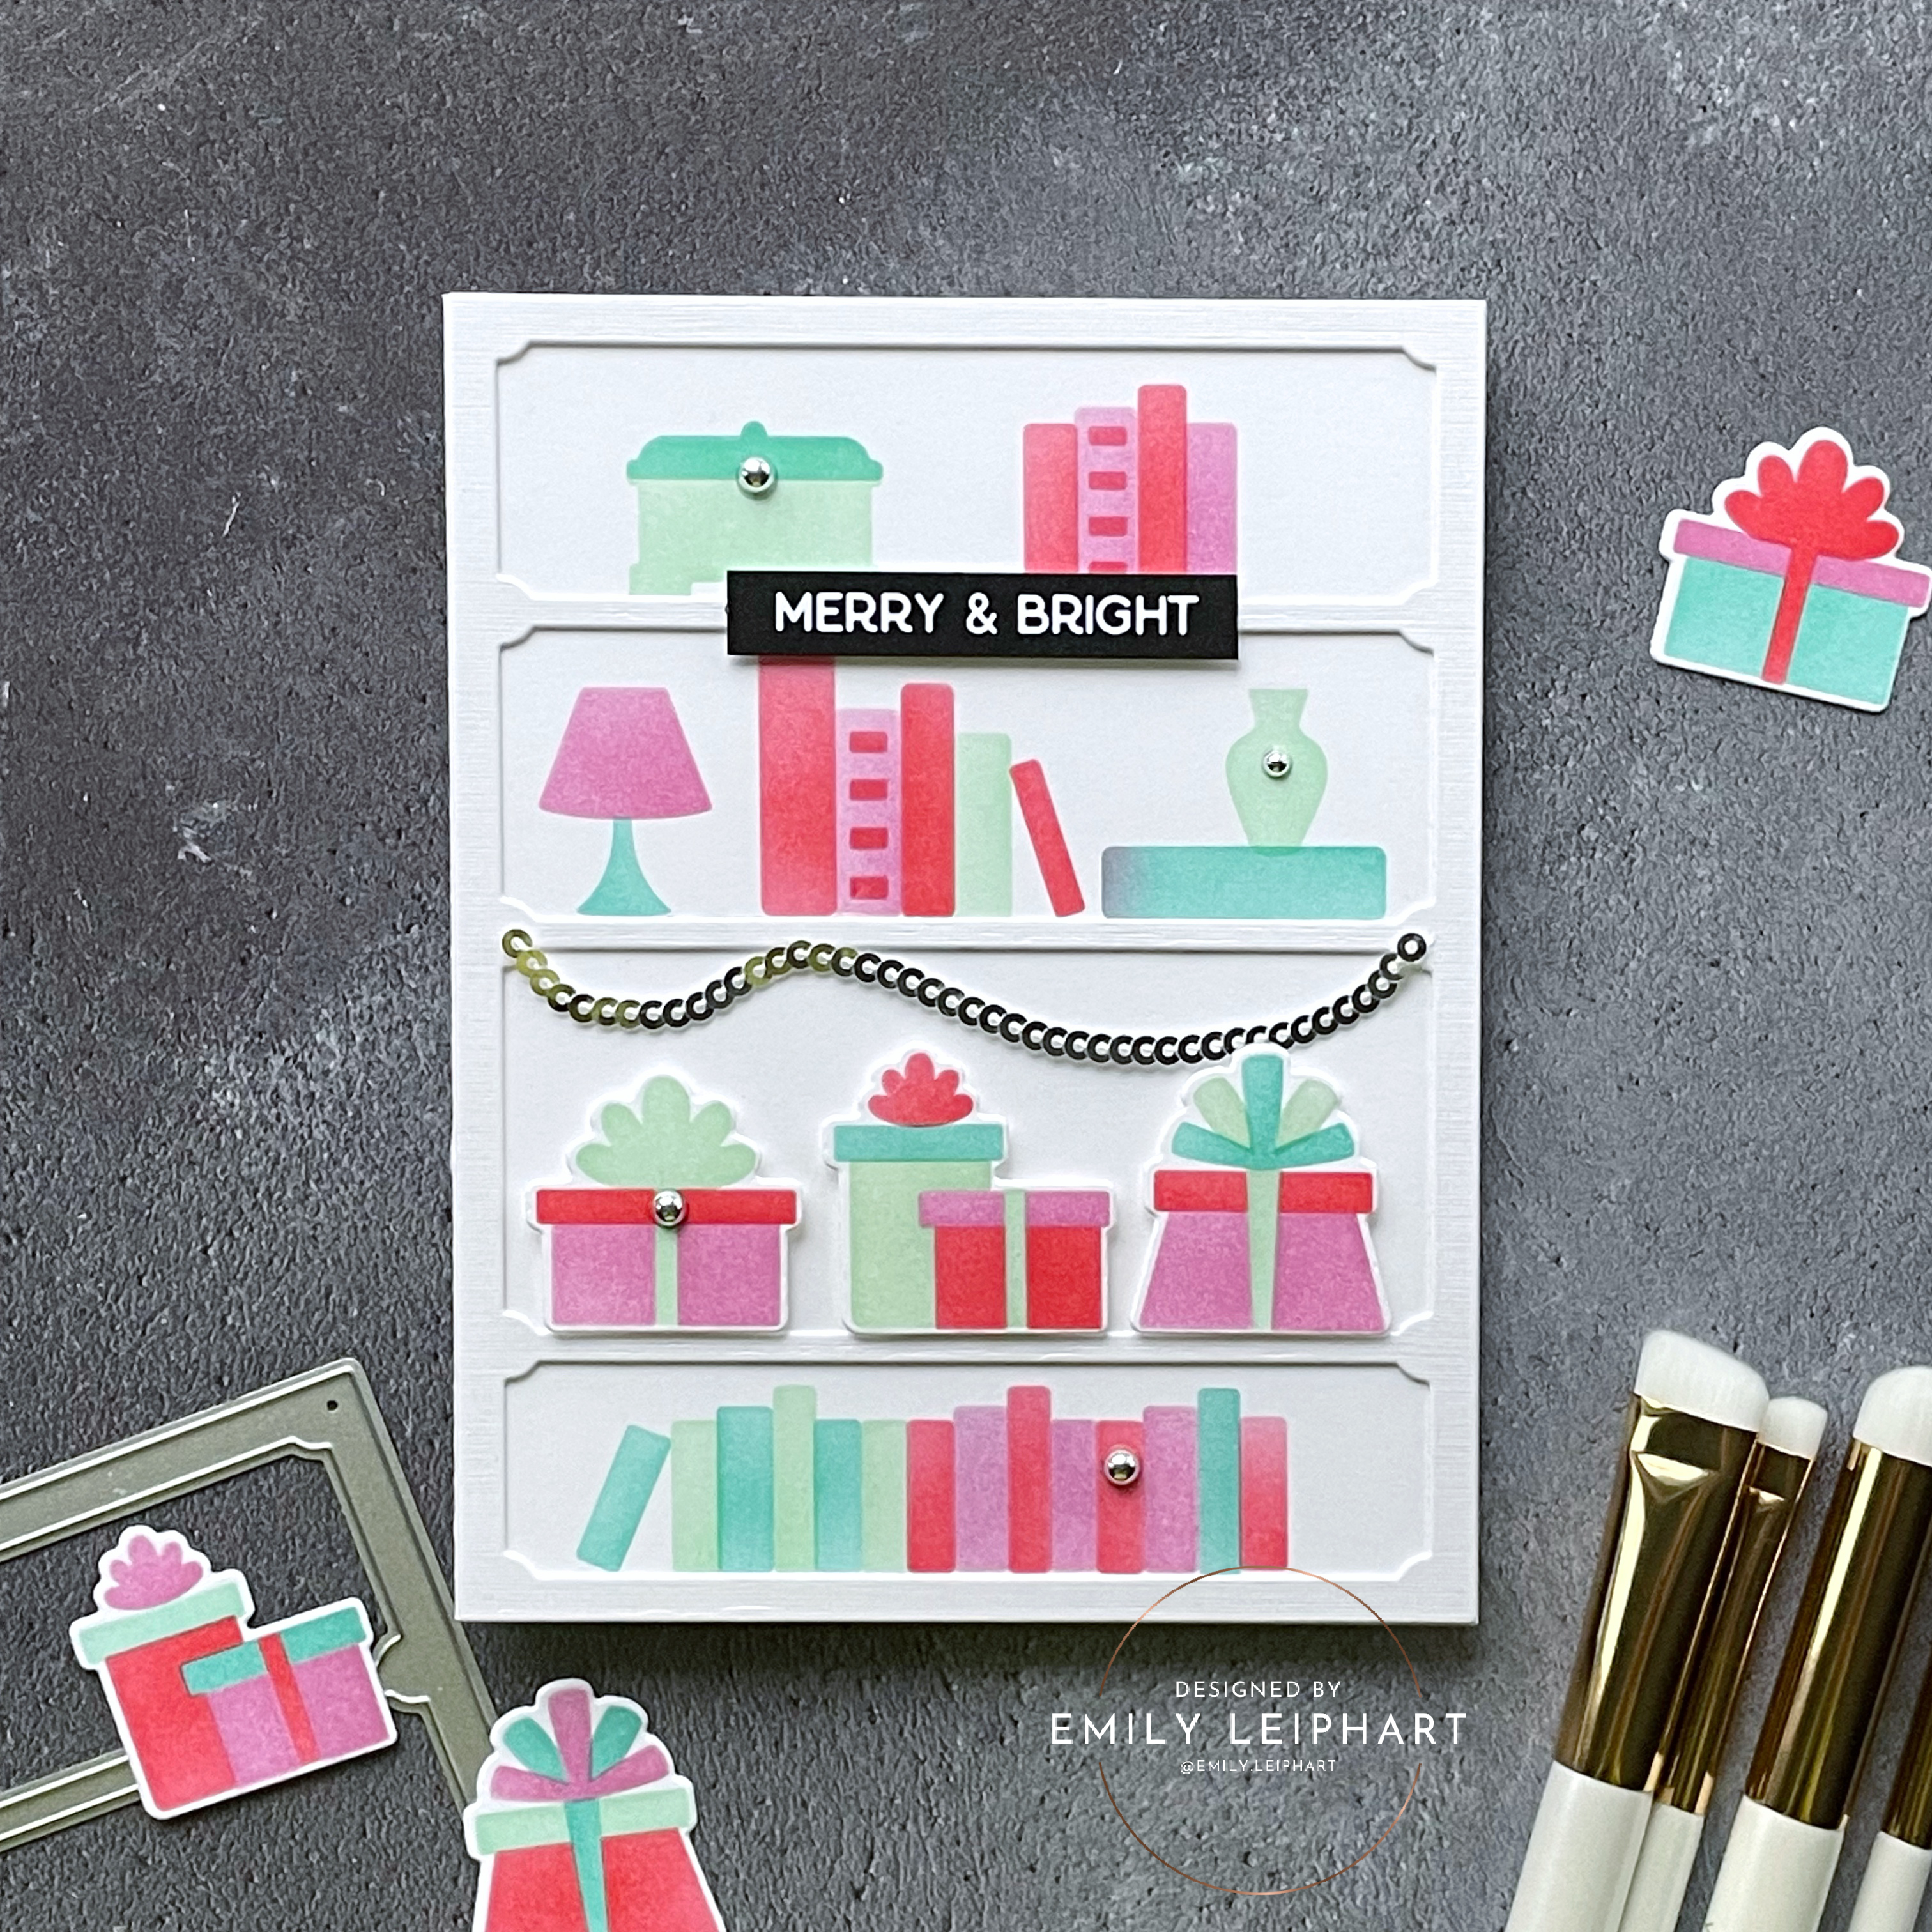
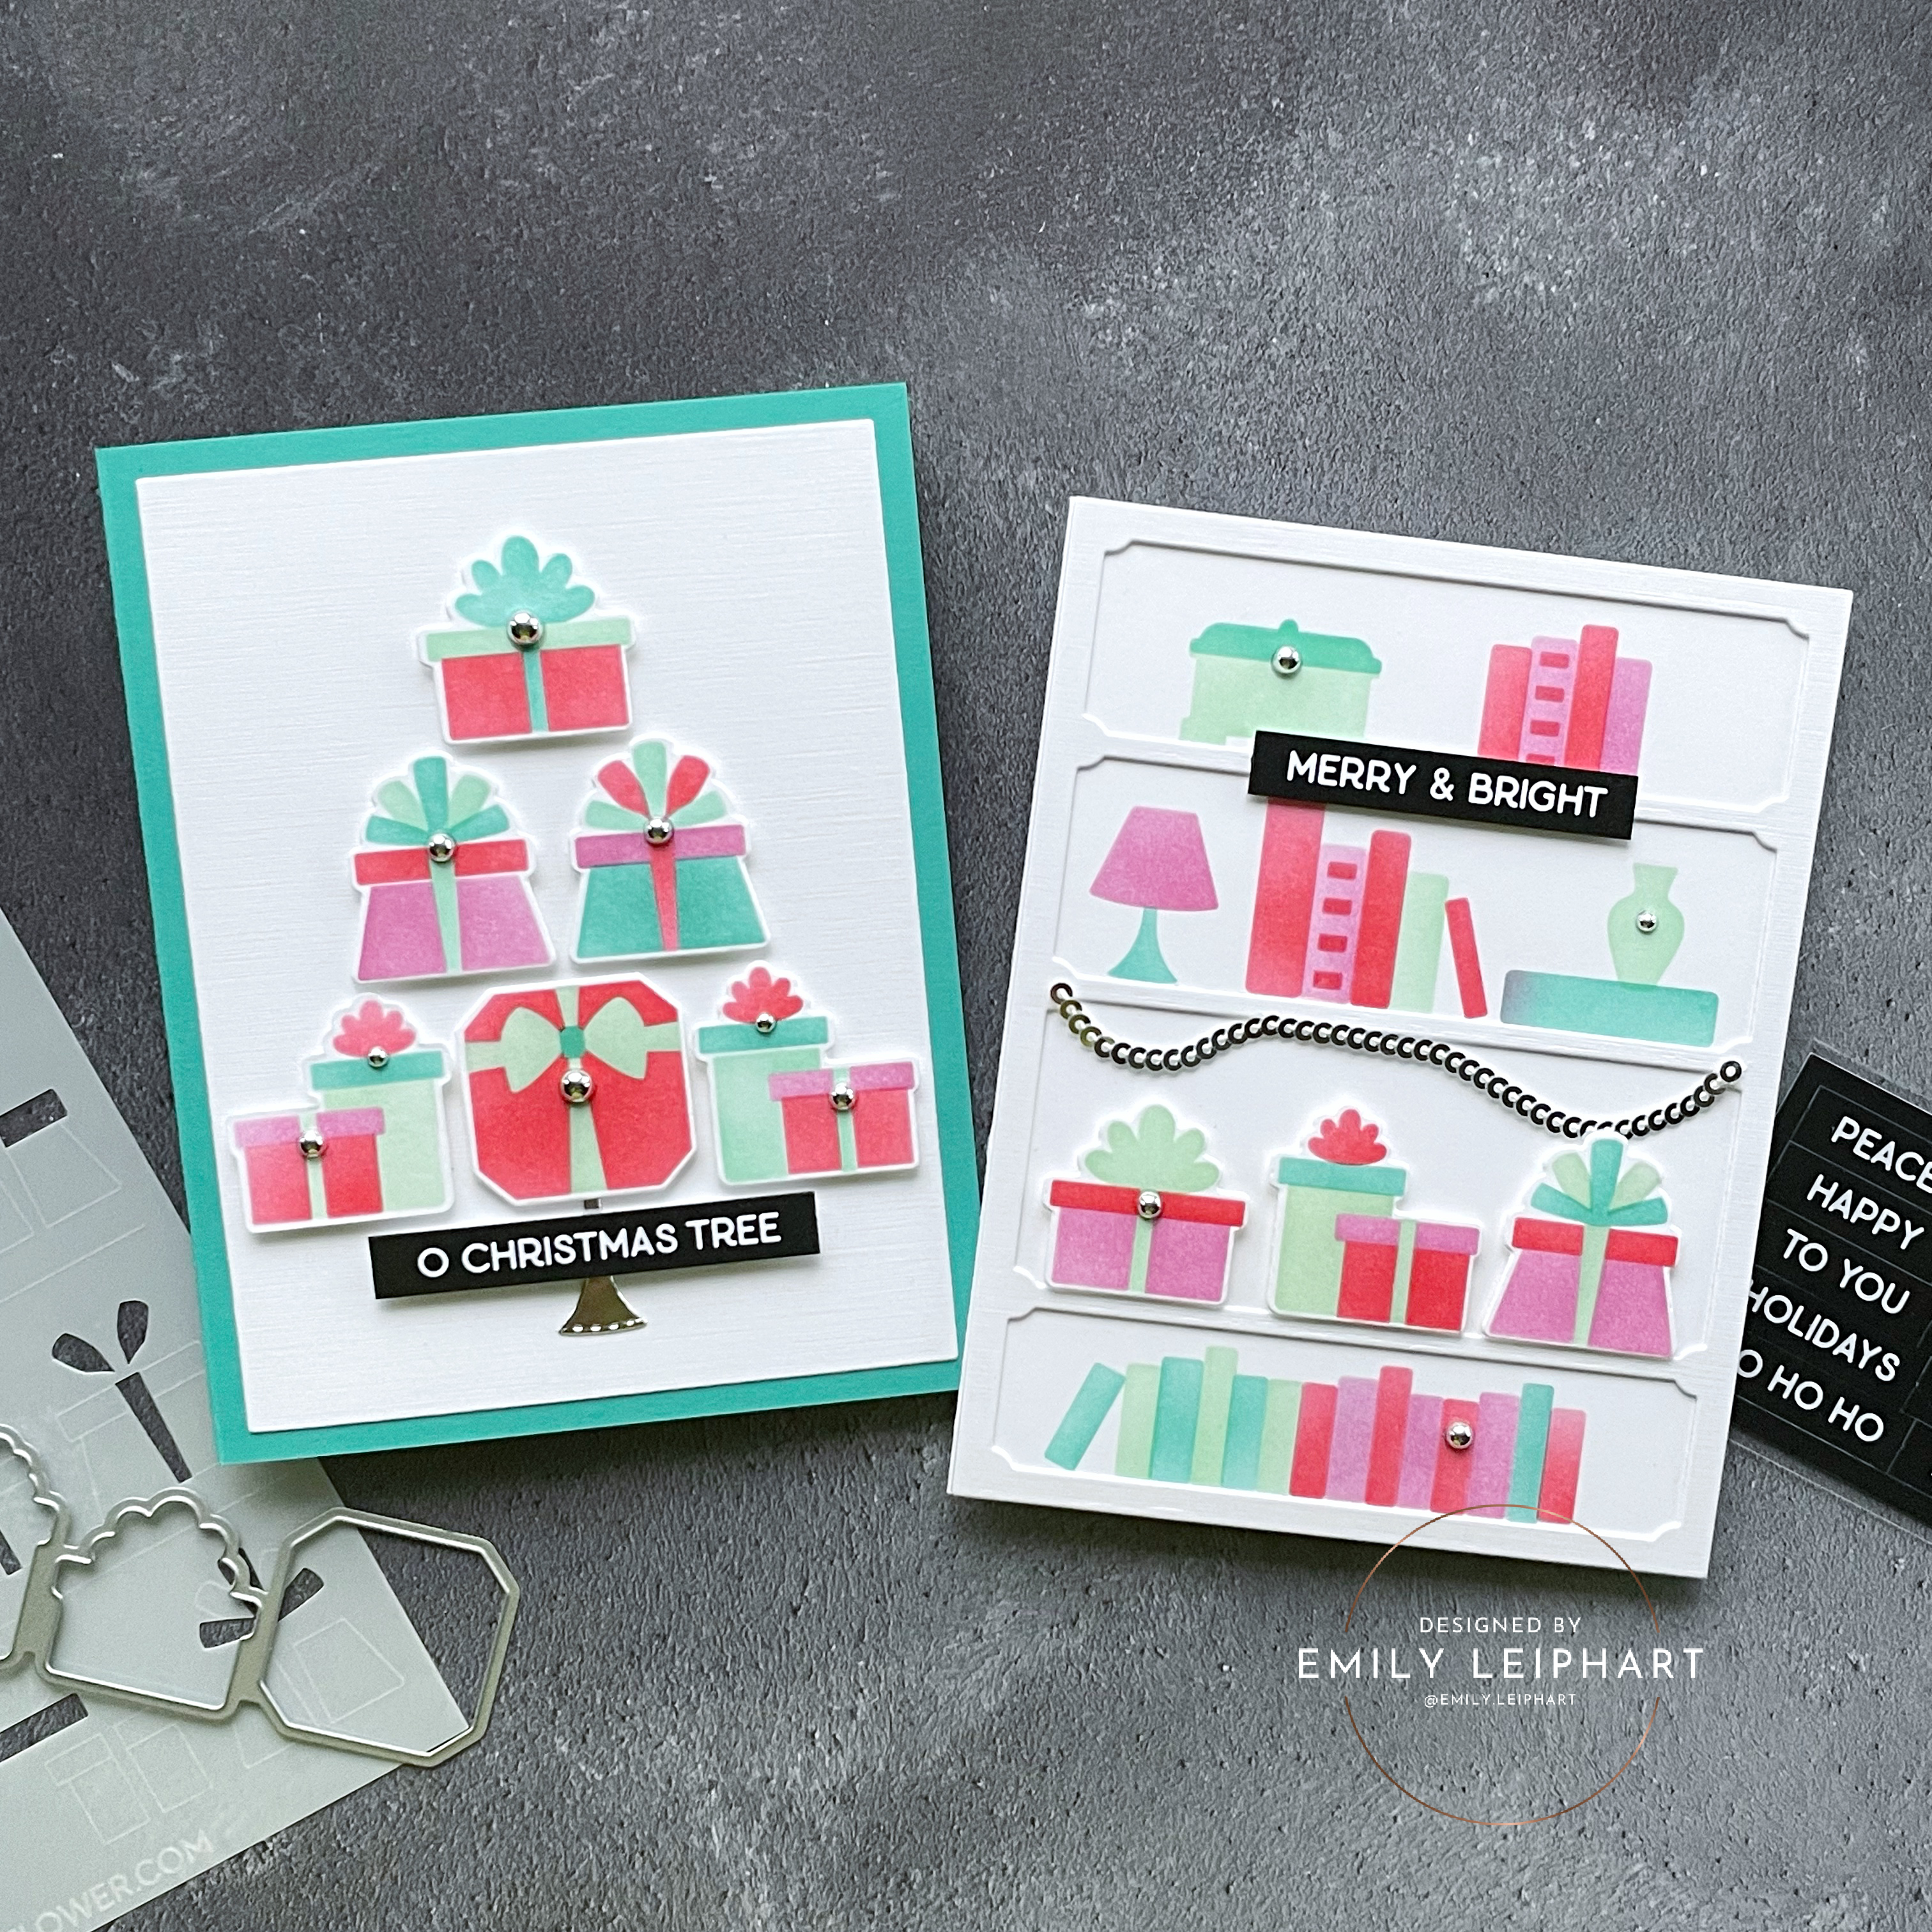
The five products featured in this post were gifted to me and I'm excited to share them on these two cards. It's no joke that Waffle Flower was feeding my book addiction when they sent me the Simple Shelves Die and Simple Shelves Stencil Duo.

I love that the shelf fills an A2 card front and you can pretty much put anything on it. Imagine my delight when I discovered that the gifts from the Multiple Presents Die-n-stencil fit perfectly on the third and largest shelf!

I used Catherine Pooler inks to do all my stencilling for these two cards and the colours featured are Sparkling Berry, Samba, Minted and Aquatini.

I cut two layers of the Simple Shelves Die from Neenah linen white cardstock for a bit of dimension and texture. Then I popped the gifts on with foam tape since they're the highlight of this bookshelf.

Since this card is indeed Merry & Bright, I used one the perfect sentiment from the Subsentiments Christmas Tree Diecut Sheet. Using a trick I learned from Michelle Short, I used a black Copic marker to blacken the edges of the die cut so it looks bolder and cleaner.


For my second card, I decided to use the gifts from Multiple Presents Die-n-stencil to create a Christmas tree and I'm thrilled with the results. It's so cute and since I stencilled four sets of these gifts by rotating the four colours, I have a lot of extras to mass-produce this design.

On the bottom row, left side, I had to make a reverse set of gifts to make the tree symmetrical. I created a mirror image of the gifts on the right side by flipping the stencil 180 degrees and recreating it. To use the same die on this mirror image, I simply held up the die on the back of the stencilled image in front of a lamp and place vellum over the image so the lines on my cutting plate wouldn't impress on the front of the image. Then I used a bone folder to round off the edges of the die cut since the sharp edge was showing and I wanted it to match the other die cuts.

For the base of the tree, I discovered that the lap from the Shelf Add-Ons Die worked perfectly (see more inspiration using this set HERE). However, it was too short so I cut two of them from Spellbinders silver foil cardstock and used another perfect sentiment from the Subsentiments Christmas Tree Diecut Sheet to cover the break in the middle.

I assembled the tree on a panel of Neenah linen white cardstock cut from Spellbinders Precision Layering A2 B Dies and glued that on a card base cut from Teal Topaz cardstock.

To tie in the silver from the base of the tree and the previous card, I embellished the gifts with and assortment of silver metallic pearls.

I hope you enjoyed these cards using some really delightful products from Waffle Flower Crafts. Which card is your favourite? My son likes the book shelf! Don't forget to comment on my Instagram Post for a chance to win a Waffle Flower Shade Brush PLUS Sampler Pack.

Don't forget to check out Waffle Flower's amazing Black Friday and Grab Bag Deals, on now through November 27th and November 30th, respectively.
I hope you enjoyed today's projects. I appreciate you stopping by and, if you're inspired, please shop my affiliate links below. Thanks so much for your continued support!
Supplies:


