Taylored Expressions has released the next in the Create-in-Quads Layering Stencils and you're going to love it! I'm thrilled to be introducing Create-in-Quads Peaceful Pines, the eighth of the Create-in-Quads series.

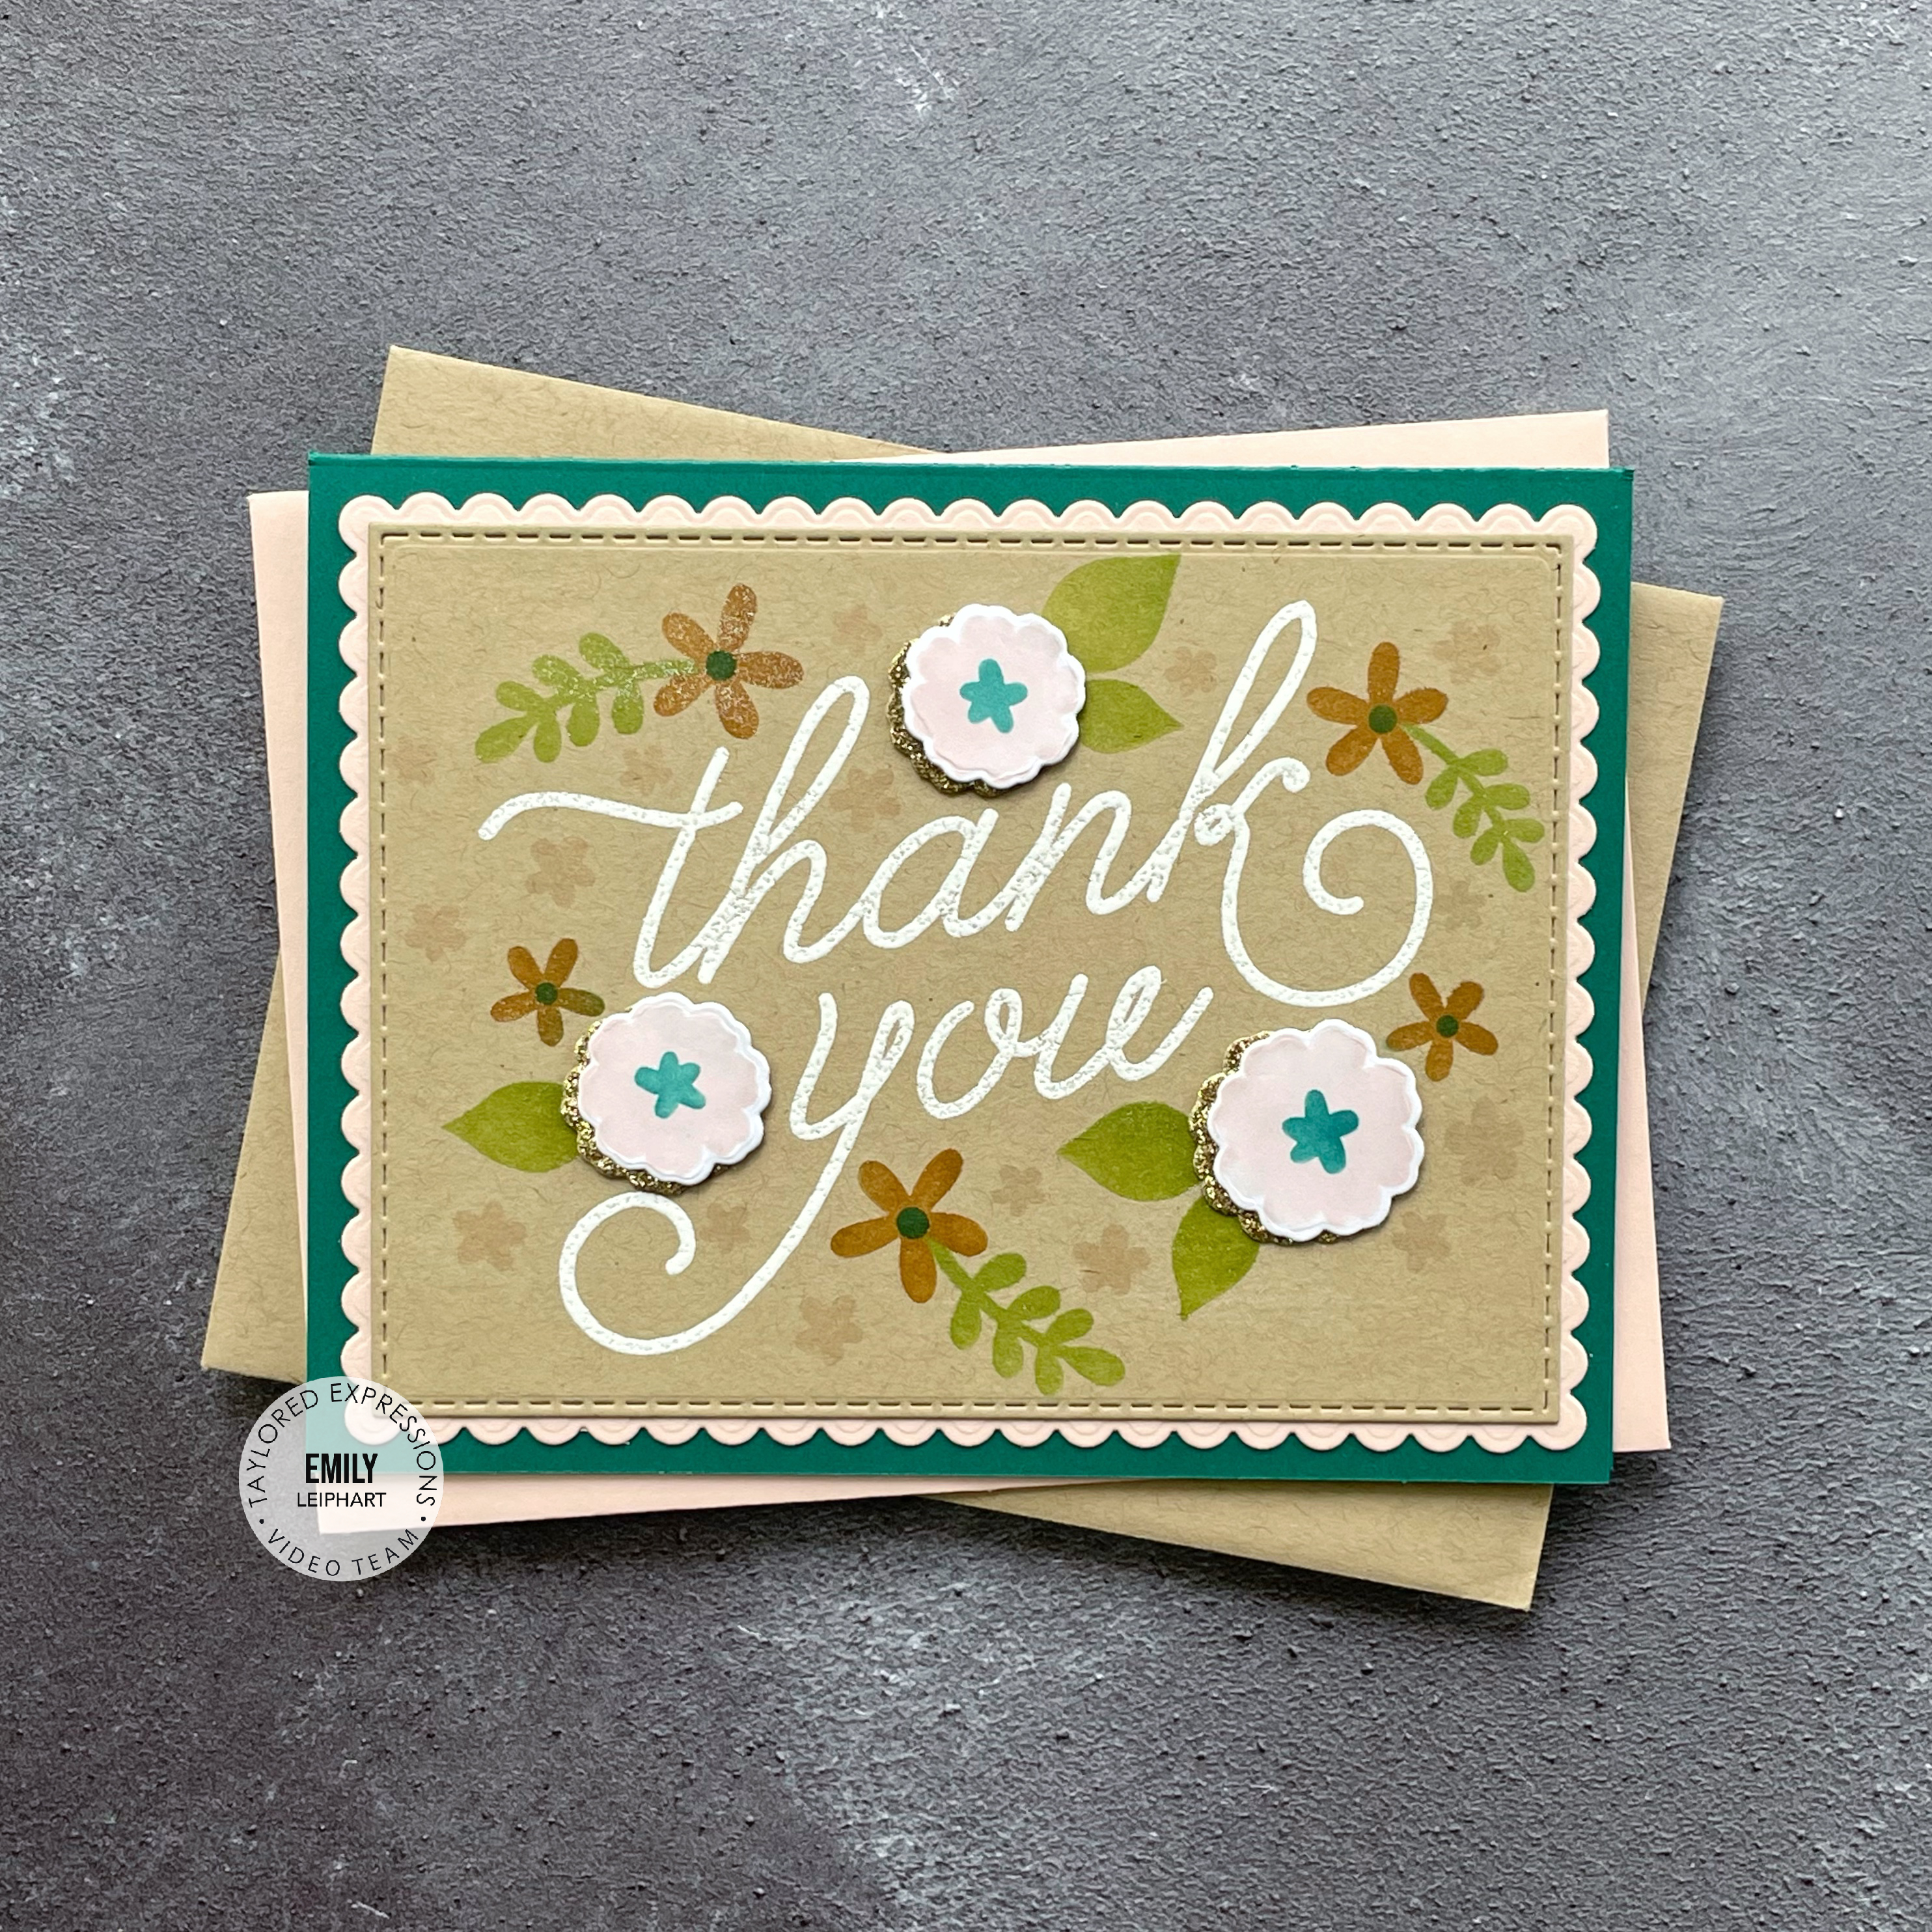
I'm sharing four cards in my video. They all feature the Create-in-Quads Peaceful Pines, Foil It Winter Blessings sentiment panels and coordinating Winter Blessings Dies. Three of the cards feature a portrait design and one has a landscape design. I selected Pink Champagne, Guava, Spearmint, Poblano Pepper and Chocolate Truffle inks for my stencilling. I love this pretty, non-traditional colour combo for holiday/winter cards!

After the stencilling was complete, I used my Mini Minc Foil Applicator with Deco Foil Sheets in Scattered Stars to create the stunning sentiments. They were then cut out using the coordinating Winter Blessings Dies. You can also find the original Winter Blessings sentiments HERE or in this video.

I love the way the Scattered Stars look on those letters! They provide so much dept to the sentiments and the sparkle adds that wow factor. I love how full this first panel looks with all the trees and snow.

After stencilling the snow very lightly with Spearmint ink, I added Happy Medium in Iridescent Glitter on top. It adds dimension and a festive sparkle which I love!

This second card also uses the Frame-in-Frame 3 Die, a former freebie but now available for purchase. I popped it up with foam strips and I love the way the snow extends up and over that frame.

This third card uses the largest of the Diagonal Stitch Rectangle Stacklets, another favourite and often-used die in my stash. I love the detail it adds without bulk or distraction.
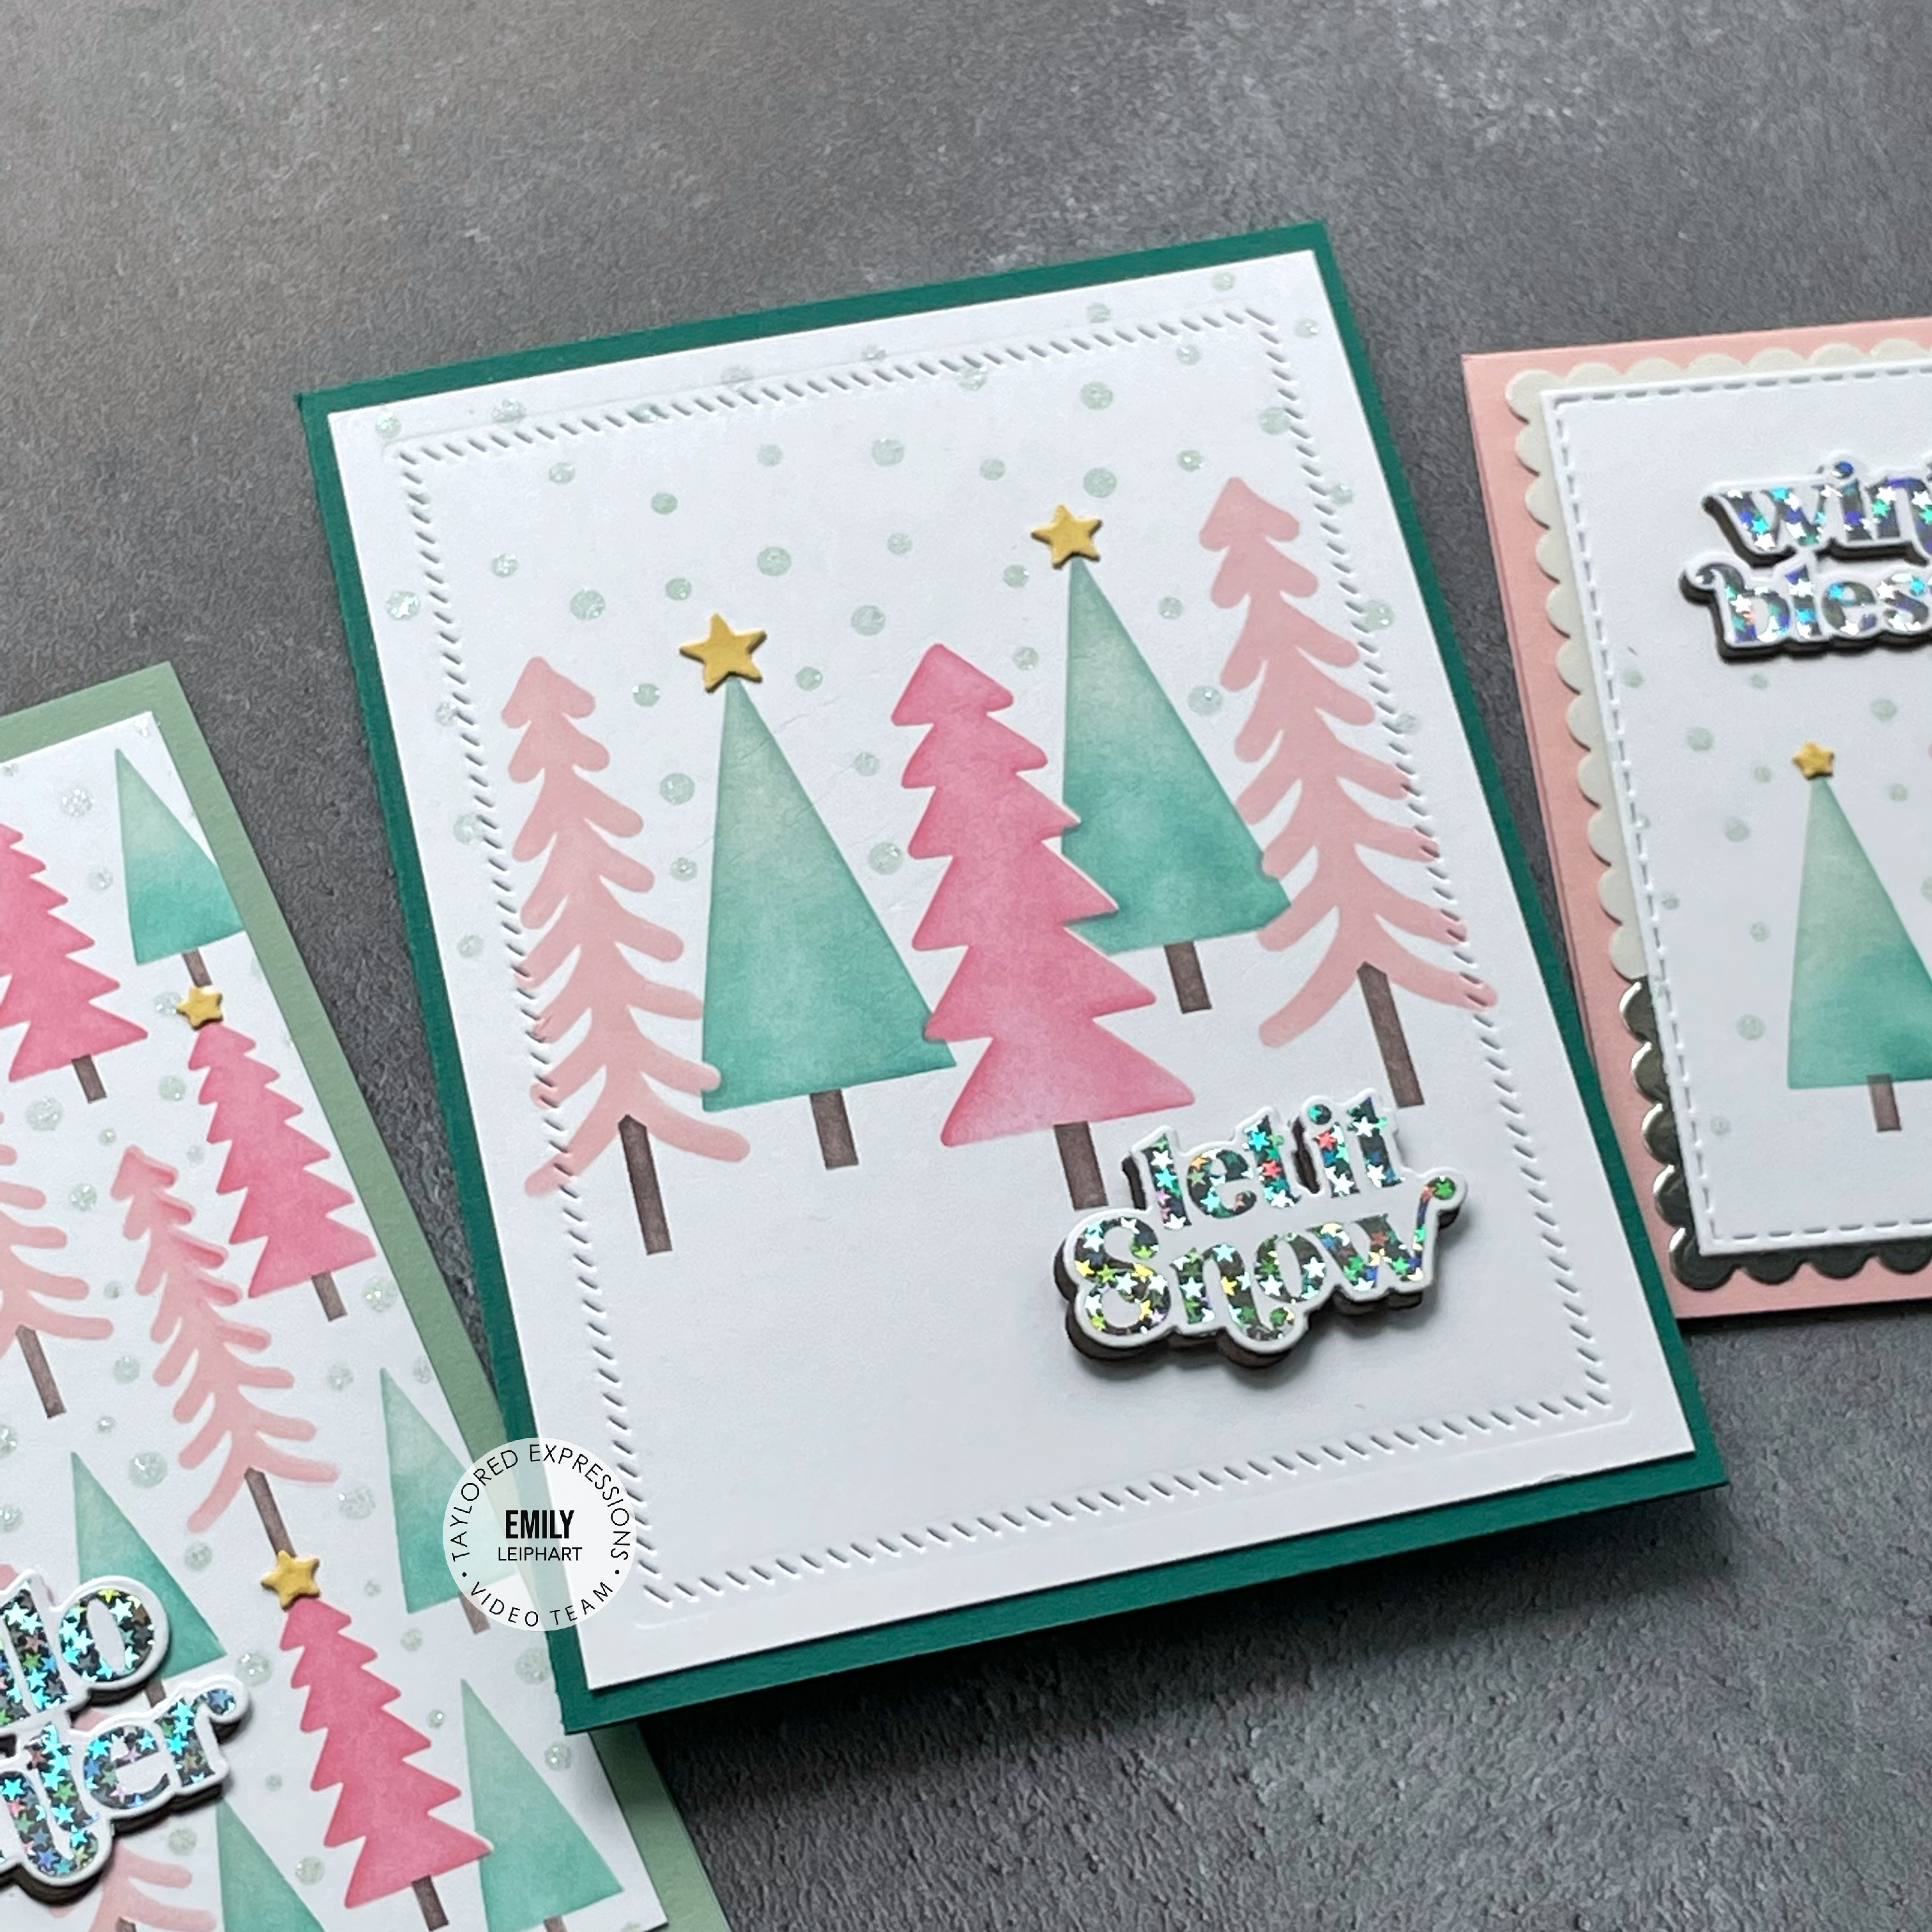
One other feature I added to all four cards was the use of the Gathered Stars Die cut from Pineapple cardstock. I used five different sizes of stars on the different cards and topped some of the trees with them. The pop of yellow is a pretty addition to the pink and teal trees.

My last card features both the Stitched Rectangle Stacklets and Petite Scallop Rectangle Stacklets, the latter of which was cut diagonally from vellum and matte silver foil.

Thanks so much for watching!
Supplies: