It's the last Tuesday of the month and Taylored Expressions has a new cardmaking kit! Ever since I started cardmaking, I've been obsessed with paint swooshes and brush strokes so I was delighted when I saw the adorable With All My Art Cardmaking Kit! Not only are there both stamped and stencil strokes and splotches, there are layering dies for two sizes of cute paint brushes!
As you'll see in my video, I made four cards (thankfully, ha) but almost only had three and still could've made five. LOL It's impossible to stop once you start playing with all the kit ingredients. Both simple and busy card designs look amazing with these products.
The second card also features the Rays Pierce & Cut Plate, which I used to add even more detail to the stamped panel, as well as highlight the marvellous sentiment. All of the sentiments in this video are from the With All My Art stamp set and were white heat embossed on Black Licorice cardstock. The coordinating With All My Art Dies are sold separately and I love how closely the dies cut around the letters so they don't cover any of the backgrounds.
The other two cards are in the horizontal mini slim orientation and they feature the Paint the Town paint brush dies. These dies feature two paint brushes and four layers for each size. I love all the details in those brushes, including that little hole to hang the brushes and the metal pieces that hold the bristles to the handle. They're super cute and you'll love assembling them!
My third card features the Bold Brushstrokes Layering Stencil. This two-part stencil is meant to create and cover an entire A2 card but I customized the strokes for my mini slim layout. After ink blending the strokes, I cut out the centre of the panel using the Stitched Mini Slim Stacklets and added a cute scalloped edge cut from the Petite Scallop Mini Slim Stacklets.
After botching what would've been the fourth card in my video, I decided to create this bolder design and I really love it, especially the two-colour base panel in Mint Julep and Cilantro which coordinates with the singular Mint Julep and Cilantro brushes.
With All My Art will not be restocked so grab this adorable kit while supplies last. Thanks so much for watching and, if you're inspired, please shop my affiliate links below!
It's been a while since I posted projects from my husband and son. Chris and I celebrated our 19th wedding anniversary earlier this week but Damian hasn't been feeling well so we didn't have a full-on celebration just yet. They both made me slimline cards using heat embossed and watercolored images with mini distress inks! Can you guess who made which card? ;)
If you guessed that Damian made the mini slim card and Chris made the business slimline, then you are correct! Damian used Concord & 9th's Perfectly Penned set to custom stamp his sentiment because we make fun of Chris for using longer (and redundant) descriptions like "bunny rabbit", "kitty cat" and "puppy dog" instead of singular words. LOL
My video shares lots and lots of tips on stamping every image included in the O Canada Stamp Set, as well as how to use the Forever Maple Stencil and coordinating Forever Maple Dies. I also have a quick tutorial on how to reink Catherine Pooler ink pads and using stencils to dry emboss like I did here on my first card.
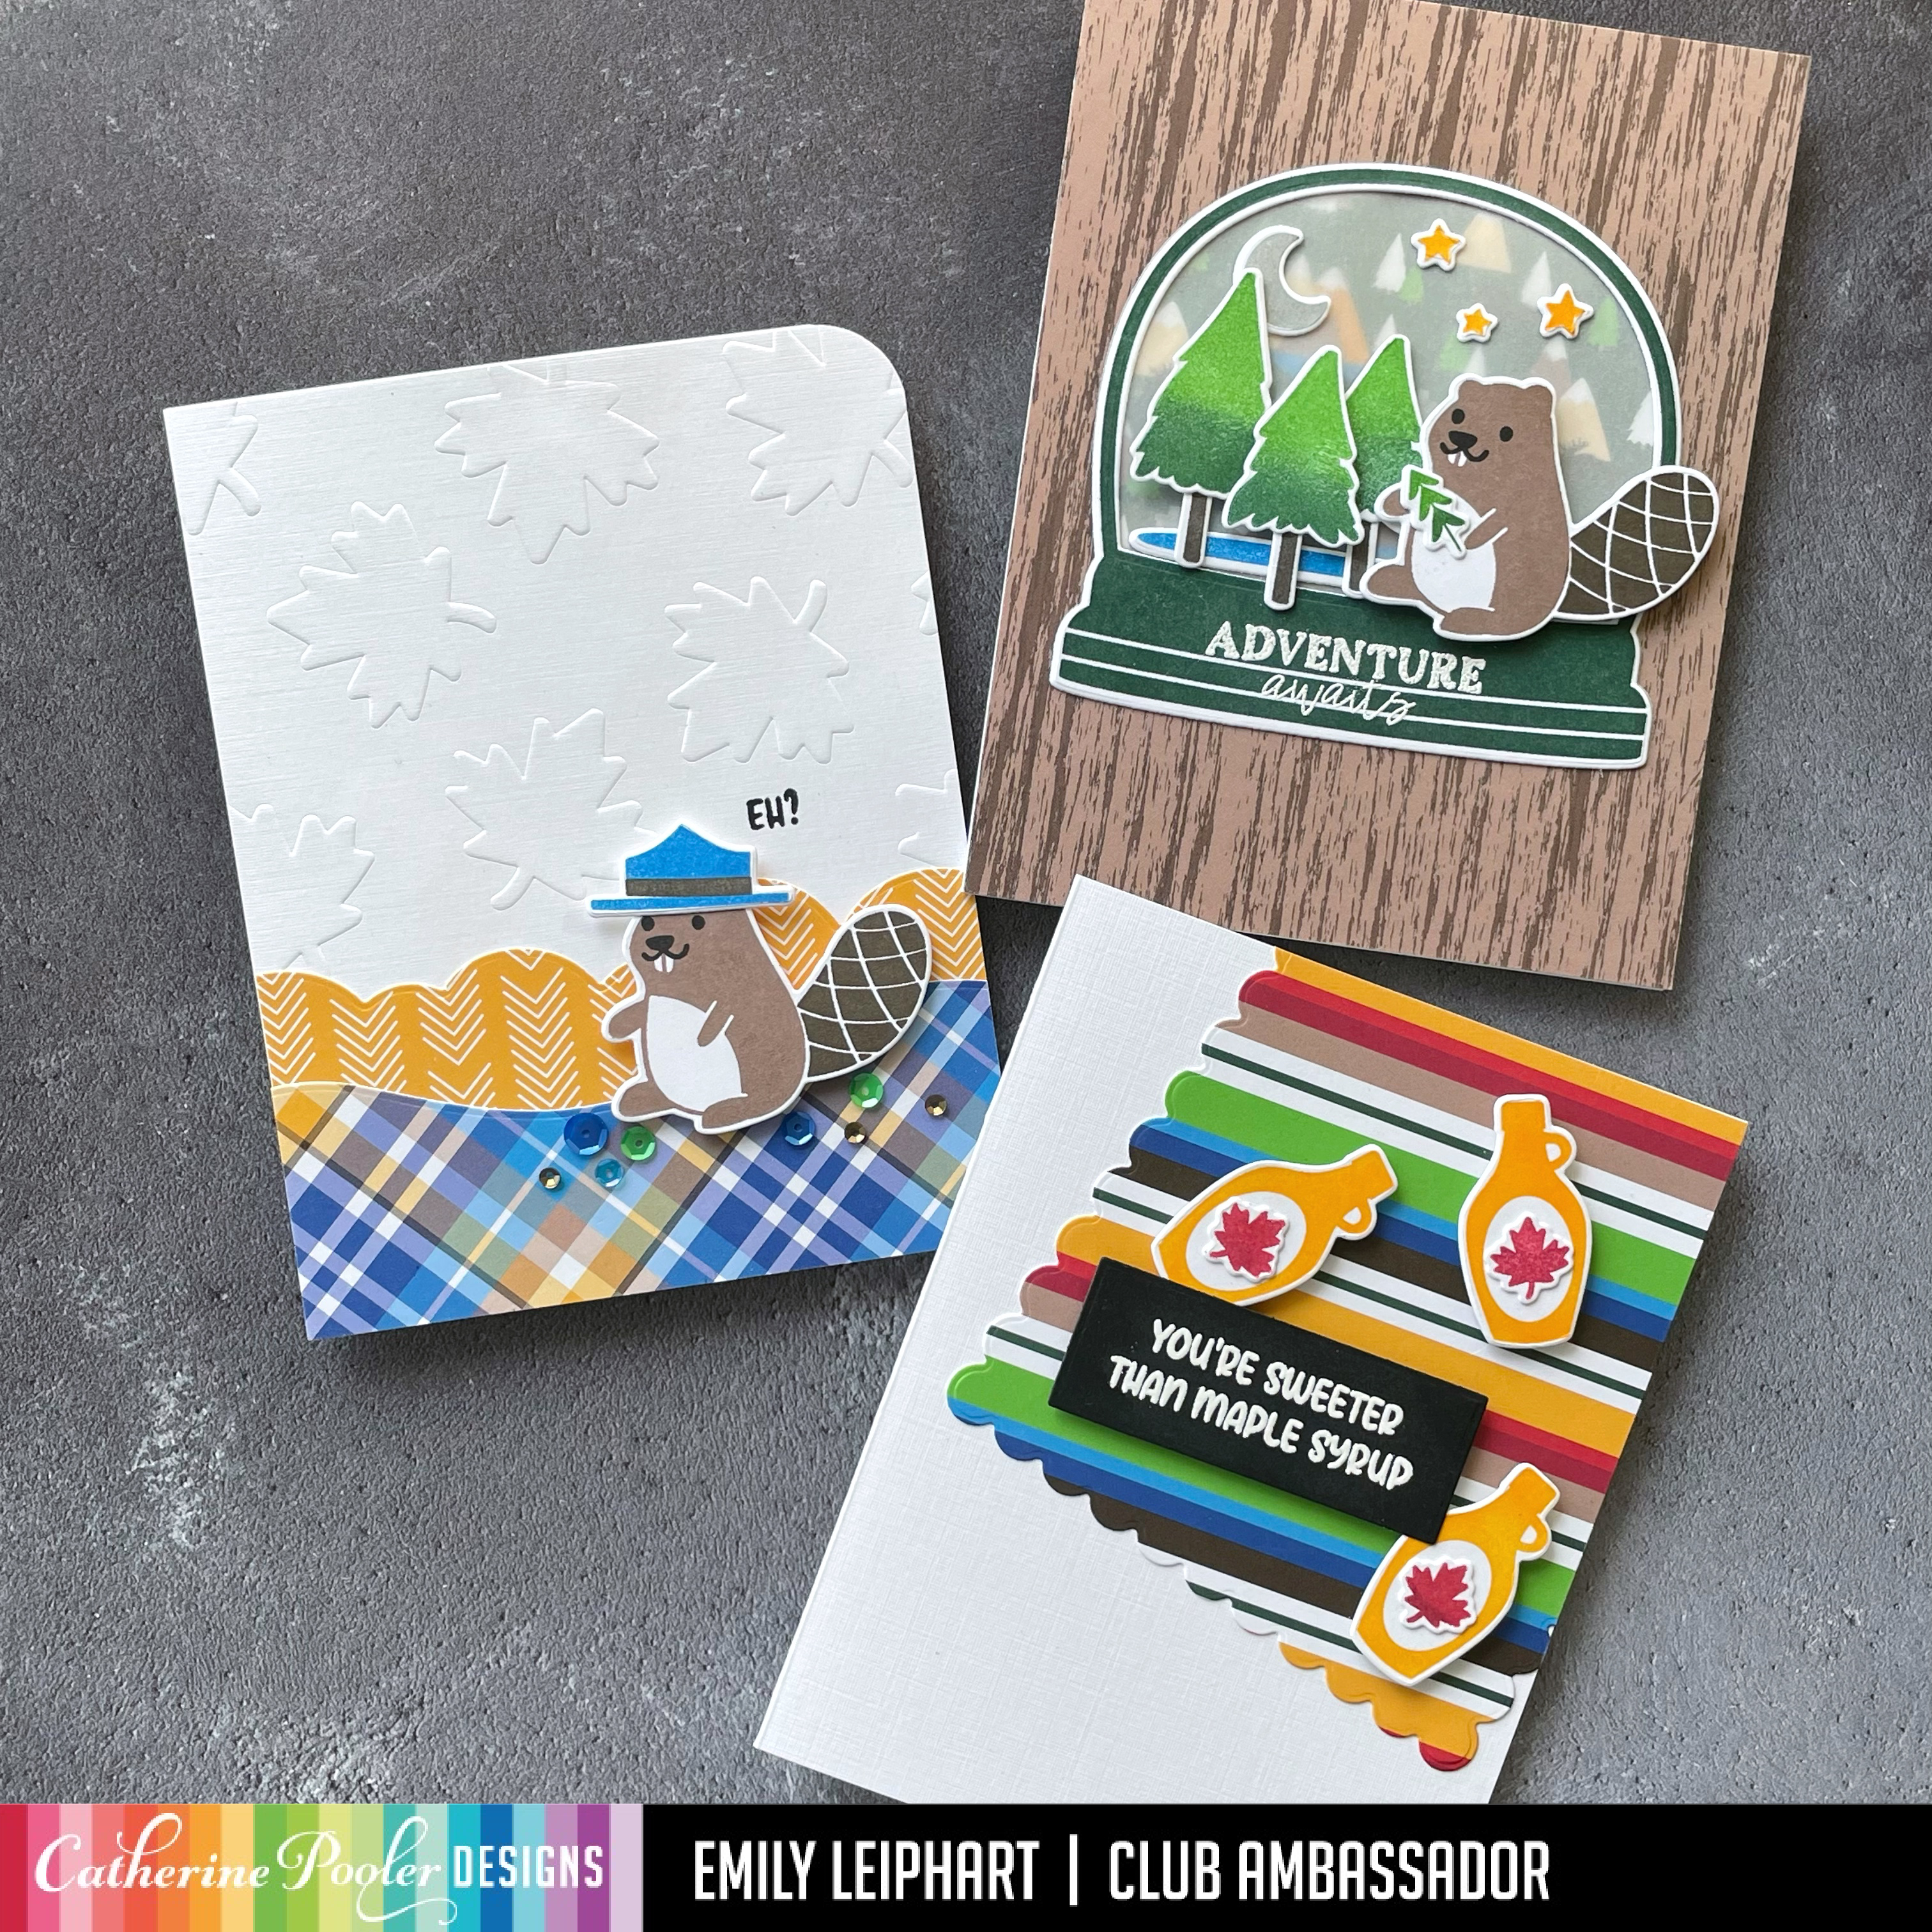
The background of this first card features the Forever Maple Stencil, which was used to dry emboss the pattern into the base panel. I used the Melon Edge Dies to cut two sheets of Moose Crossing patterned paper to mimic water and sunlight.
I cut up one of the sentiments so I could easily stamp one word as the sentiment, popped up the beaver on foam tape and added some sparkle using the Yukon Sequin Mix. To soften the corners and coordinate with the die cut papers, I used the 1/2" side of my corner chomper to round the upper right hand corner.
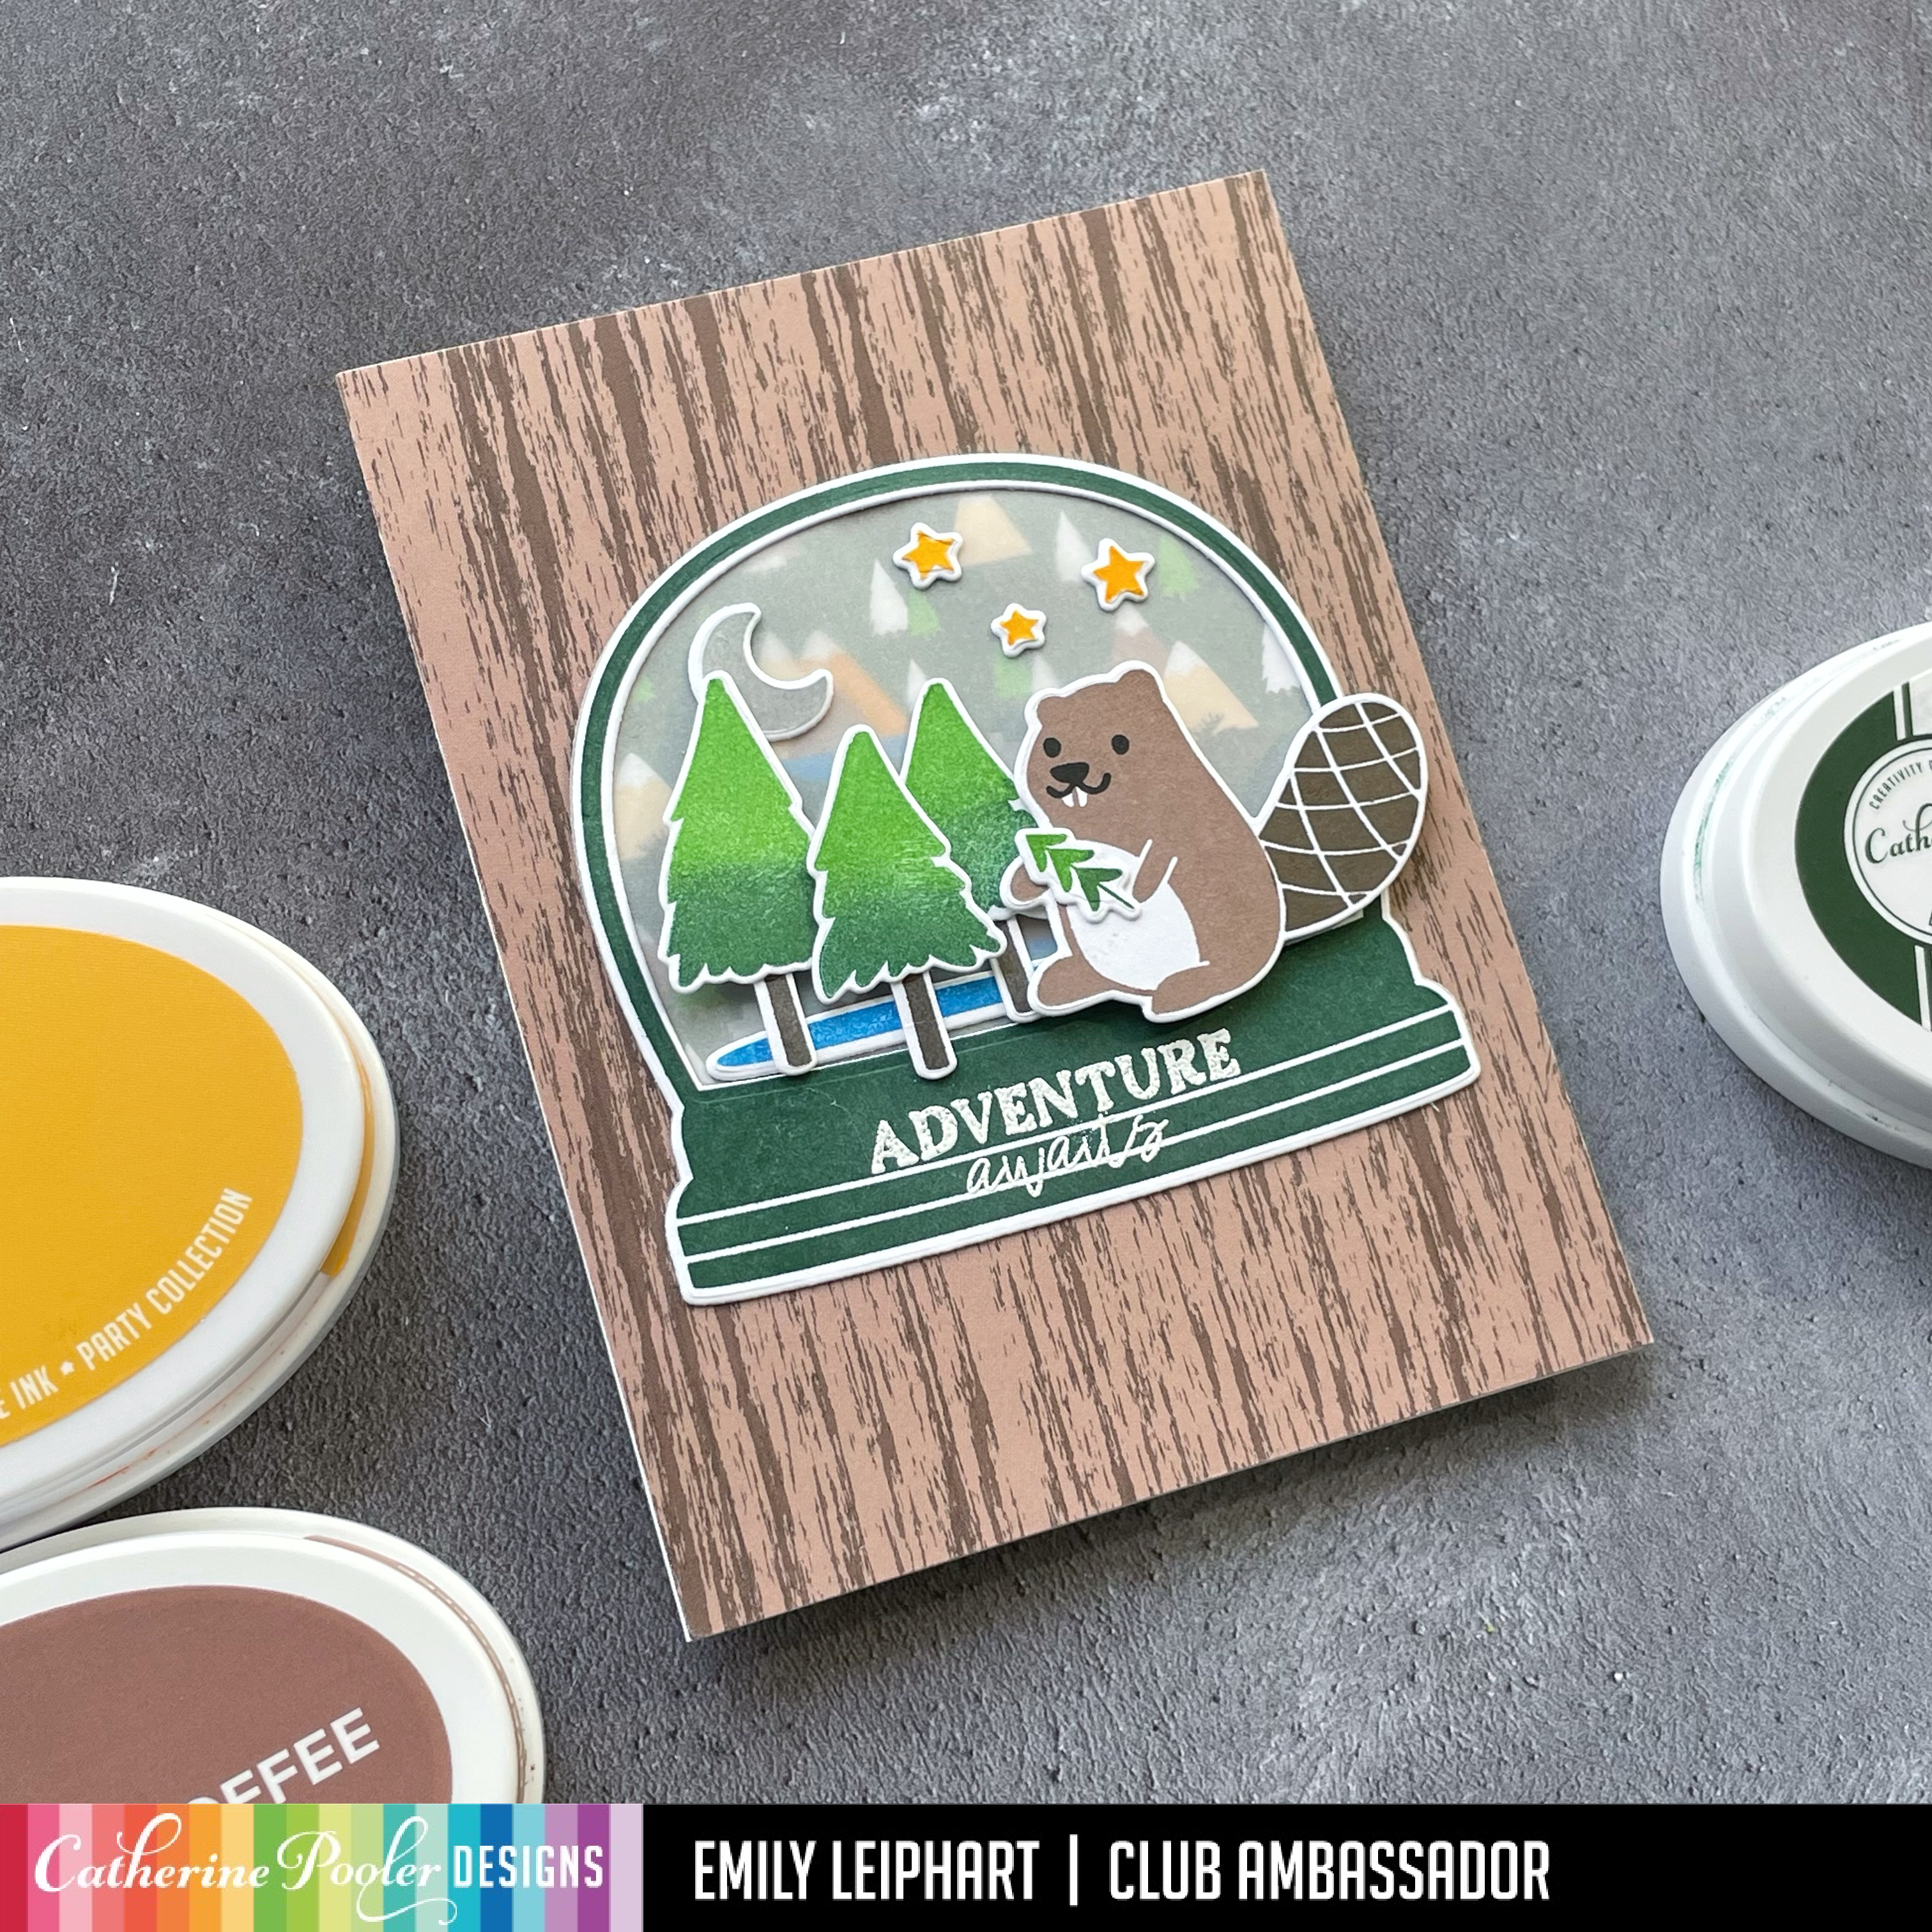
I used a vellum overlay on the forest background because it would've taken away from the elements in the foreground. I white heat embossed the sentiment directly on to the base of the snow globe. Everything was glued flat to the card base, except for the large trees and beaver, which were popped up with foam tape.
I just love this adorable card with a scene within a scene! I just love snow globes and was thrilled that this older set worked with the O Canada Bundle. The snow globes could be used on their own, as small note cards and even gift tags and shakers.
This last card design was inspired by Ilina Crouse who frequently uses an angled panel on her cards. I used the largest of the Scallops and Dots Dies and another piece of Moose Crossing patterned paper to create that panel, which was glued on to the white linen base.
I glued the stamped maple leaves on to the maple syrup bottles. I also white heat embossed the coordinating sentiment on to black cardstock, then die cut it using one of the Ex Libris Dies. I popped up all of those pieces with foam tape. In hindsight, I feel like the lower right bottle should be sitting on top of the sentiment panel so don't mind me while I carefully make that change after-the-fact. ;)
I hope you enjoyed all of today's inspiration, including the detailed review of the O Canada Bundle and many tips and tricks related to reinking, as well as using the Forever Maple Stencil and coordinating Forever Maple Dies.
Remember to leave comments at every stop for a chance to win a $50 gift certificate to the Catherine Pooler Shop. The winner will be announced on YouTube on Wednesday, March 29, 2023.
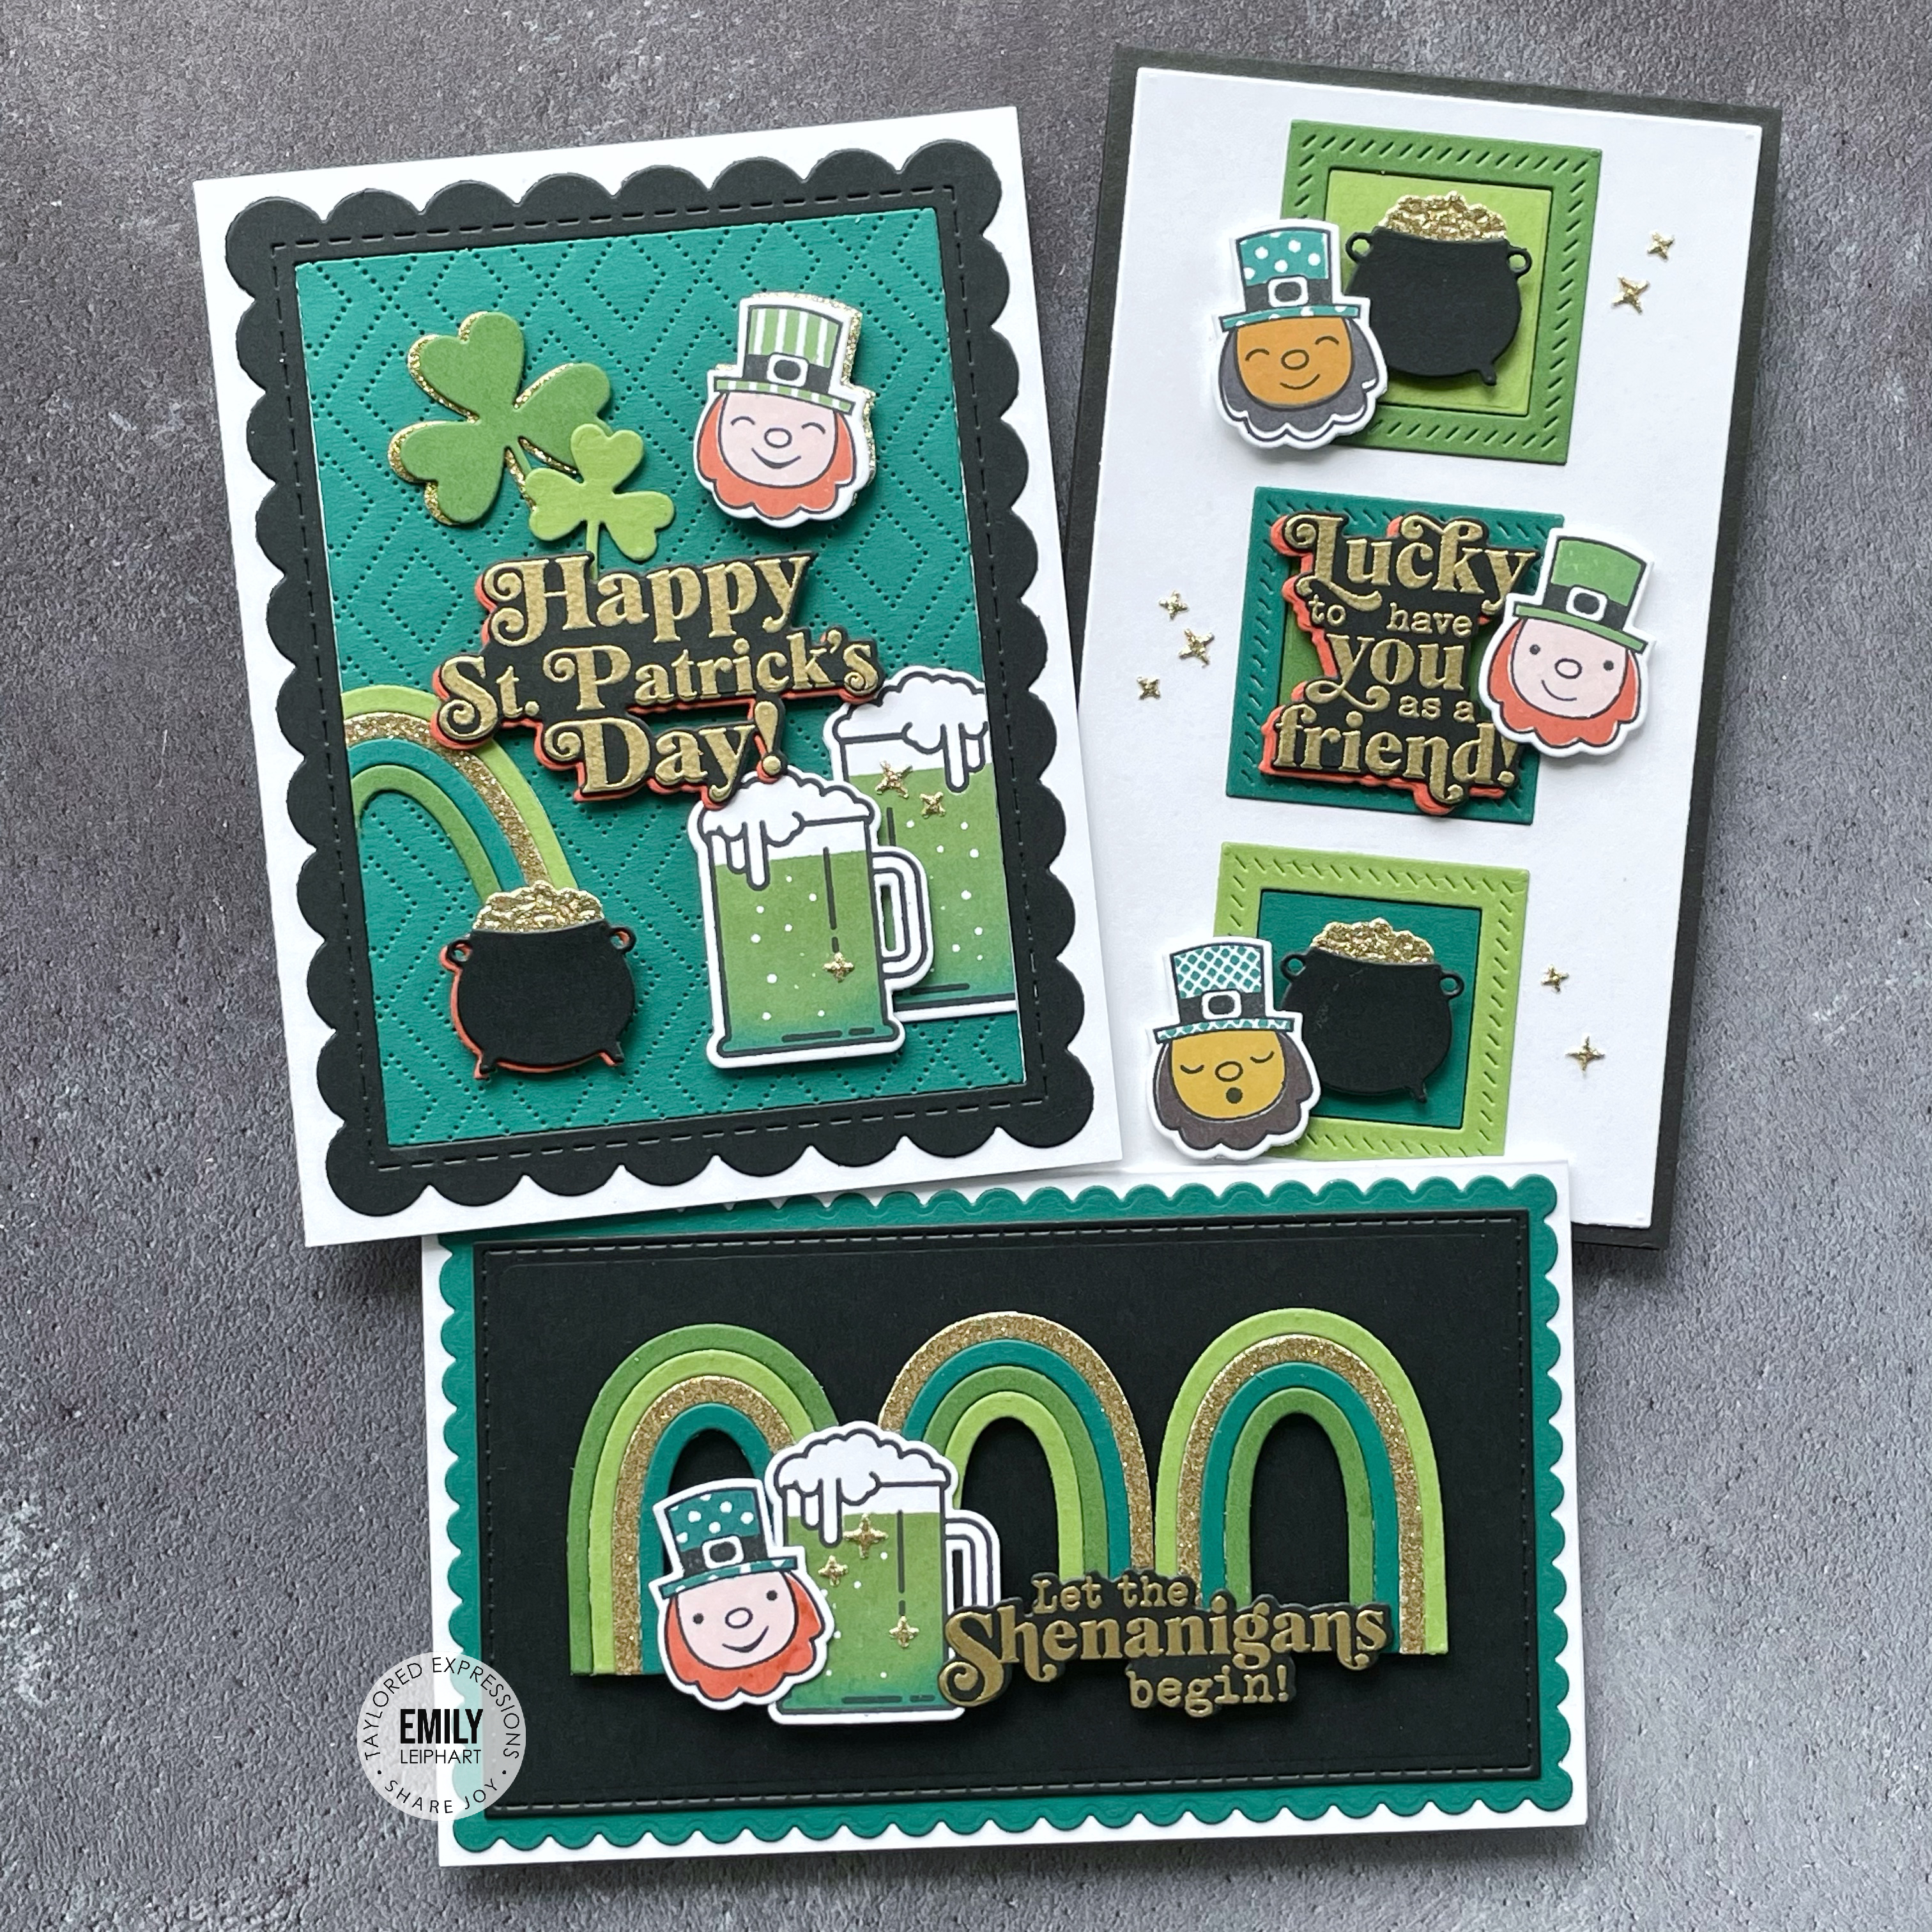
I haven't made St. Patrick's Day cards in six years and it was time to make a bunch! I needed some new supplies and Taylored Expressions released several amazing sets recently. These cards combine a few new must-haves with a few older but new-to-me sets.
On this last card, I had to use the Diamonds Piercing Plate again and I'm obsessed with the way it looks on Poblano Pepper cardstock! I added a few of the leftover images to keep the eyes moving around the sentiment. This design is more of a happy accident and I absolutely love it!
To see these fun cards in motion, please visit THIS reel on my Instagram feed.
For the first time ever, a cardmaking kit from Taylored Expressionshas been restocked! That's right, the Perk Up! Cardmaking Kit is back so grab one while you can! The kit sold out in less than 24 hours the first time around so I don't think the restock will last long either. Today's video offers you more inspiration using these fun and popular products.
I went with a retro colour palette this time, adding black to every card for dramatic effect. The colours featured are Pink Champagne, Potato Chip, Dried Fig and Olive, which I used in both inks and cardstock.
My second card features one of the panels from The Insiders - Coffee, which is included in the kit but also sold separately, if you wanted to purchase extras. I just love this snarky sentiment and thought it would be fun to feature on the front of the card!
I ran the panel through my Mini Minc Foil Applicator with Black Deco Foil to give it a bit of shine. I used the small Cup of Joe dies to cut mugs and used the Hug in a Mug mini stamp set to add beans to the mugs. I used a piece of Press 'n Seal to hold the arrangement together, then added liquid glue to attach the to the panel. After trimming the excess from the edges, I used the 1/2" side of my corner chomper on the upper right hand corner before gluing the panel to a Pink Champagne card base.
I die cut two Frame in Frame 3 Dies from Black Licorice and Dried Fig cardstock, and glued them together before attaching them to the card base. Finally, I attached the large mug with foam tape.
If you're inspired by my work, please shop my affiliate links below. Thanks so much for watching!
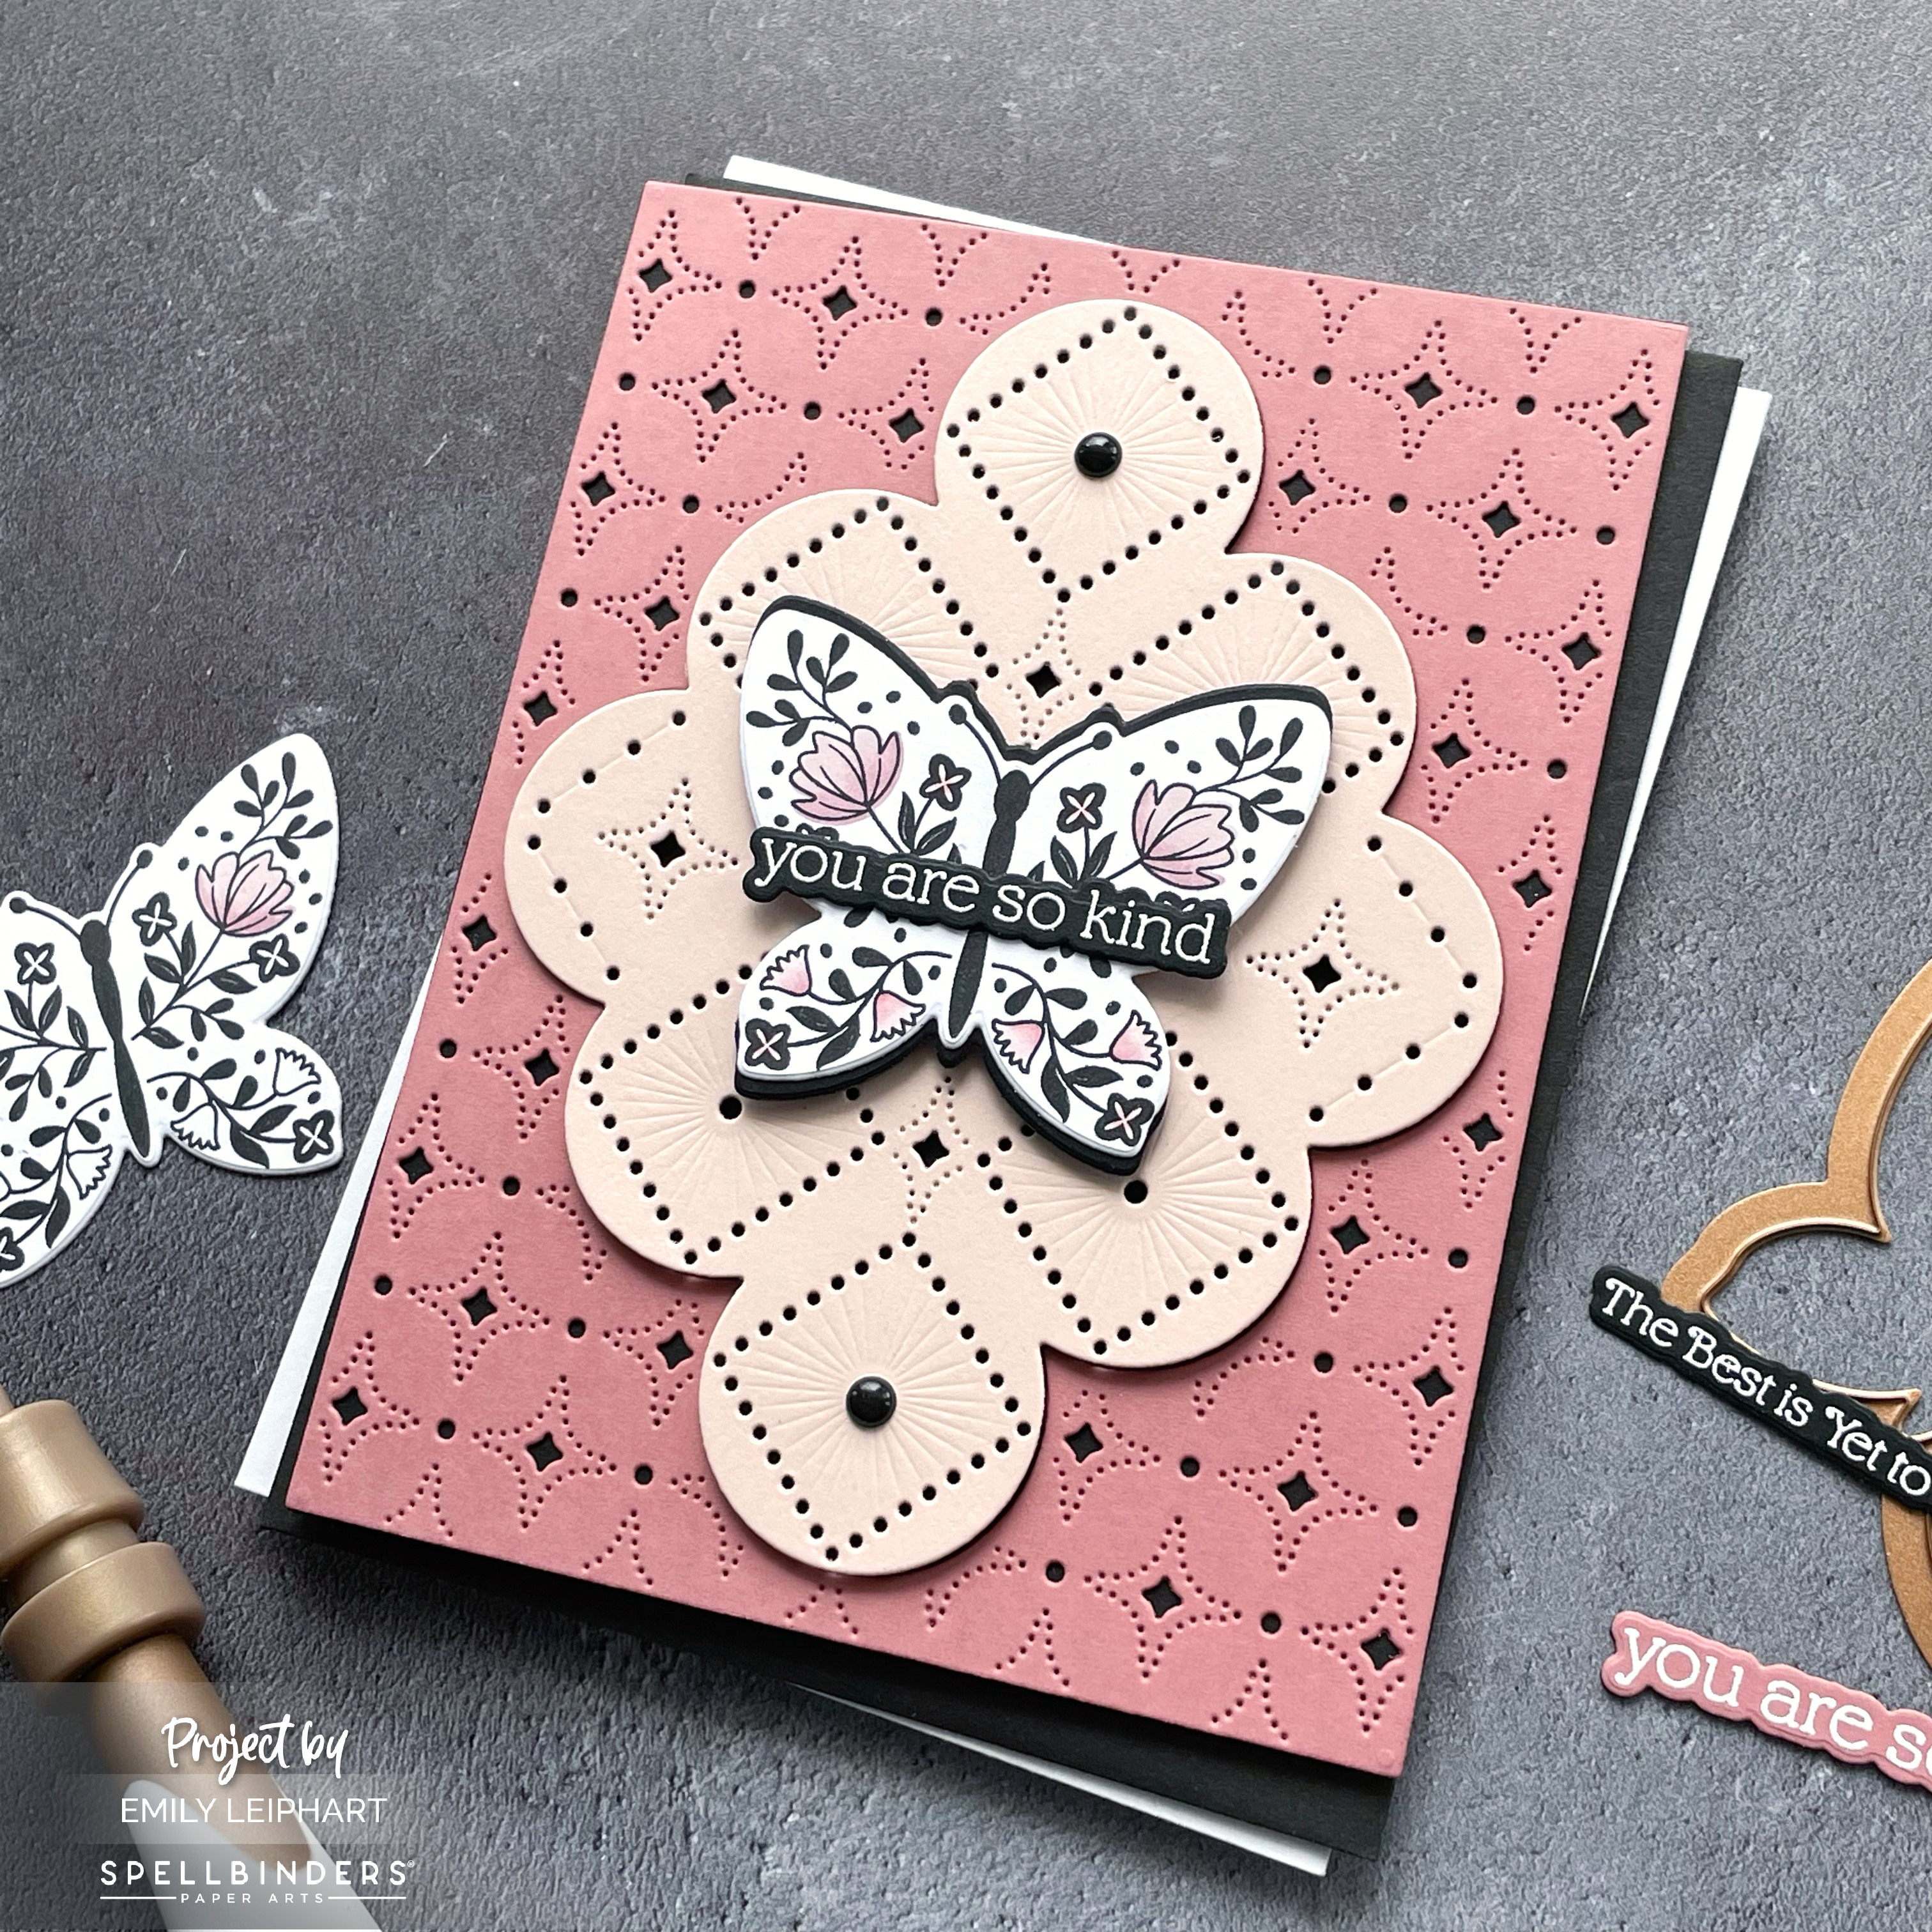
Obviously, these Nested Layered Stitched Petal dies are meant to be stitched but I think they're beautiful on their own, as is, which adds versatility. Sometimes all you just need are some small details to elevate a card from good to wow. I cut the outer layer from Raspberry Sorbet cardstock and the inner panel from Rose Water cardstock.
From March 10-15, 2023, you'll receive a free card kit with every purchase of $150 or more! It will be added to your cart automatically. New products have been added the ongoing Clearance Sale and you'll find some great deals on items in your wish list! Click on either icon to head to the shop.
Here's a list of monthly club kits I share, as well as some of the value kits offered by Spellbinders:
{pronounced lee'·part} I'm a former research analyst and make-up artist turned paper crafter and stay-at-home mom. I love to practice yoga, listen to music, read and bake when I have time but my son keeps me pretty busy! I hope you enjoy what you see here.