
Well, apparently I can't stay away for very long! ;) Today's post is for the
Moxie Fab World Card Sets Challenge. As you all know, my best friend Elen is spending the next couple of months, and maybe more, on the Greek Island of Rhodes (Rodos) with her parents and caring for her Dad. Elen emailed me to tell me she cries whenever she thinks of her son because she misses him so much. How gut-wrenching that must be! Thank goodness her husband is taking care of everything in Montreal. Anyway, let's get on to why I have 20 photos in this post. Will you stay? LOL I felt like I ran a marathon when I was done so I certainly hope you don't mind. This is a step-by-step post of how I made the feature card and packaged gift set for Elen's parents.
 These cards are in the mail along with the Brave Girl card I made for Elen last week. The long card is a 'hello' card for Elen's parents. I thought the cheery colours would be perfect for the season and considering what they're all going through right now. I started by stamping the flowers, die cutting two houses and stamping the sentiment.
 I positioned the houses where I wanted them to be an used a pencil to trace the hearts.

Then I applied Scor-Tape over the hearts.
 I cut tiny pieces of Honeydew baker's twine from The Twinery and pressed them in to the Scor-Tape.
 I added clear rhinestones to the centres of the darker flowers and adhered the houses on to the card base with foam tape. To finish, I stamped three hearts coming out of one house and rounded the bottom left hand corner of the card.

Here are a couple of close ups of the twine showing through the houses.
 Next is the gift set I made for Elen's parents. I felt that thank you cards would be the most useful for their situation. I think they will be calling on close family and friends in the coming weeks and months so these cards will come in handy.
 I still don't like the way I photograph groups of cards so here's the set from a different angle.

The base of the cards are embossed with Side Two of the In Bloom impression plate. I used the same four colours I used in the house card to tie this entire project together. I stamped the sentiment first on to the frame in turquoise and then again in black on the hands once I knew where I was popping them off the label. I stamped the sentiment in black in the hand to make sure it would be noticeable against the dark pink. I added a Honeydew twine bow on the index fingers as a sort of 'I won't forget what you've done for us in our time of need.'
 I don't make a lot of templates since I don't own a printer. Here's how I prefer to package my cards and gifts.

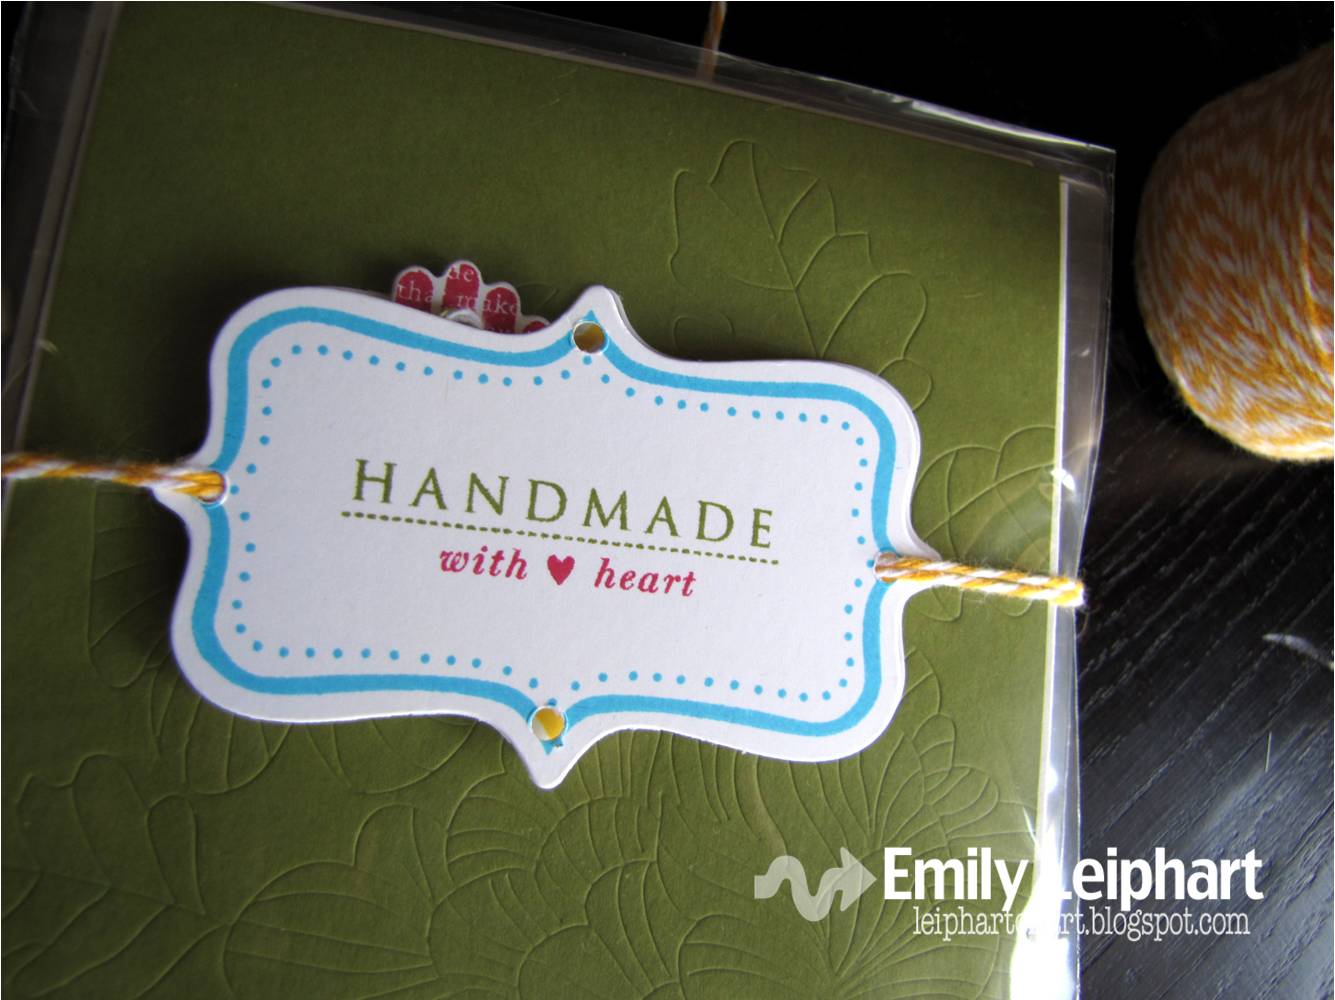
I gathered four envelopes, clear bags and twine. Then I made a label for the gift set and punched a small hole in each of the four points.

I put the envelopes inside the card and slip them into the clear bags. I love these clear bags because they're cheap, super thin, biodegradeable, compostable and they make the cards extremely presentable. ;) My clients receive all their cards this way and some have told me they put the card back in the clear bag for the recipient after writing the card and addressing it. Cool!

Before I tie them together in a bundle, I rotate two of the cards 180 degrees to reduce the bulk.
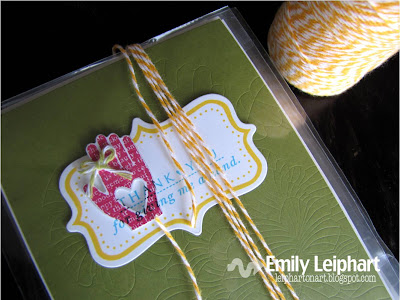
To cut the proper amount of Lemondrop baker's twine, you will want approximately ten times the length of the card. Wrap your twine around the bundle five times.

Take your piece of twine, open it to its full length, then fold it to halve it. Snip the loop so that you have two pieces of twine and four ends. String the twine behind the label and up through the holes like so.

When you get to the back of the package, I simply bend the twine at 90 degrees. One end will head toward the top of the cards and the other toward the bottom.

Bring the twine around to the front, put the bottom end of the twine through the bottom hole, up behind the label and out the top hole in the label. The twine at the top of the package will meet it. This is where I tied the bow.

You can tie the bow at any of the four points and you don't even have to wrap the twine around all four sides. I prefer it this way so the cards can't slide out.

I really hope you enjoyed this post! I loved playing with Papertrey Ink's Love Lives Here stamp set. Now I really want to make more sets like this but not until I've had some rest. ;) Have a great day everyone!!
Sources for From My Heart card: Gina K Designs 120lb pure luxury white cardstock; Papertrey Ink Love Lives Here & Up, Up & Away; SU Rose Red, Summer Sun, Tempting Turquoise & Old Olive inks; Memento Tuxedo Black ink; SU Basic Rhinestones; Papertrey Ink Love Lives Here Die Collection; QuicKutz Epic Six; The Twinery Honeydew baker's twine; Stampin' Dimensionals
Sources for Thank You set: SU Old Olive cardstock; Gina K Designs 120lb pure luxury white cardstock; Papertrey Ink Love Lives Here & Fillable Frames #4; SU Rose Red, Summer Sun, Tempting Turquoise & Old Olive inks; Memento Tuxedo Black ink; Papertrey Ink In Bloom Impression Plate, Love Lives Here Die Collection & Fillable Frames #4 Die; QuicKutz Epic Six; The Twinery Honeydew & Lemondrop baker's twine; Stampin' Dimensionals; Marvy-Uchida 1/8" long reach circle punch; Clear Bags


 It's not often that I use both a colour inspiration challenge and a sketch but that's what ended up happening here. I used the colourQ challenge #102 as well as Moxie Fab World's Vertical Sketch Challenge after I saw Emily Keaton's sweet submission to my Moving Challenge using the same colours and sketch. Thank you for the spark, Emily! I think my mojo might finally be returning, despite the hit on the head. :Þ The words on this card are for all of you who have left encouraging comments and emails! Thank you so, so much for the smiles and laughter. ;)




_wm.jpg)

_wm.jpg)
_wm.jpg)
_wm.jpg)
_wm.jpg)
_wm.jpg)


