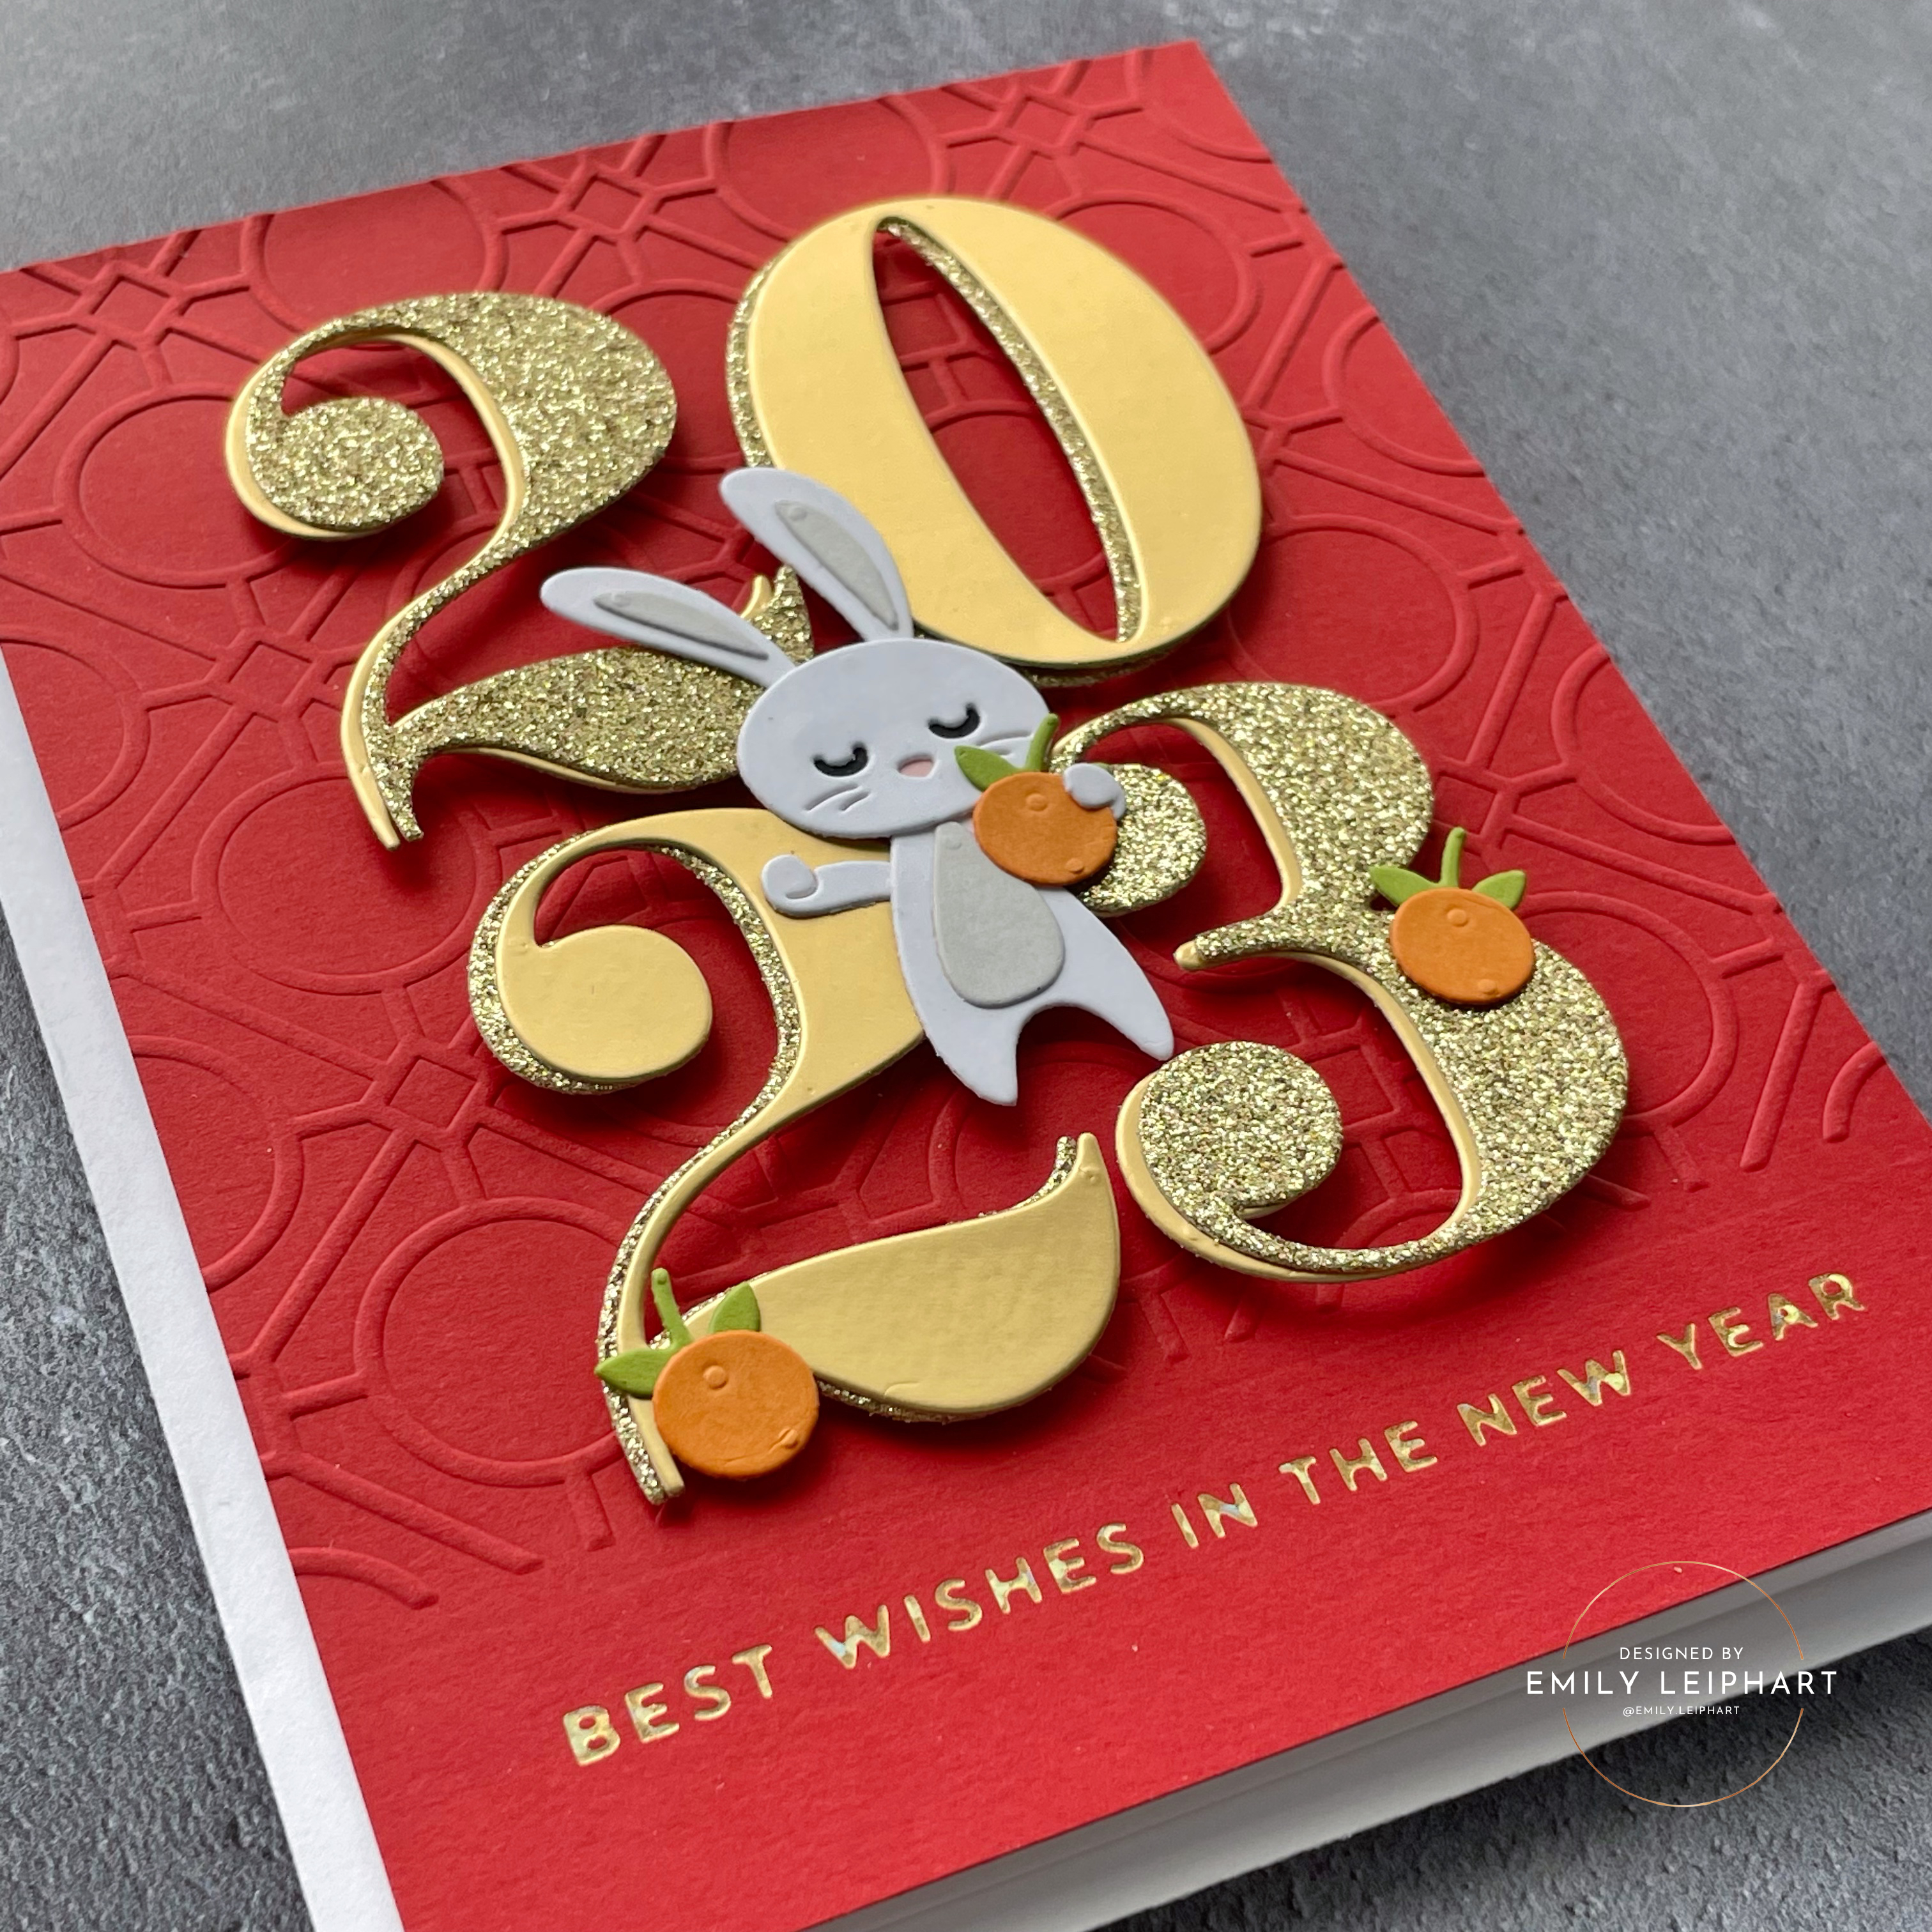
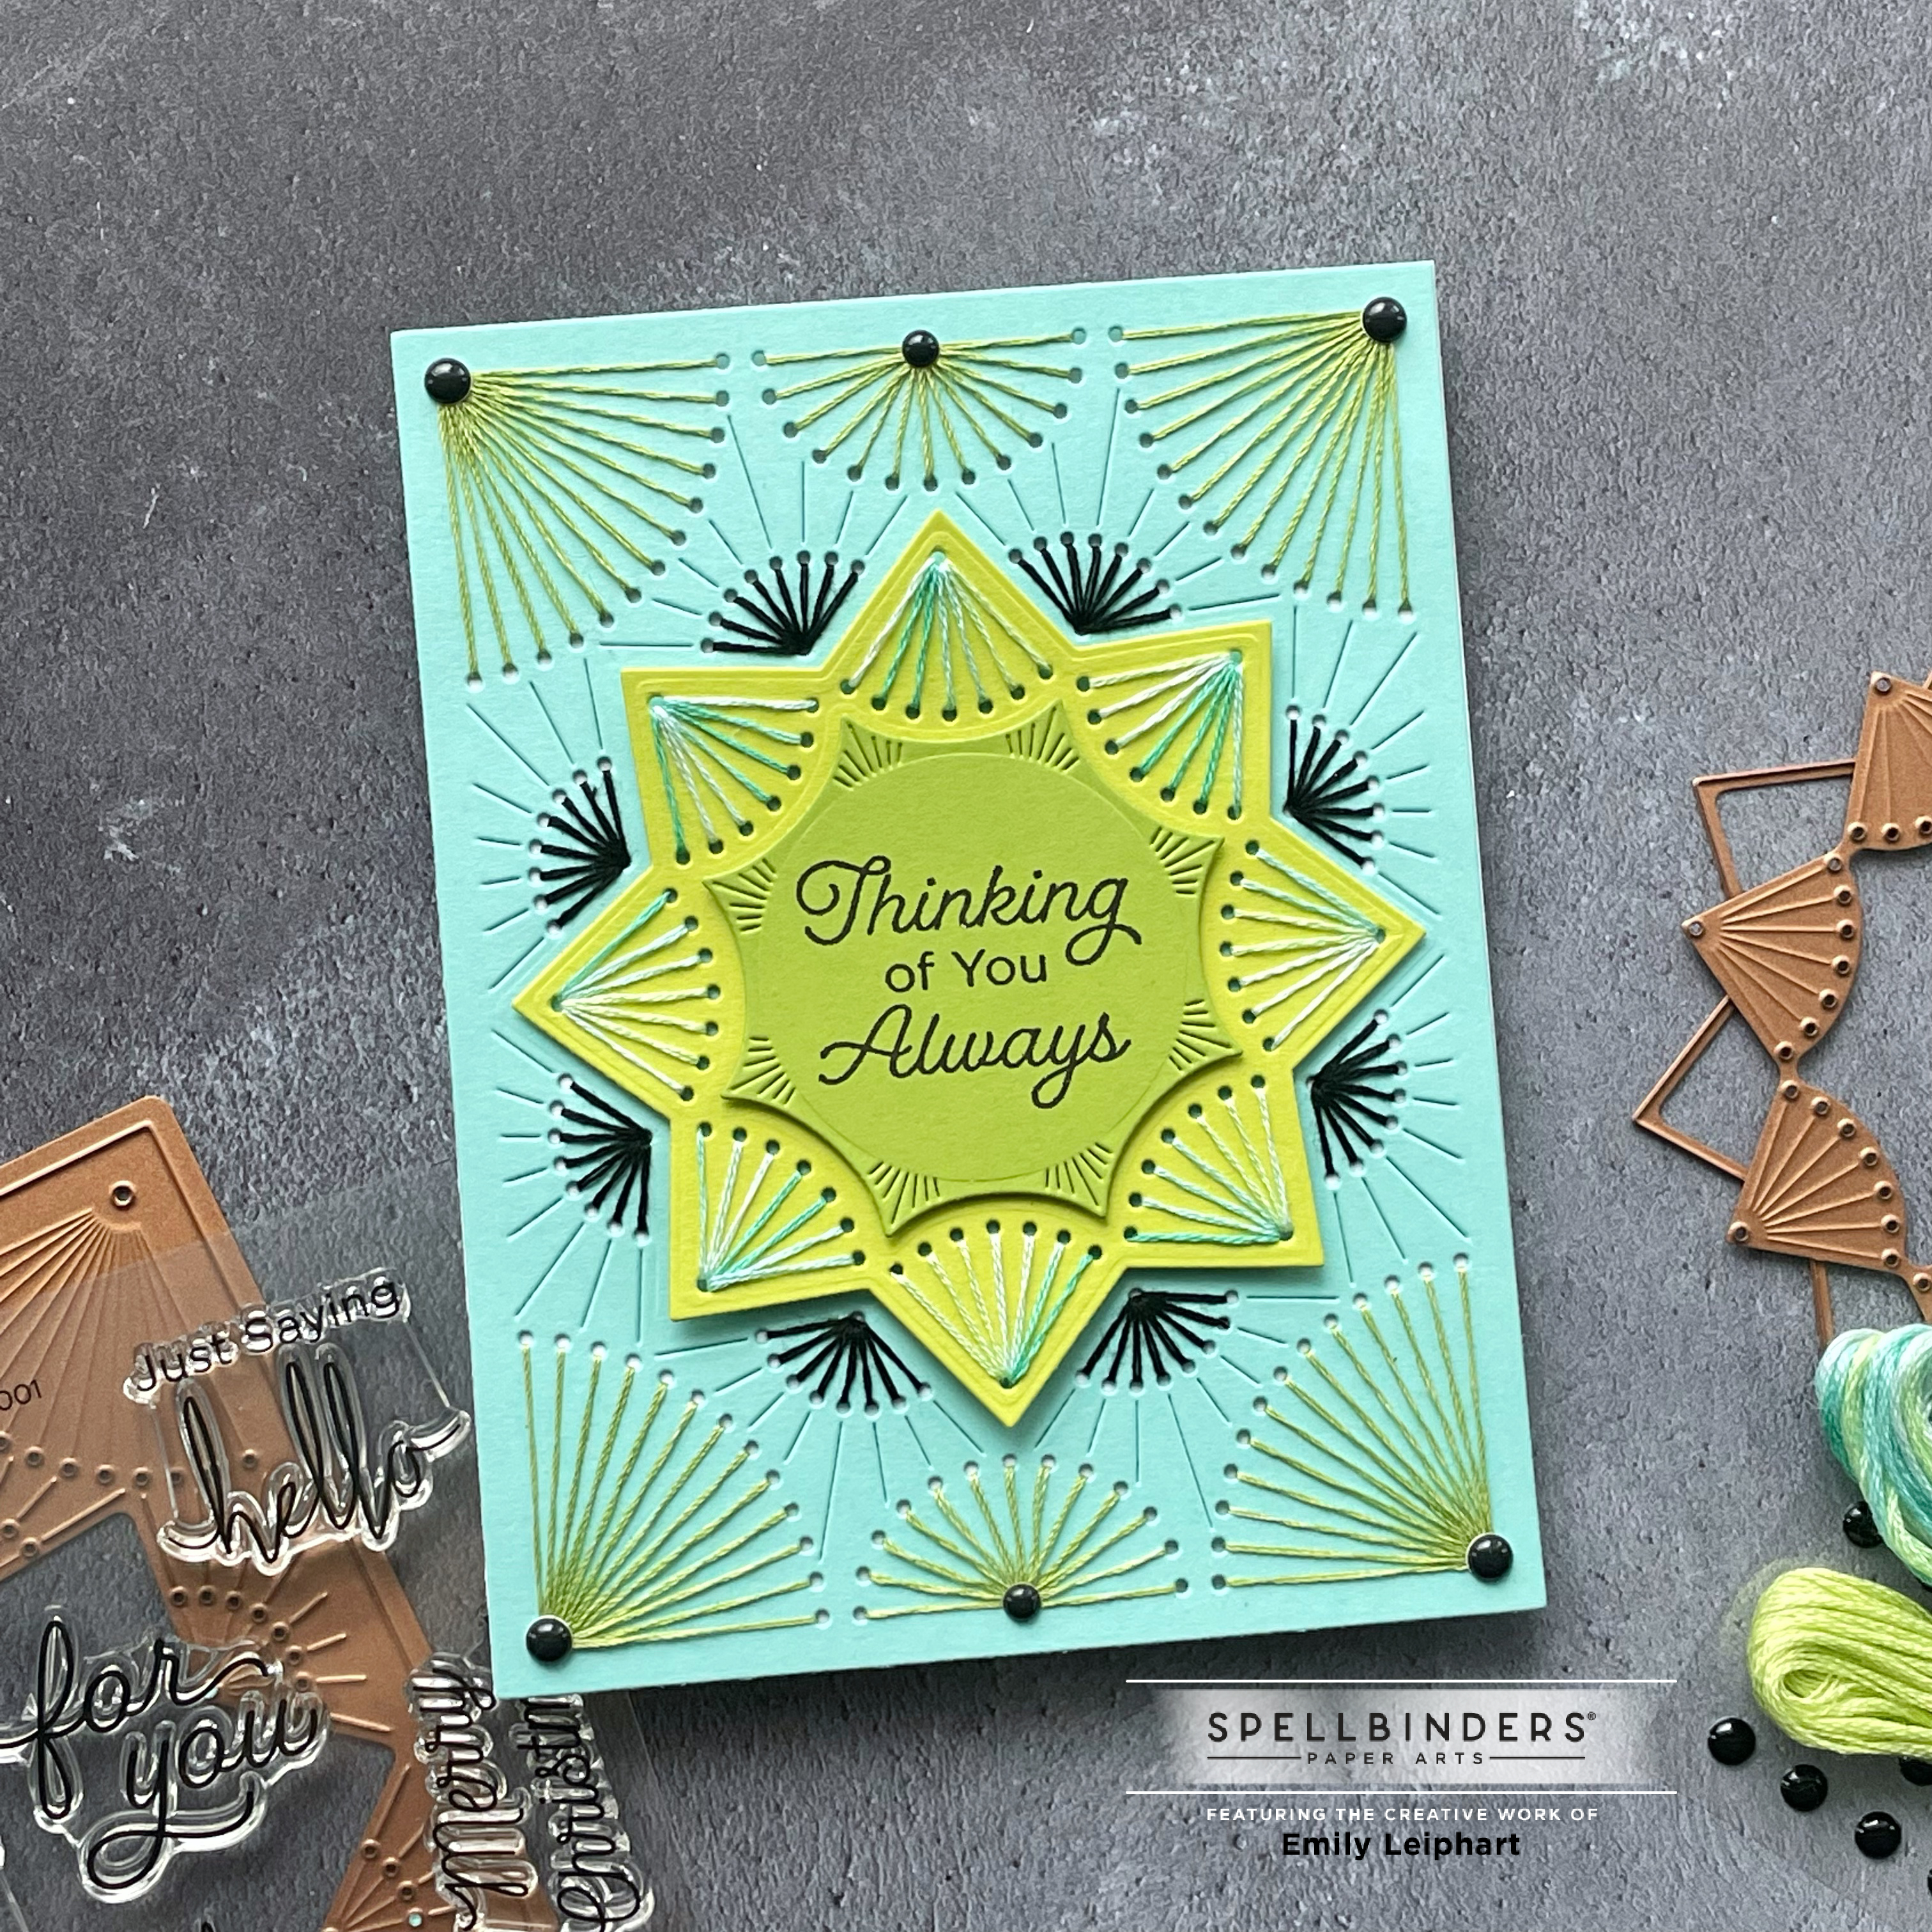
This card features the January 2023 Stitching Die of the Month - Nested Stitched Burst and it comes with five different stitch-and-die cut pieces. Subscribers were also offered an add-on Sentimental Greetings Stamp Set which is currently in stock and available. It offers a fabulous assortment of versatile sentiments in beautiful fonts.

I used four of the five dies on my card and you can use them all on a single layer or separately to create dimension like I did here. I love all the options and there are so many. The cardstock colours I selected for the three layers are Teal Topaz, Peridot and Rainforest.

The embroidery floss colours I selected for each layer are: Light Chartreuse 16 and Black 310 stitched on Teal Topaz, and 92 Variegated Avocado stitched on Peridot. I stacked two additional layers of the smallest die cut and glued them to both the inside layers to provide dimension.

The sentiment was stamped using Versafine Clair Nocturne pigment ink on Rainforest cardstock. To finish, I added a few black enamel dots to the base panel and attached it to a white linen card base.
Be sure to check out the Stitching Dies that are part of the Clearance Sale. These include the Circular Stitch Slimline Strip and the Stitched Kaleidoscope Strip. Find these and more HERE or by clicking on the image below.
Here's a list of kits I share each month and some of the value kits:
Thanks so much for stopping by!
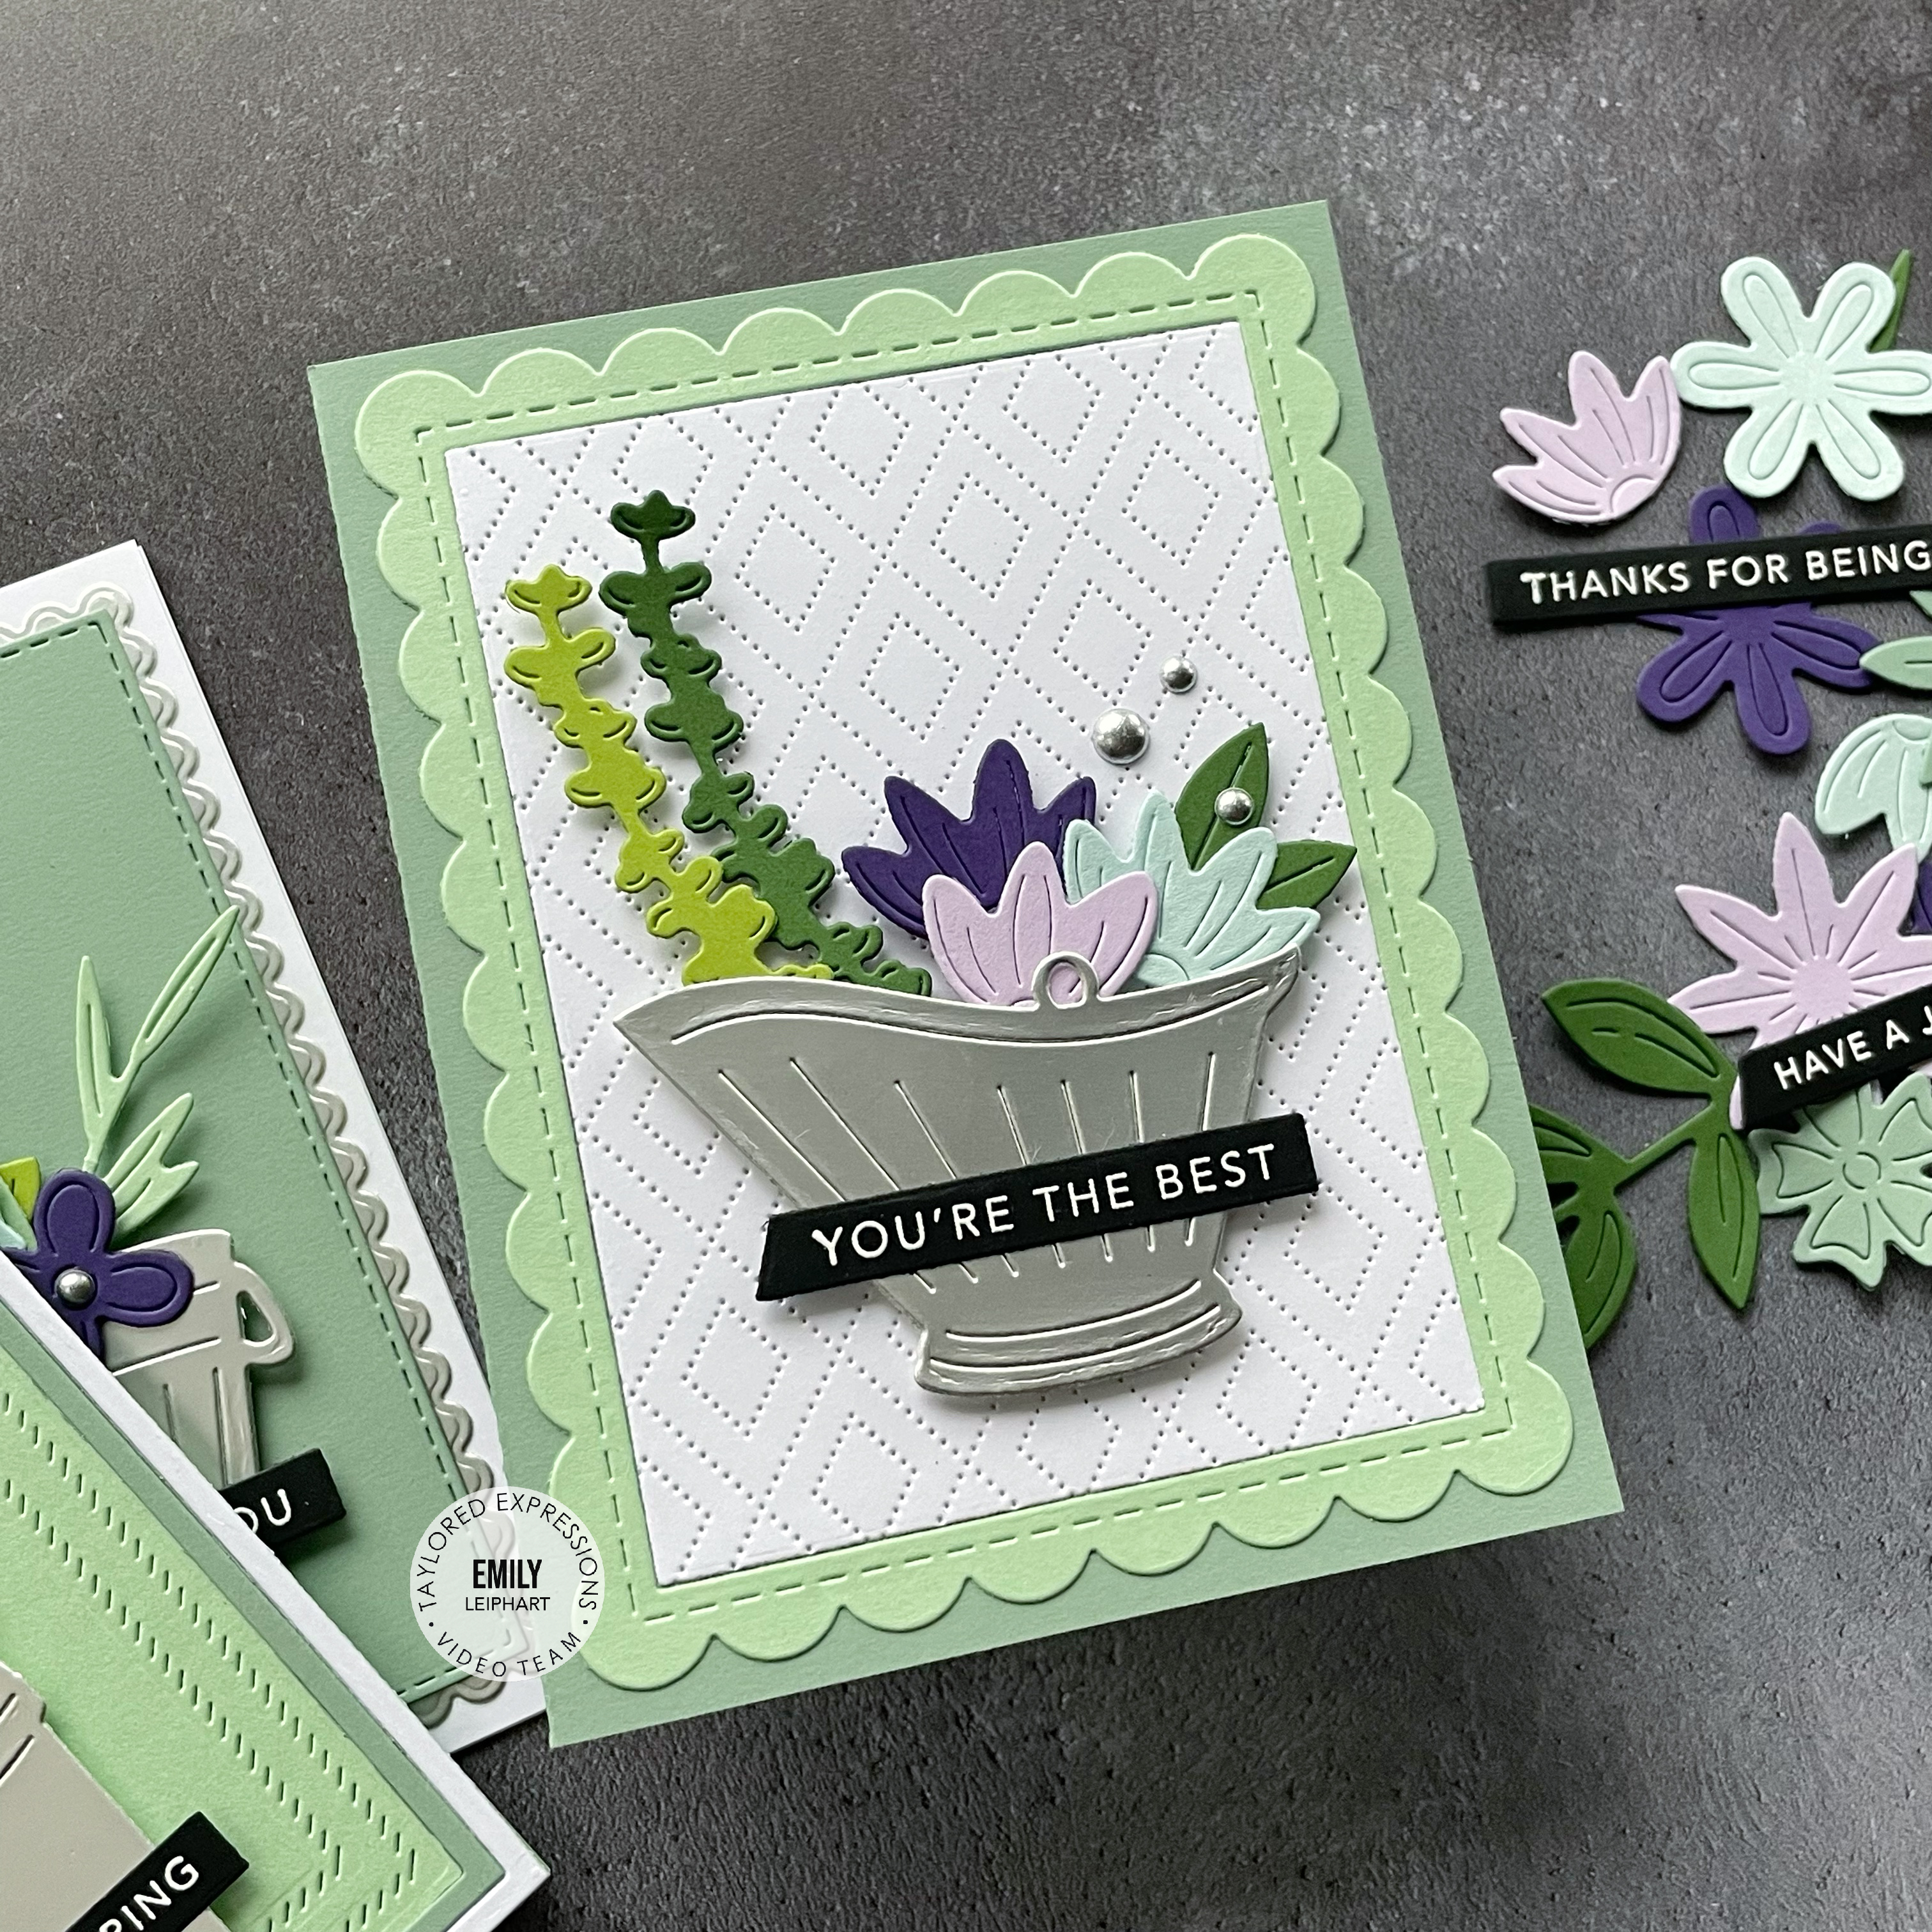
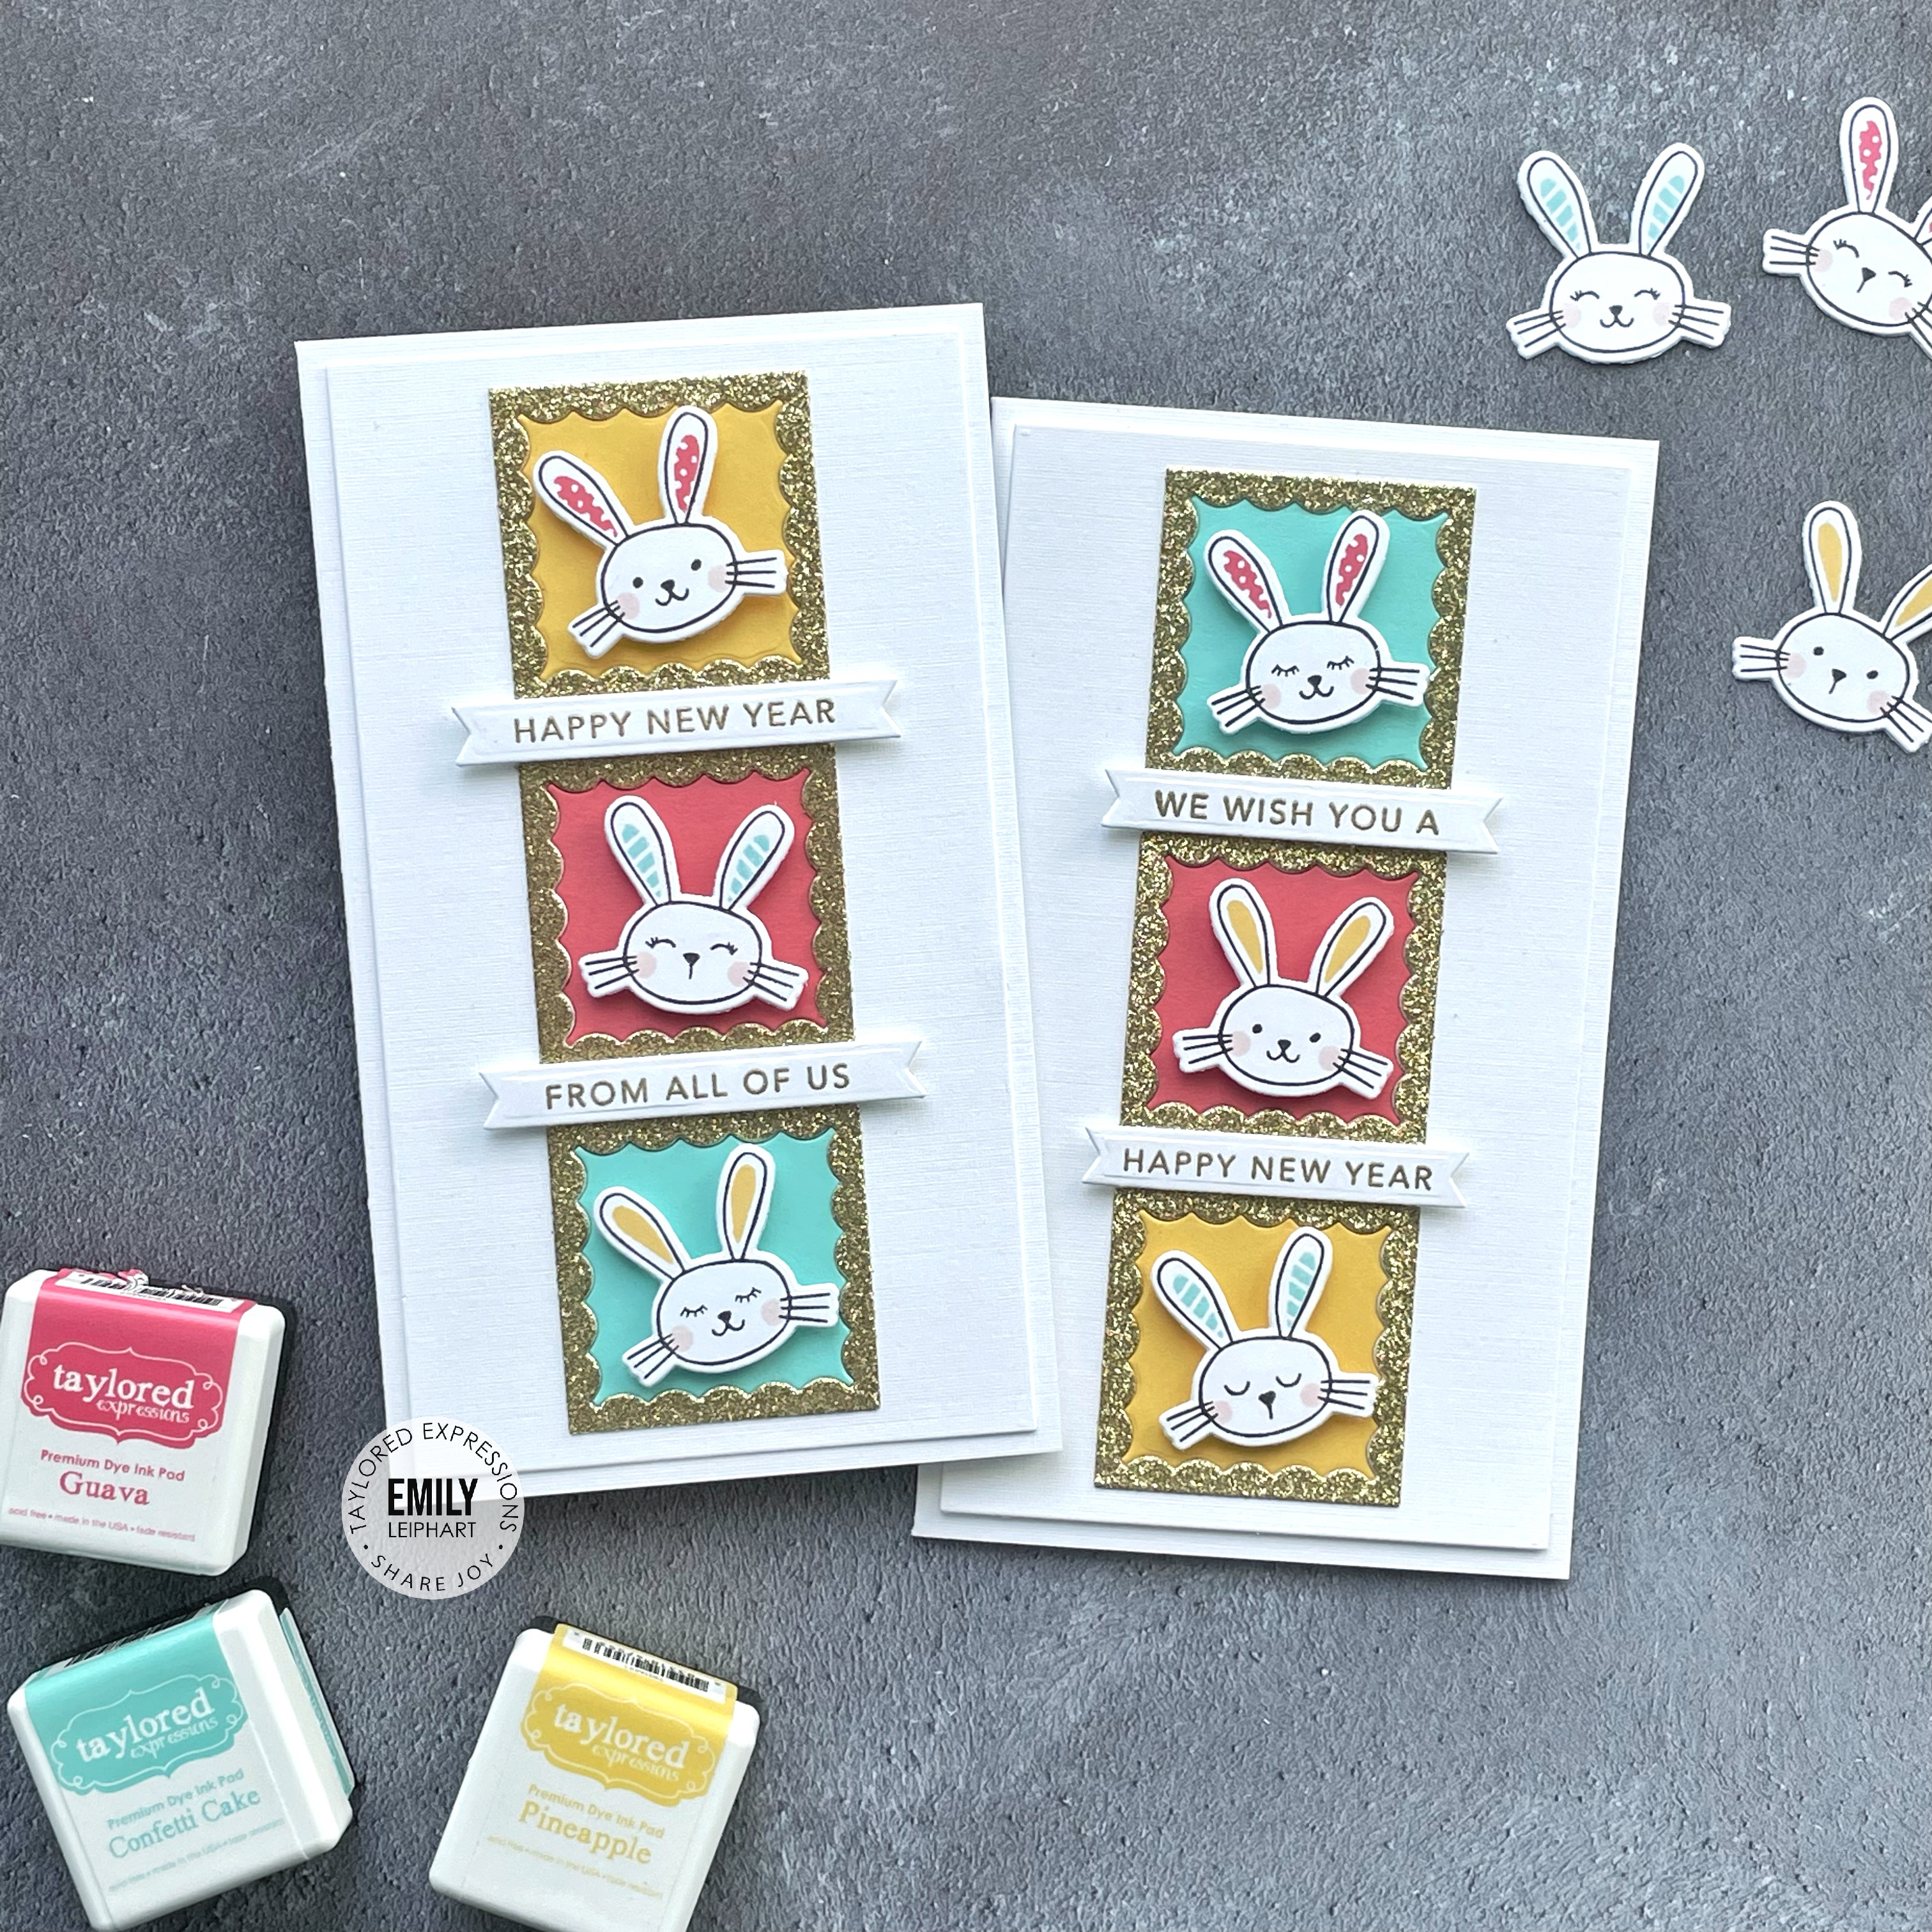
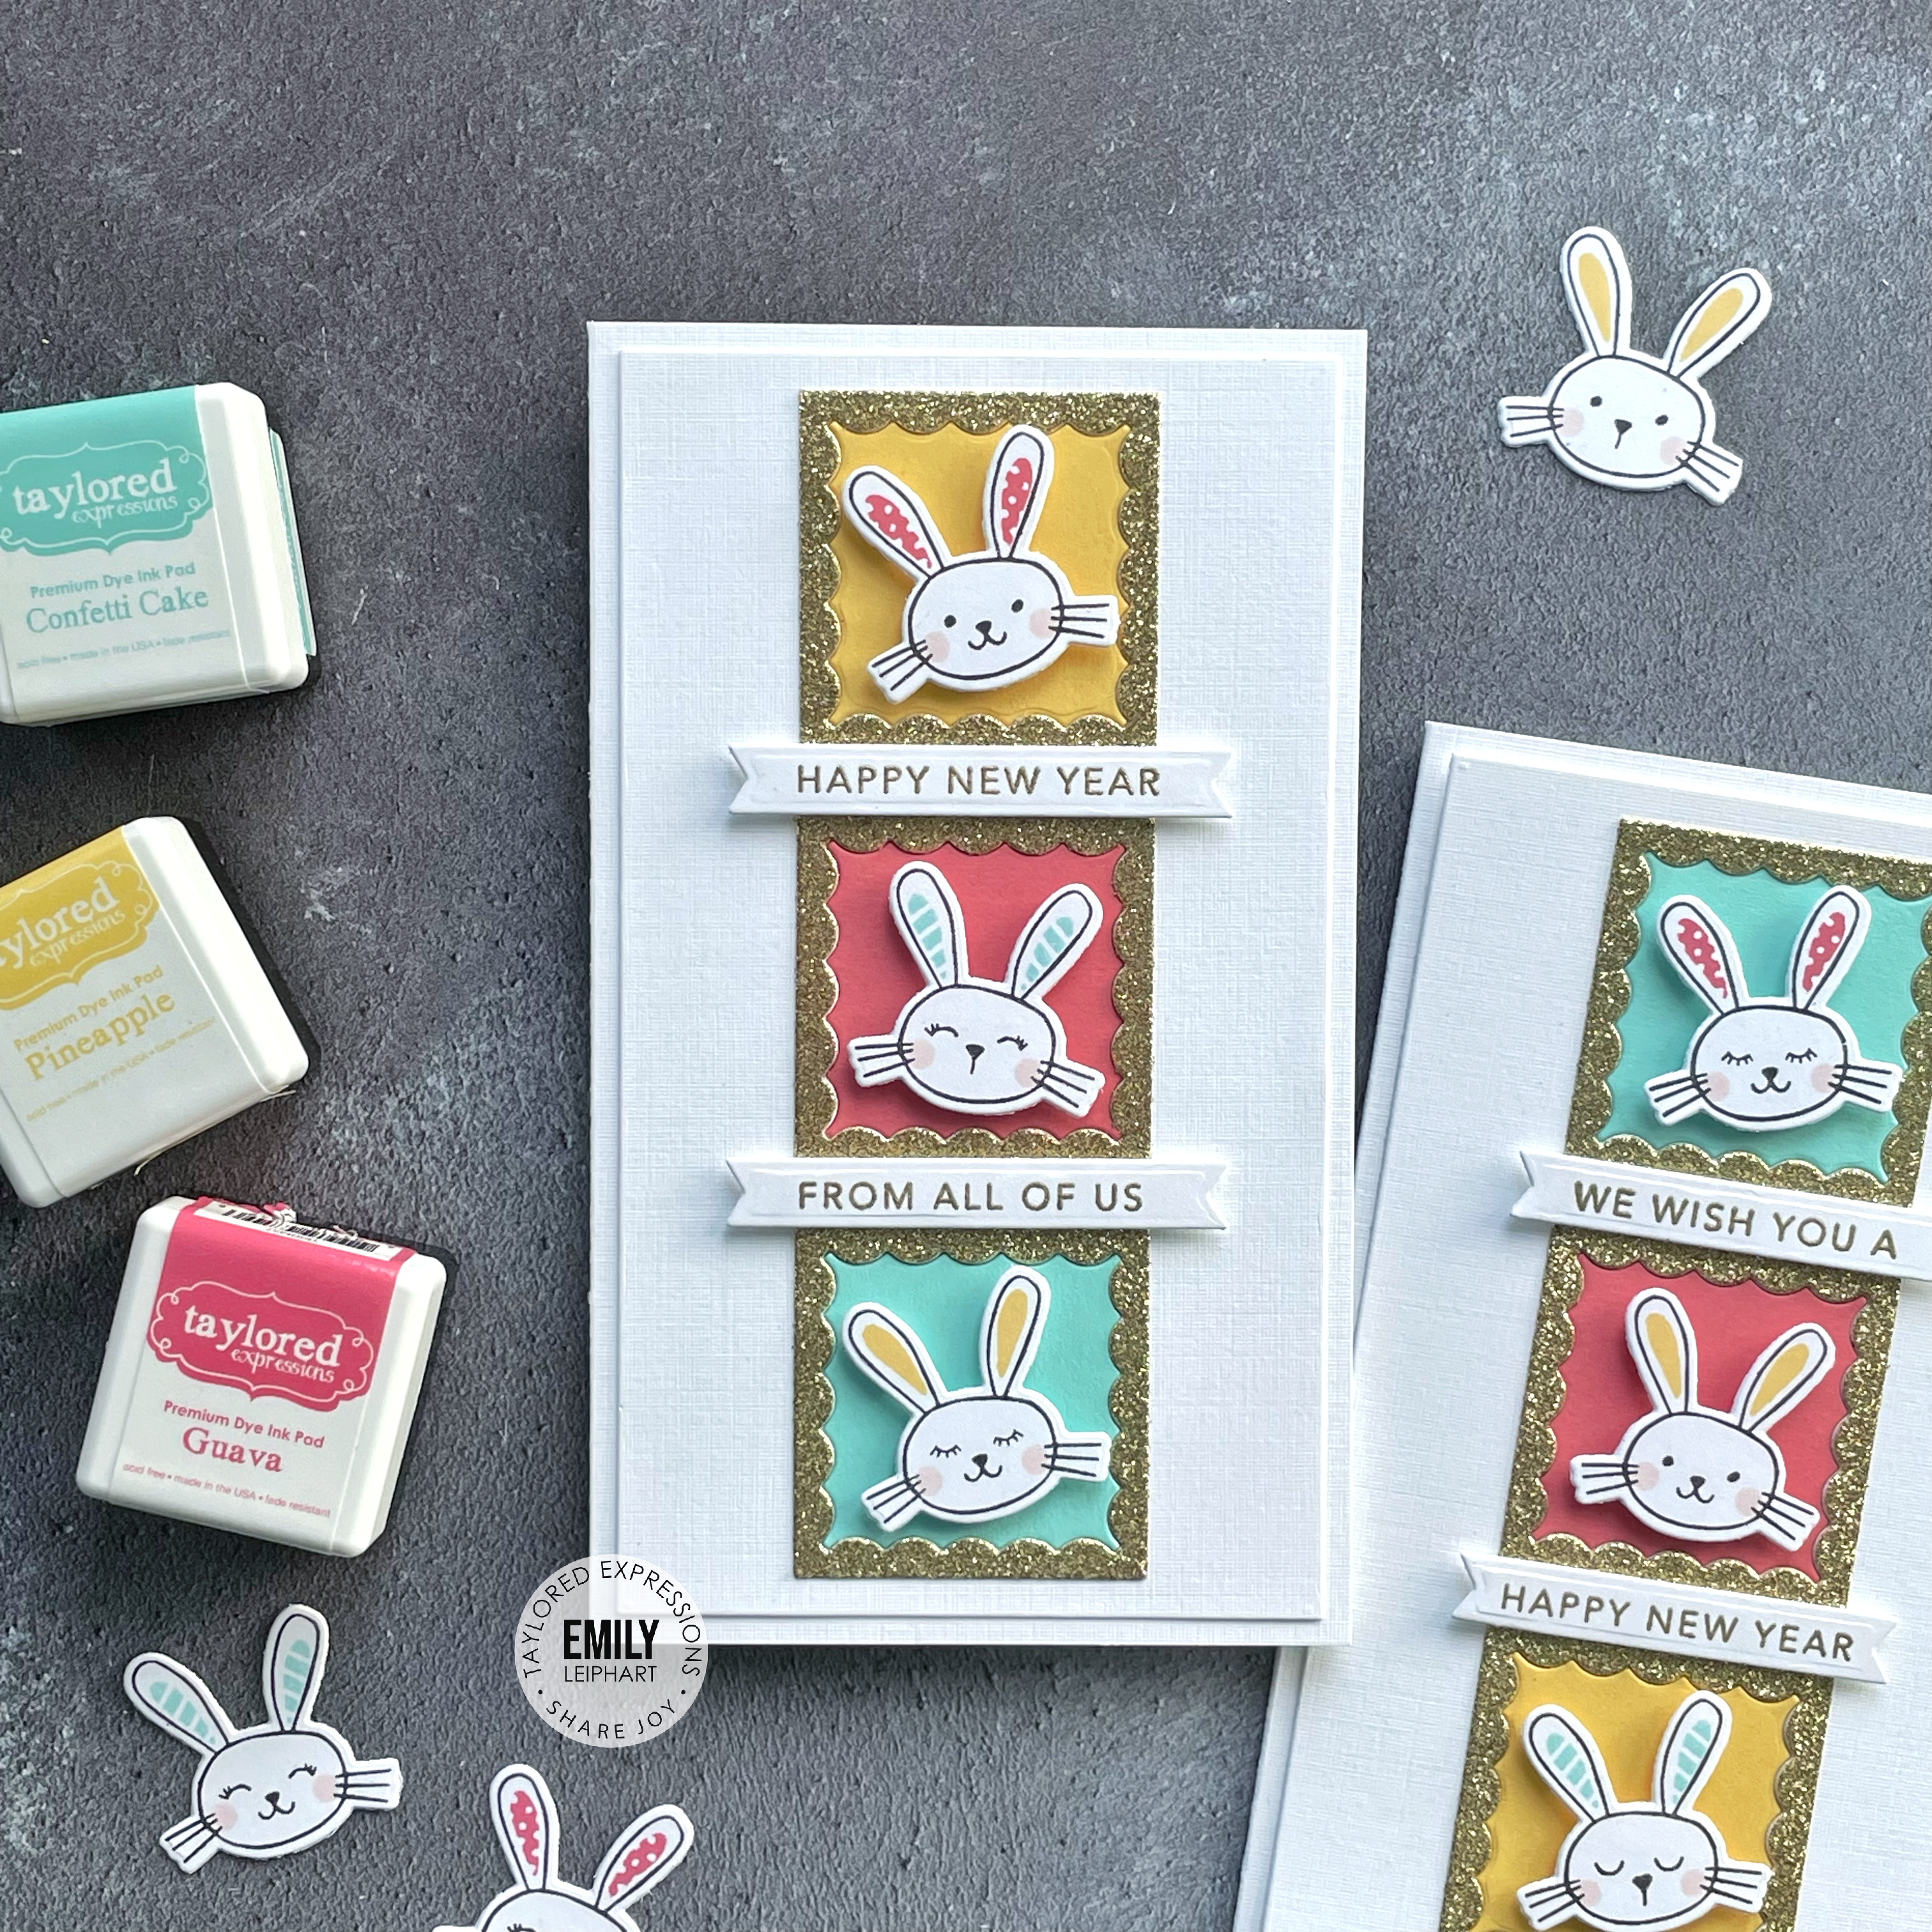
Supplies: