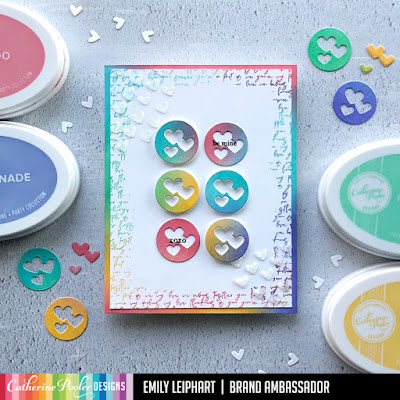
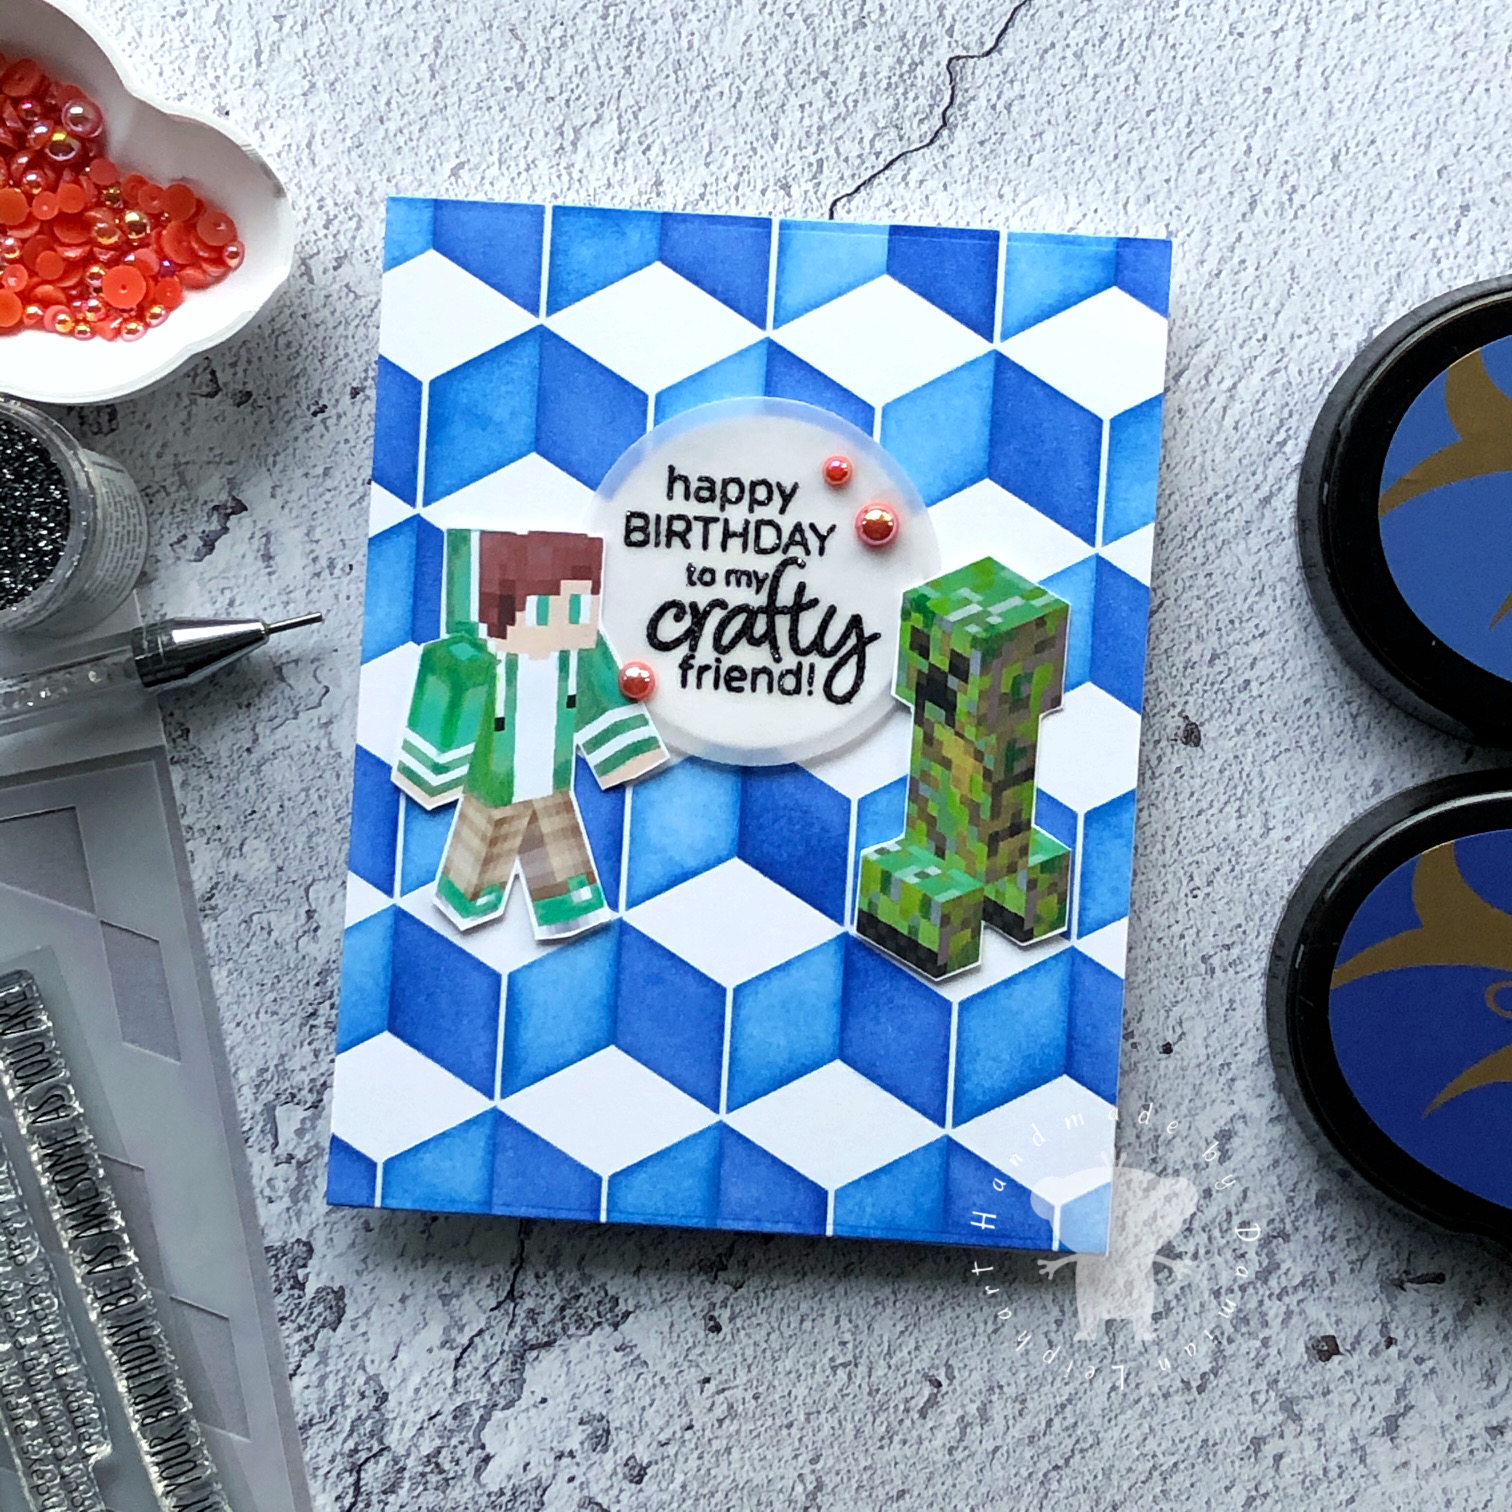
I'm sharing one more card for Catherine Pooler's Date Night Ink Promo and Giveaway on Instagram. Please head over to my corresponding Instagram post for all the details and comment for your chance to win!
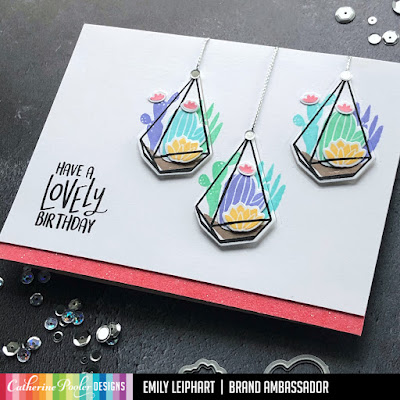
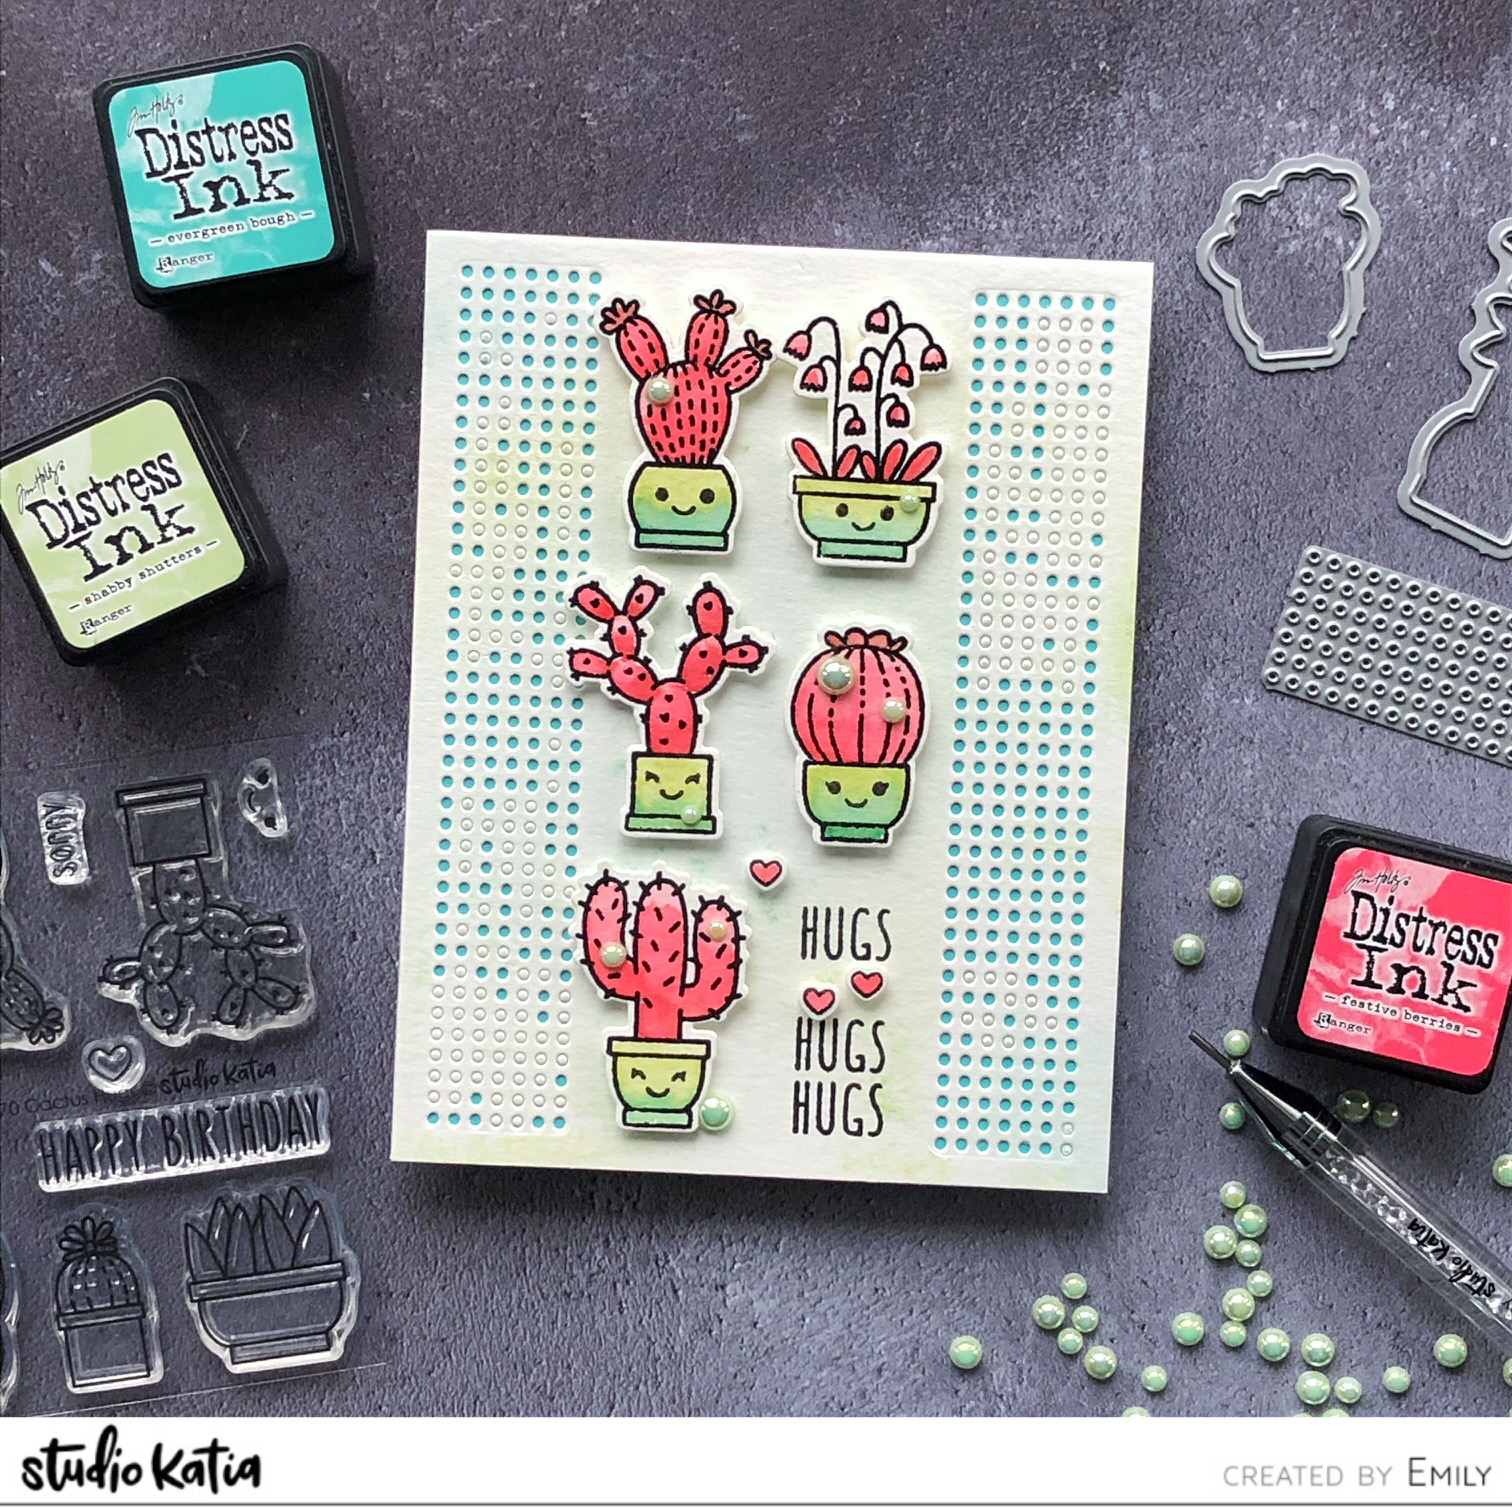
My order of the latest Club Sursee sets, Build-a-Terrarium and Lovely Birdies just so happened to arrive so I had to get them inky with the new Date Night Ink Collection! Like my previous card for the giveaway, I used Do-Si-Do, Catching Rays, In The Park, Cummerbund and Serenade, as well as Sand Castle and Midnight.

It took a while to wrap my head around how I was going to stamp and layer these with the outline of the terrarium hangers but I'm delighted with how much dimension I was able to get. I just love these adorable cacti in the pretty Date Night colours!

To finish, I added a sentiment from Lovely Birdies, applied Do-Si-Do direct-to-paper and heat embossed it with WOW! Halo embossing powder. I 'hung' the terrariums with silver cord and added Tinseltown sequins to finish the card.

Please head over to Instagram, be sure to follow me there and leave a comment for your chance to win! To increase your chances of winning, follow and comment on all posts with the hashtag #cpdatenightinks between January 25-29, 2021.

Thanks so much for stopping by!
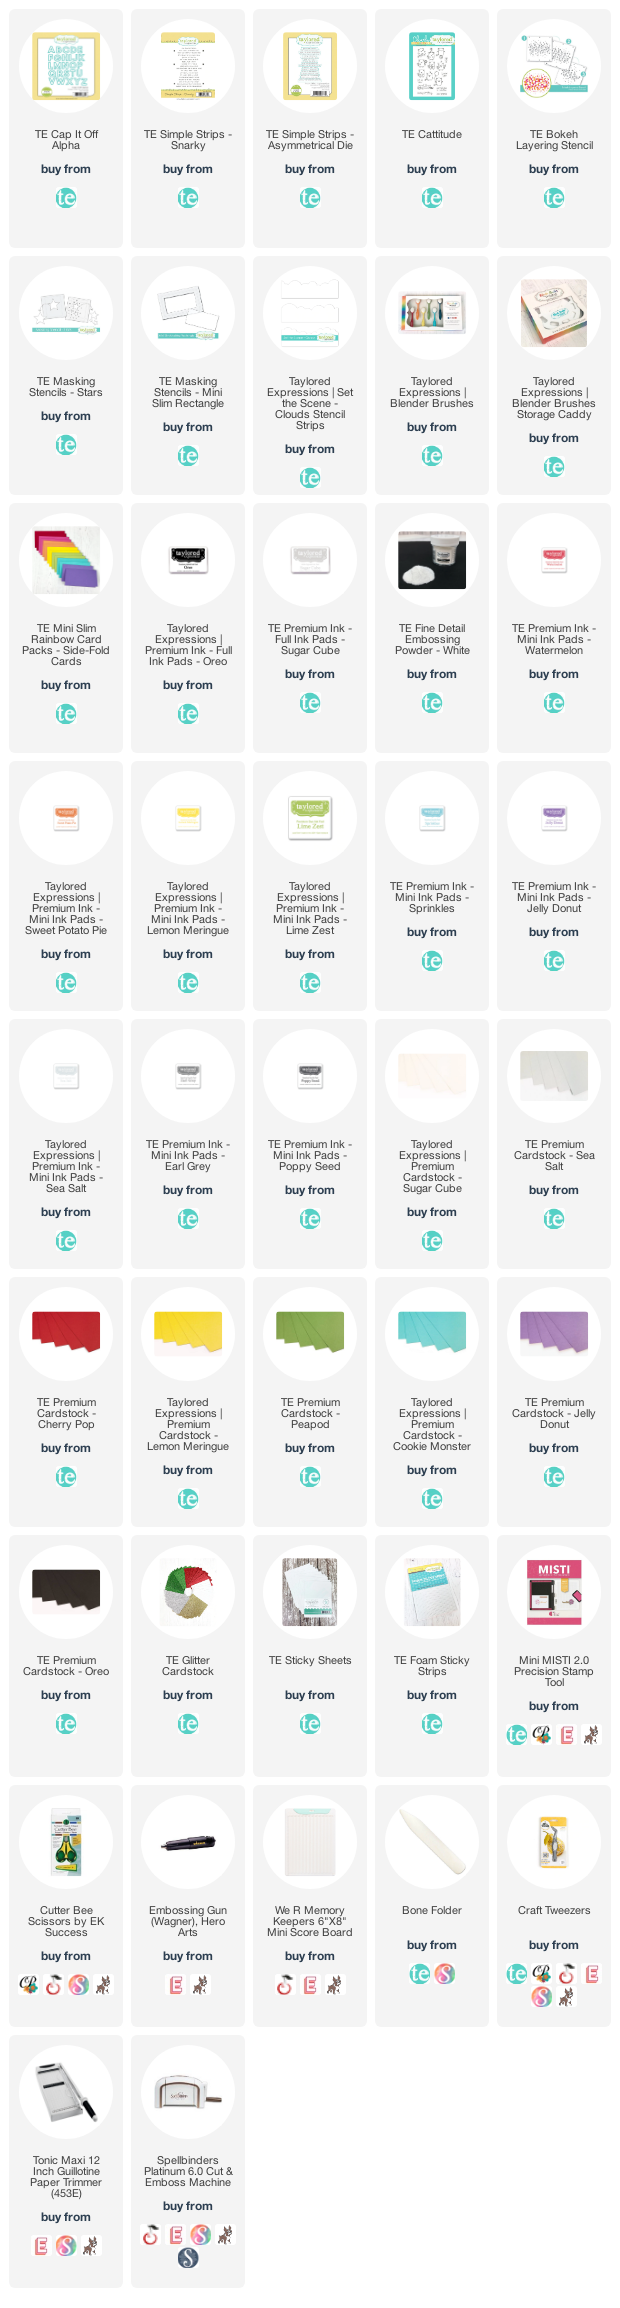
Supplies: