Showing posts with label foil. Show all posts

Sunday, August 15, 2021

Custom Birthday Card

My son turned 13 this week and I'm finding it hard to believe that he's a teenager! While he's growing up fast, there are still some things about him that remind me that he's still my little boy and I'll be holding on to that for a little longer.

When I asked him what kind of card he wanted for his birthday - and I never do that - he said he wanted 'Widgie' on it. If you have kids (or even if you don't) and you've been collecting Squishmallows, then you know that the mallard duck Avery is a cult favourite and very hard to get nowadays. If you're not familiar with the story behind this so-called widgeon, you can read all about it in last year's birthday post.

Off I went to think about how to create Widgie with my craft supplies. My thoughts immediately went to the Paper Smooches Easter Egg Die. It's wider than an oval at the bottom so it was the perfect shape for Widgie.

I cut the body shape from green leaf (head and tag), white foil (collar), dark chocolate (body) and pebble (belly). To die cut the collar, I used a slightly curved die from the Paper Smooches Quotables die set, which was also used in the same video as the Easter Egg Die. It was definitely a versatile favourite so many years ago. The belly was made using one of Catherine Pooler's Nested Oval Dies.


The shapes from Ellen Hutson's Stay Cool Dies turned out to be absolute perfection for the tag, eyes and beak. I clear embossed the tag to mimic satin ribbon just like on the real Widgie and that was the end of the popsicle stick. The eyes were die cut from black cardstock using the small circle die that I used for eyes on THESE cards. The beak was die cut twice from orange peel cardstock and layered for height.


As I've mentioned a few times now, I'm completely obsessed with heat foiling so I wanted to use one of my current favourites, Sweet & Snarky Birthday Wishes from Spellbinders. For the large Happy Birthday die cut, I used silver shimmer foil on white cardstock. I love that the shimmer shows up as a straight silver on some angles and a full rainbow on other angles. The secondary sentiment was heat foiled using aurora foil on dark chocolate cardstock.

I created a 5" x 5" kraft card base and trimmed a piece of 4.75" x 4.75" panel of audrey blue cardstock, which I dry embossed using Altenew's Mod Squares embossing folder. I chose this colour because it's one of my favourites but also to represent water since widgeons live most of their lives on the water. The dimension and details are really incredible and I love that it's a little Minecraft-y because my son is still very much into that.

To finish, I popped up Widgie and the sentiments with foam tape, then secured black pom poms for wings. I love that I was able to combine so many favourites from different brands to create the perfect card for my son!

Thanks so much for stopping by!

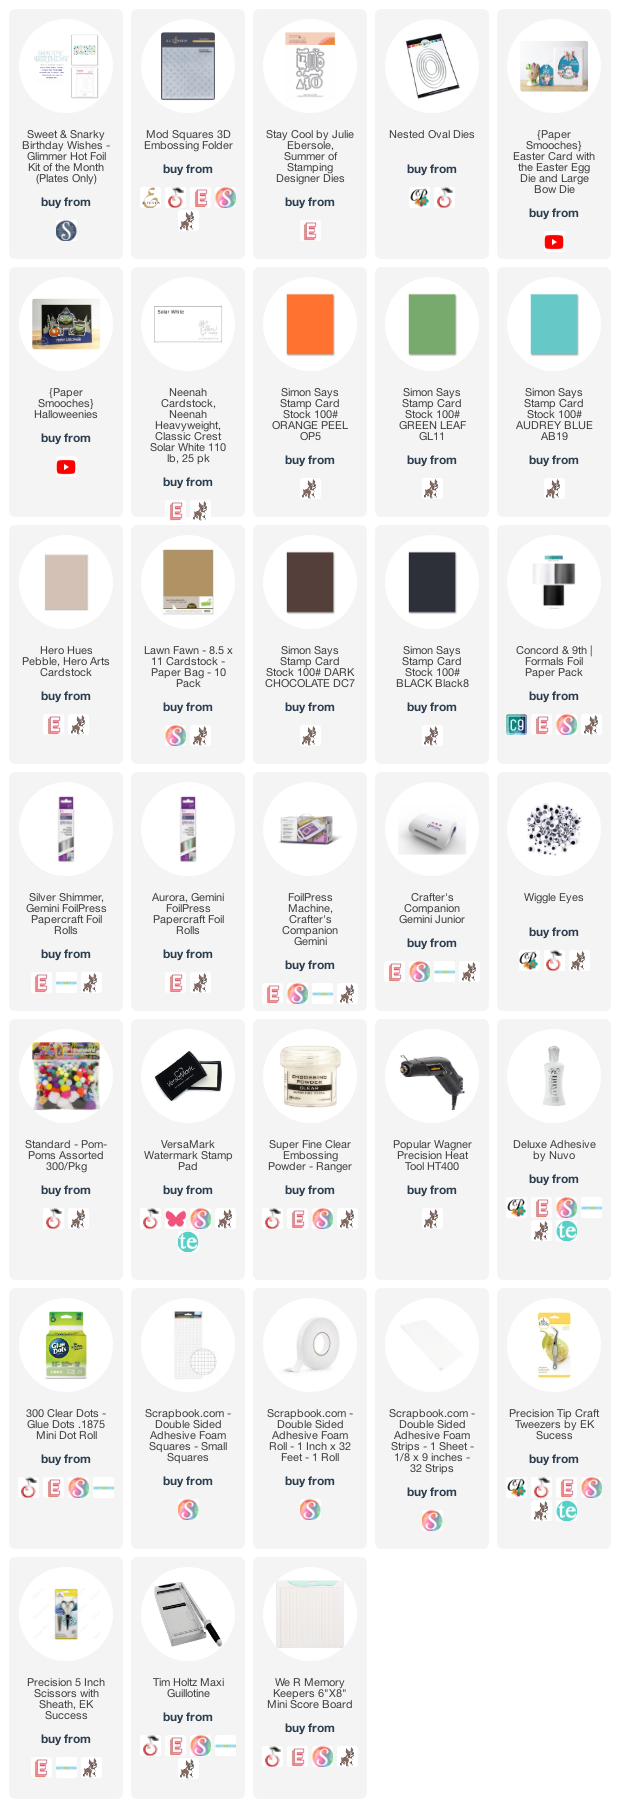
Supplies: 
Friday, June 11, 2021

Ellen Hutson | Essentials by Ellen June 2021 Release Instagram Hop + Prizes!

The Essentials by Ellen June 2021 Release is HERE and the Brand Ambassadors are celebrating with an Instagram Hop to bring you inspiration using the latest products! While appreciated, comments left here are not eligible for one of three $25 gift certificates. Please head to Instagram for all the details!

I'm featuring the stunning Abstract Mountain and Abstract Sunset dies, designed by Heather Meeson. I paired these up with stamps from And Many More and Good Day, designed by Julie Ebersole. As I've mentioned before, I adore landscape dies and stamps and I could use them on every card, if I had to. You can't go wrong with these because they work for pretty much all occasions!

The first card features the Abstract Mountain die, A2 Piercing Plate designed by Ellen Hutson, Good Day stamp set and coordinating dies, and the Shadow Box Die by Brandi Kincaid (you can watch my video for this project on the Ellen Hutson blog and YouTube channel).

As always, I started by choosing my cardstock colours for this scene, knowing that I'd need six different colours. From top to bottom, they are Bazzill Candy Hearts, Concord & 9th Midnight, Bazzill Whirlypop, Bazzill Gumball, Bazzill Icy Mint and Sizzix Surfacez Opulent Silver Glitter. I used the foiling lines from the Shadow Box Die to foil the top of the Candy Hearts panel. I also used the A2 Piercing Plate to add texture to the Midnight and Gumball sections.

I stamped the adorable bicycle image (hooray for bikes!), coloured it with Copic markers - all colours are listed in the supply links below - and popped her on to the panel with foam tape.

My second card features the Abstract Sunset and the And Many More stamp set. I started this by taking an A2 panel and ombre stamping the large sentiment using Catherine Pooler inks. From top to bottom, they are Tranquil, Cove Blue and Juniper Mist. To get the perfect transition of colours, I used a sponge dauber to soften the transition lines between the ink colours before stamping. To stamp the filled in word 'fun', I used Catherine Pooler's It's a Girl, Do-Si-Do and Party Dress.

When the stamping was done, I used the Abstract Sunset die to cut the panel. I also used the Big City die to cut the topmost section before re-assembling the scene. I die cut a second panel from white cardstock and stacked every other layer beneath the city die cut for some dimension and visual interest since all the panels are white.

On the very bottom panel, I again used the foiling lines from the Shadow Box Die but, this time, I used the very end of the die to foil grass across the entire strip. I attached the entire scene to a Sizzix Surfacez Opulent Silver Glitter mat, then attached that to a Concord & 9th Midnight panel with texture from the A2 Piercing Plate. To finish, I added a few sparkling clear stars to increase the glitter factor on this fairly clean and simple design.


COMPLETE IG HOP LIST


Thanks so much for hopping along with us!

Supplies: 

Wednesday, April 14, 2021

Catherine Pooler Designs | April Showers Bring...Collection | You're the Best

Hello, Crafty Friends! The April Showers Bring...Collection is here!! Tell me what you're buying, what you bought or what you plan to buy. ;) If you need another reason to get the Rise & Shine Bundle, I'm showing off the frying pan stamp, and the way it converts into a plate with the embossed plate die.

I love the way these frying pans from the Rise & Shine Stamp Set look in Juniper Mist, Shea Butter and Rouge. They look like Le Creuset! Aren't they beautiful? It would be fun to make a slimline card with a rainbow of frying pans filled with food. LOL


As with my previous card, bacon was rock 'n rolled with Rouge and Sangria. The strawberries were stamped with Rouge and Eucalyptus. The egg yolks and waffles were rock 'n rolled with Shea Butter and Sauna. The blueberries were stamped with Juniper Mist. I stamped the egg whites in Twilight.

To create the beautiful pot holders, I stamped the floral gingham border from the Morning Borders Stamp Set using Hot Tub. Then I used scissors to cut squares from the border, resulting in perfectly sized squares for the pans. Another idea I had was to stamp the same pattern on both sides and fold them into napkins. Oooh, I will have to do that for a future card!

After stamping and die cutting all of the food elements, I cut out a 4" x 5.25" panel which I dry embossed using the Star Stencil. Then I used the Superlatives Stamp Set to stamp a custom sentiment on the front. I attached the pot holders to the embossed panel with mini glue dots, curling up the corners with my fingers. Then I popped up the frying pans and silver plate with foam tape.

I'm having the best time creating table settings with the Rise & Shine Bundle and I hope you're inspired, too. Thanks so much for stopping by and happy shopping!

Supplies: 

Friday, April 20, 2018

{Altenew} Celebrating Parents Card Drive Blog Hop + Giveaway


Hello and welcome to Altenew's Celebrating Parents Card Drive Blog Hop! Our goal is to send cards to the elderly that live in nursing homes or shelters to let them know they’re not forgotten. Please check out the Celebrating Parents Card Drive and join this great cause by sending in cards. All of today's artists are featuring stamp sets in our Celebrating Parents stamp category, of which 20% of all proceeds earned will be donated to the Food Bank of Central New York to support seniors in need.


Emily Leiphart (you're here)
Karin Ã…kesdotter (your next stop)

I have four cards to share with you so let's get started! All of the stamp sets, dies, stencils and ink colours are listed below for your shopping convenience.


My first card features the Best Dad stamp set and coordinating dies. I've also used the Inline Alpha Dies and Pegboard Canvas Cover Die.


I watercoloured the tools and hung them on the pegboard, just like in a workshop. Then I die cut 'dad' from foil and black cardstock to create a shadow. I heat embossed the sentiment on a black strip and adhered everything to a strip of vellum.


I also sponged around the edges of the pegboard to give it the illusion of being light brown, like many pegboards, without it being completely brown and making the background too dark.


My second card features the Extra Special stamp set on a flat, easy-to-mail card with dry embossing and pearl embellishments.


I used two of the lightest shades on flowers in diagonal corners and two of the darkest shades on flowers in the other two corners. I did the same with the grey leaves.


The final step was to dry emboss the Sketched Lines Stencil on the panel after stamping. It gives a beautiful texture for visual interest.


My third card is another masculine card, and the perfect card for my Minecraft-loving mechanical engineer husband! 


First, I used the Cube Builder Stencil to sponge the pyramid of blocks on to a panel. Then I stamped the customized sentiment and added small die cut images, using the Engineers Rule stamp set and coordinating dies.


When my son saw this card, he eyes grew big and he started dreaming of Minecraft cards he could make himself with this awesome stencil. ;)


My fourth and final card for this hop is another feminine card for my mother-in-law. She had surgery recently and I thought this would make a wonderful card to let her know that we're thinking of her.


I stamped the birds from Birds of a Feather in her favourite colours, along with a sentiment from Trigonometry.


In two of the corners behind the lilac-coloured birds, I also stamped florals from Frosted Garden in the lightest shade of blue used on the belly of the middle bird.


Altenew is giving away $50 gift certificates to THREE lucky winners. Be sure to leave comments by May 6th, 2018 at 11:59 PM EDT for a chance to win! Winners will be chosen at random from the comments left on any of the blogs listed above and will be announced on the Altenew blog on Mother's Day, May 13th, 2018.

I'm also drawing ONE $20 gift certificate to the Altenew store. The deadline for comments is the same as above and the winner will be announced on my blog on May 10, 2018. Please leave a comment below for your chance to win and be sure to check back to see if you're the lucky winner!

Thanks so much for hopping with us!

Sources:

Tuesday, April 17, 2018

{Spellbinders} Folk Art Collection by Lene Lok Release: Day 3


Hi, everyone! I'm sharing two more cards that were on the Spellbinders blog last week, using the new Folk Art Collection by Lene Lok. I love using dies in unique ways and I'm here to share some ideas for the Kurbits 2 die. These dies are so intricate, there's so much you can do with them, whether you use the entire die or just part of it.


I haven't made ultra tall cards in a while and 3.25" x 6.5" cards are my favourite card shape. The Kurbits 2 die lent itself perfectly to this shape so I made two of them to show how different they can look with small changes in materials and colours!


For the first card, I die cut the bottom end of the Kurbits 2 die from both ends of the watercolour panel. I chose this watercolour cardstock for its texture. Then I die cut the die twice from black cardstock to inlay it into the negative space.


Next, I die cut a panel from gold foil cardstock included in the March 2018 Card Kit of the Month. Then I used the Platinum 6 embossing mat and plate to dry emboss the top end of the die on to both ends of the panel. This beautiful embossing into the gold foil shows that part of the die design through the black die cuts that are inlaid into the watercolour panel.


For my second card, I used daubers to sponge distress ink colours on to the Kurbits 2 dies, which were die cut from watercolour cardstock, then misted with water.


The front panel was watercoloured with evergreen bough and peacock feathers distress inks. Instead of the gold, I used a panel of blue cardstock that blends perfectly into the watercoloured panel in the foreground.


On both cards, I used simple but beautiful sentiments from Altenew's Birds of a Feather which complement the Kurbits 2 die perfectly. These were stamped with black pigment ink and clear embossed for shine and dimension.

I hope you enjoyed all three of my posts featuring dies from Spellbinders' Folk Art Collection by Lene Lok. If you missed the first two, you can find them all here:


Thanks so much for stopping by! 
Sources:

SaveSave

Wednesday, November 9, 2016

{Neat & Tangled} November Release Week: Day 3 + Giveaway!


Welcome to Day 3 of Neat & Tangled's November Release! Today, the design team is featuring the Merry & Bright Ornament stamp and coordinating die, designed by Danielle Walls, as well as the Star Cover Plate Die and Star Stencil, designed by Miriam Prantner! All of these products will also be available for purchase when the November release goes live on Friday.


To create my card, I first dry embossed the Star Cover Plate into the top right hand corner and bottom left hand corners of the panel. Then I heat embossed the Merry & Bright Ornament stamp in gold and watercoloured it with distress inks. After the panel dried, I splattered three different colours around the ornament. To finish, I dry embossed the Star Cover Plate into gold foil and applied a thin strip of black glitter tape between the foil and front panel.


There's a GIVEAWAY! Be sure to leave a comment on the Neat & Tangled Blog for your chance to win the Merry & Bright Ornament stamp! There will ALSO be a $25 gift certificate drawn from all comments left on the design team blogs so be sure to leave one here, too! :)

All release products will be available for purchase on Friday and I'll be updating my links at that time. See you again tomorrow!

Sources: