Showing posts with label Sizzix. Show all posts

Saturday, December 18, 2021

Spellbinders | December 2021 Glimmer Hot Foil Kit of the Month


It's time to share the Spellbinders December 2021 Club Kits and you're going to love this month's Glimmer Hot Foil Kit -- Botanical Crest! It includes a stunning hot foil wreath that comes with separate dies for the inside and outside of the wreath so you can use it in different ways.
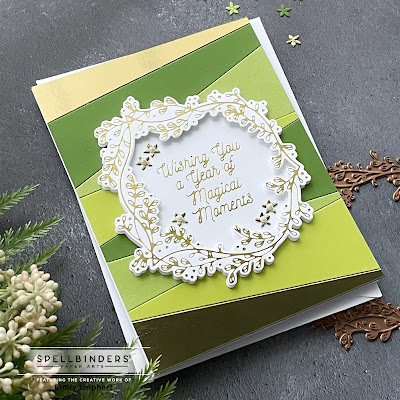

It also comes with two sentiments, also with coordinating dies. This particular sentiment is most likely to be used as a birthday sentiment, just like the other sentiment, but I think it could also be used in lieu of a Happy New Year sentiment. I love making New Year cards so that's what I had in mind with this design.


I foiled both the wreath and sentiment using Gold Hot Foil and added the little flowers using gold mirror cardstock. To create the background, I die cut gold mirror cardstock and three different shades of green cardstock using the Color Block Slices.


I haphazardly adhered the slices to the card base and cut off the overhanging pieces. I used foam tape to pop up the top layer of the wreath before attaching it to the card base. To finish, I added pearls to the centres of the tiny gold flowers, which are also part of the December 2021 Glimmer Hot Foil Kit. You have until December 24th to subscribe to and receive this stunning Botanical Crest!


Here's a list of kits I share each month and some of the value kits:
Supplies

Monday, November 15, 2021

Spellbinders | November 2021 Clubs Inspiration Blog Hop + Giveaway!

I'm thrilled to be part of the Spellbinders November 2021 Clubs Inspiration Blog Hop! You should've arrived from Marie Heiderscheit's blog and I have the full list of participants below. There are also details on the generous giveaway so be sure to read 'til the end.


For this hop, I've combined the Small Die of the Month - Stitched Curved Borders & Ornaments with the Glimmer Hot Foil Kit of the Month - Curved Christmas Glimmer Borders and you can see my previous club kit inspiration cards HERE and HERE. The design of this card is basically the reverse of this design HERE. I actually made them at the same time but instead of gold, I used silver on this version.


I also used silver embroidery floss on these ornaments as they were intended. I layered the ornaments using glitter and mirror silver cardstock, with sea glass blue and white cardstock. The addition of the silver pearls pull all of the silver layers together.


I love the impact of the matte silver hot foil on the lipstick red cardstock! With all of the details on the ornaments and the bright red panel, this card doesn't need much more.


I hope you enjoyed today's card featuring the Small Die of the Month with the Glimmer Hot Foil Kit of the Month! You have until November 24, 2021 to sign-up for these particular kits.

HOP ALONG

GIVEAWAY

To celebrate this release, we are giving away a $25 gift certificate to 3 lucky blog readers – selected from the comments on our blog. Giveaway closes on Sunday, November 21st, 11:59 pm MST. The winner will be announced in this blog hop post the following Wednesday. The winner is responsible for shipping cost, duties and taxes. 

Please note, store credit (gift certificate) cannot be applied to Club Subscriptions. Store credit can be applied to shop past Club products, Club extras and regular releases.

Your next stop is Jessica Vasher and, if you wish, please head to the Spellbinders Blog to begin the hop.

SALE

Don't forget to check out the Pre-Holiday Clearance Blowout Sale for amazing deals! Some of my favourites are less than half their original price!

Thanks so much for hopping along with us!

Supplies


Sunday, November 14, 2021

Spellbinders | It's Okay To Be Sad


The Spellbinders Mini Blooms and Sprigs dies had been out of stock everywhere for so long and I was finally able to get my hands on them! I also got the Mini Sincere Sentiments since I plan to collect all of the foiling sentiment sets. It's so hard to pick and choose which ones to get first.

A good friend of ours lost his father this week so I thought this was the perfect chance to combine the Mini Blooms and Sprigs with a sentiment from the Mini Sincere Sentiments and the Pinstripe Bracket Card Builder.


All of the cardstock is from Simon Says Stamp, with the exception of the silver glitter which is by Sizzix. I chose a combination that is more on the masculine side but also muted which suits the occasion.


The Mini Sincere Sentiment was heat foiled on Smoke Gray cardstock and the Pinstripe Bracket was heat foiled on Slate Gray cardstock. I used Matte Silver Glimmer Hot Foil on both these sections and I'm completely obsessed. Heat foiling doesn't have to be shiny to look incredible!


I die cut the Mini Blooms and Sprigs from Mint, Cornflower, Midnight Green and Fog Gray cardstock. Then I layered and arranged all the florals and foliage across the length of the foiled bracket section. After using liquid glue to attach the pieces, I popped the bracket panel on with black foam tape and embellished the blue flowers with white pearls.

Don't forget to check out the Pre-Holiday Clearance Blowout Sale for amazing deals! Some of my favourites are less than half their original price!


Thanks so much for stopping by!

Supplies

Sunday, October 17, 2021

Spellbinders | October 2021 Small Die of the Month


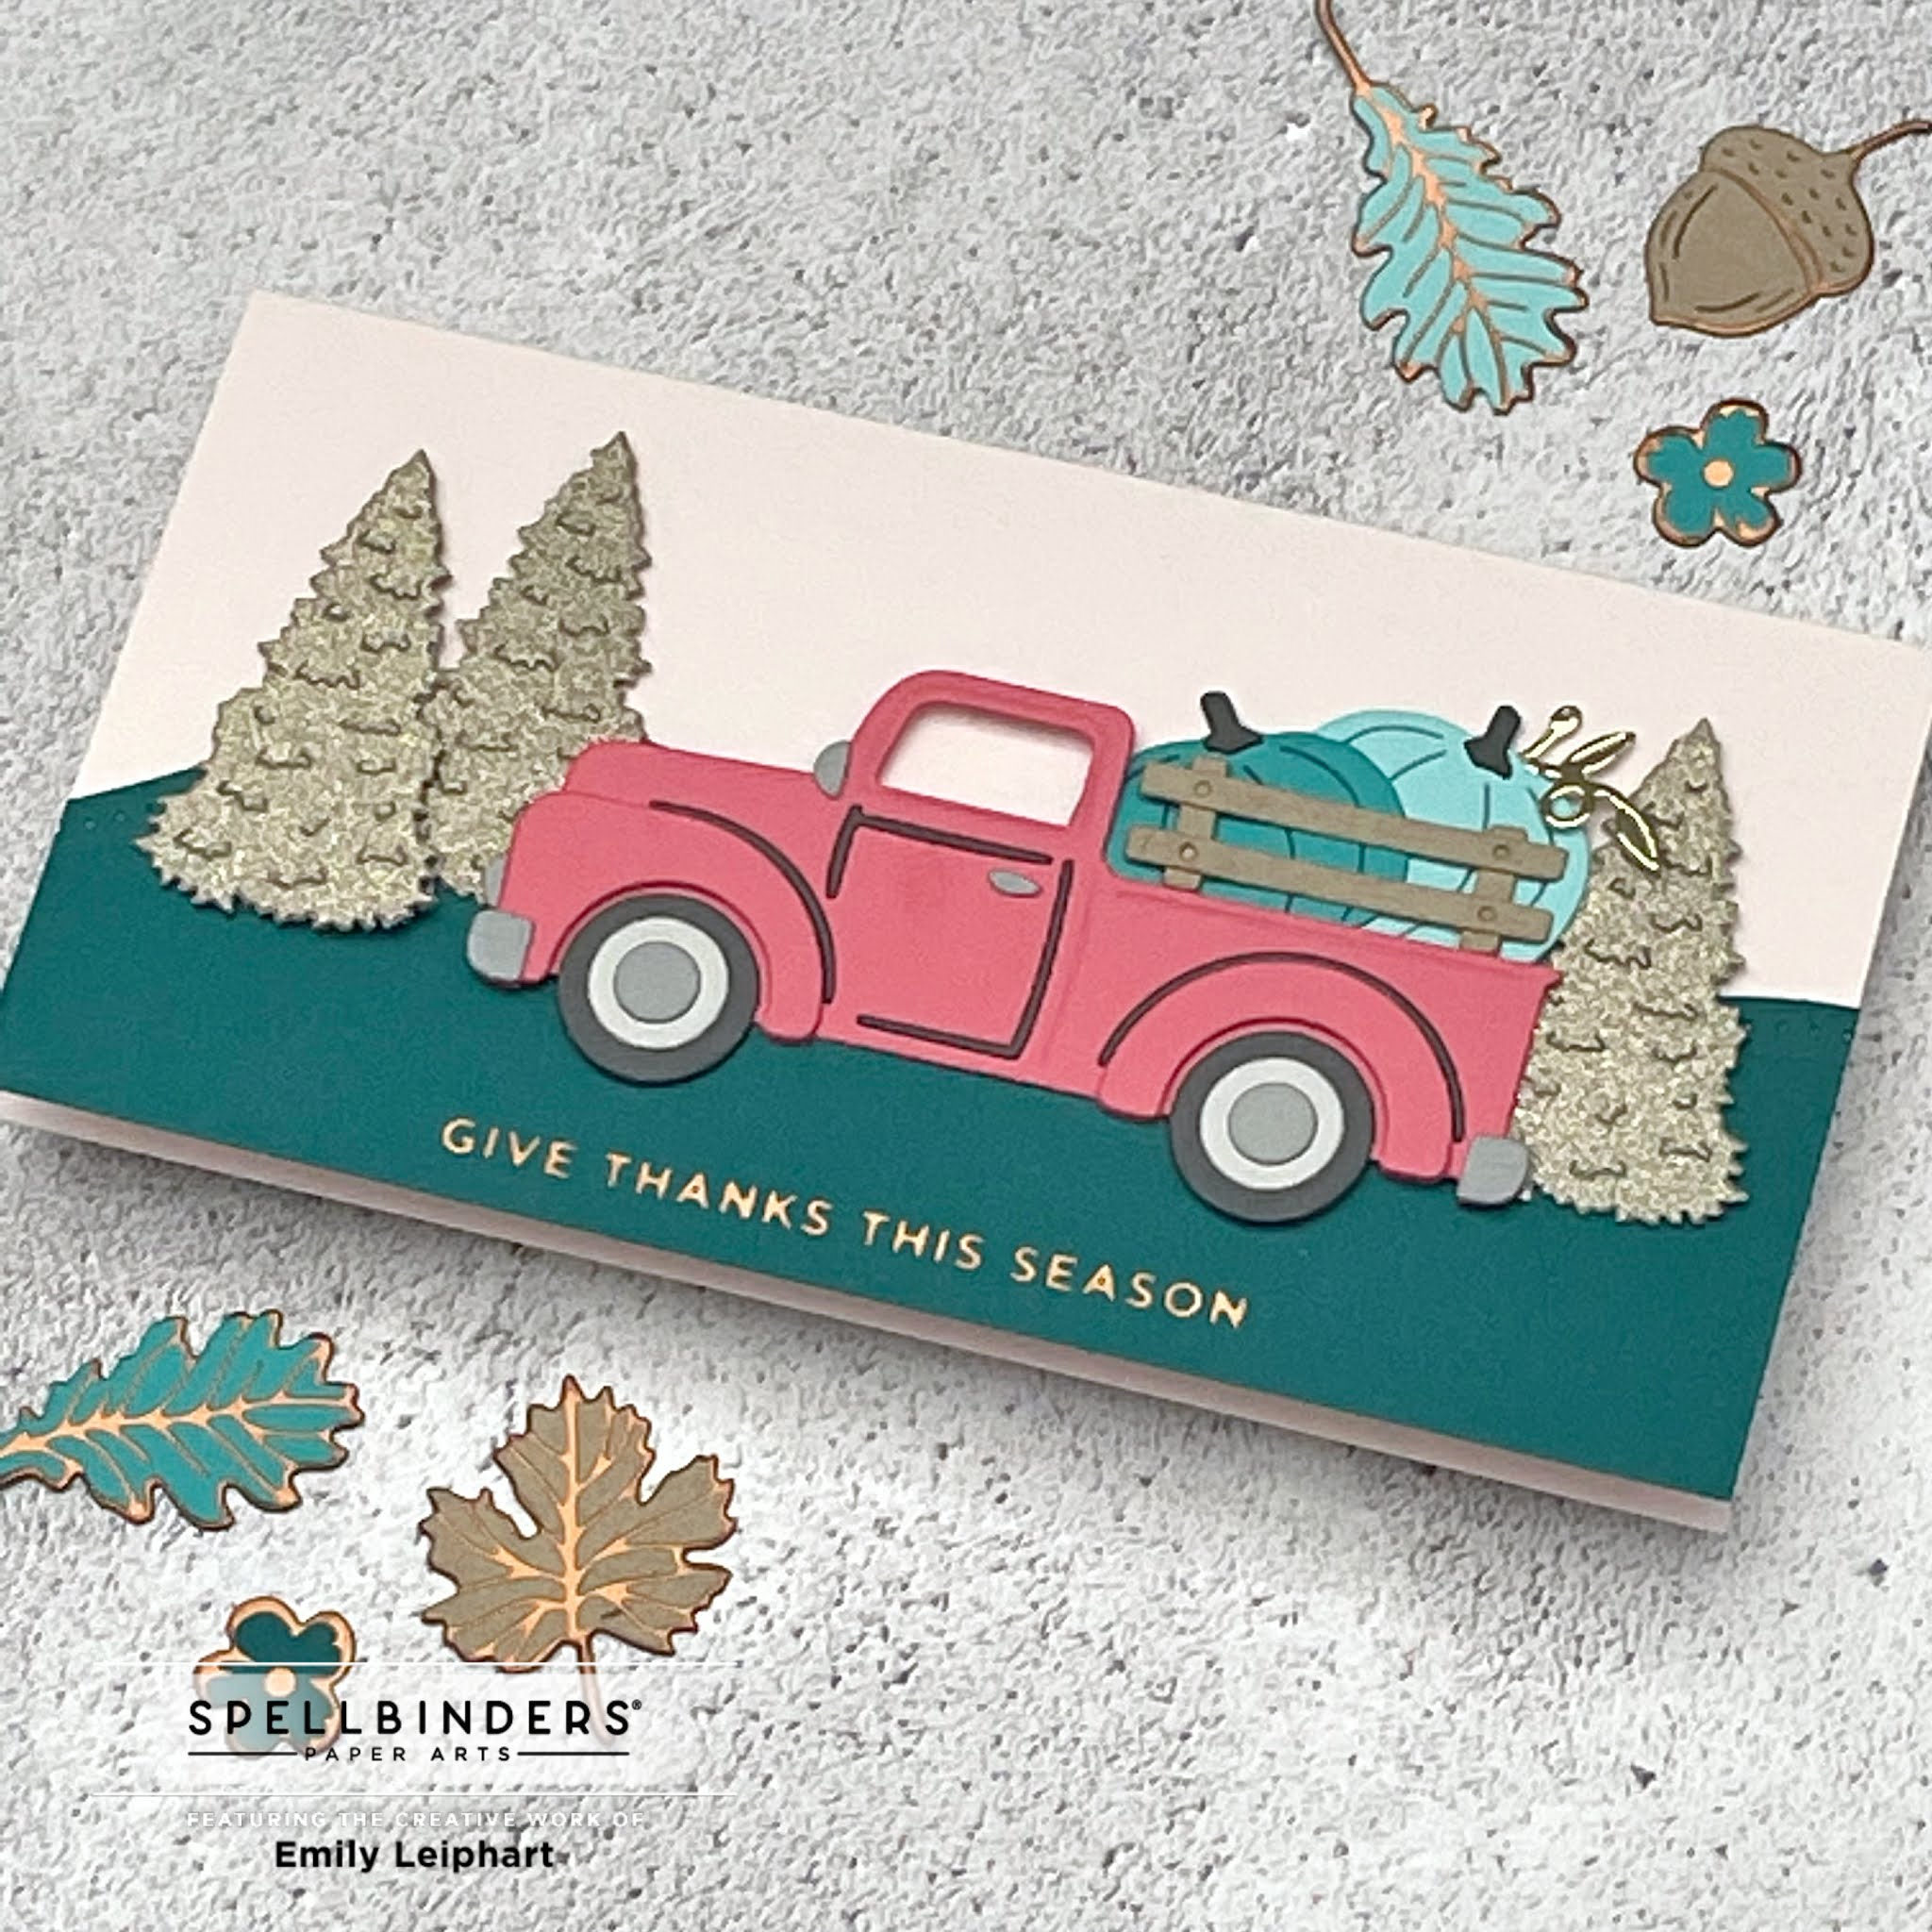
Hello, crafty friends! Today's card features the Spellbinders October 2021 Small Die of the Month which is primarily focused on Thanksgiving and Christmas but you can definitely use it year-round. Isn't it cute?! I just love that truck which you can customize in so many ways. I also love the details on the pumpkins and trees. I didn't even use the present so you can imagine all the birthday cards, too!

I used the same colour palette as my other three cards for both the October 2021 Glimmer Hot Foil Kit of the Month (HERE and HERE) and the October 2021 Stamp & Die of the Month (HERE). The only colour missing from this card is the red.

I used the Universal Curved Border Set to cut the hill from Jawbreaker cardstock. Then I foiled one of the sentiments from Mini Christmas Sentiments Strips with Copper hot foil on the bottom edge of the panel, which I adhered to a Pale Rose mini slim card base.


I die cut the trees from gold glitter cardstock and added some gold mirror cardstock to the pumpkins to add extra shine to the card. I attached all of the elements to the card using a combination of Scor-Tape, glue dots and liquid glue.

I love seeing all these same-but-different designs together! I hope you're inspired to create with these monthly kits. You have until October 24th to subscribe and receive these particular kits.

Here's a list of kits I share each month and some of the value kits:

Thanks so much for stopping by!

Supplies

Friday, August 6, 2021

Spellbinders | August 2021 Small Die of the Month


Today's Spellbinders inspiration features the August 2021 Small Die of the Month with a heat foiled sentiment from Sweet & Snarky Birthday Wishes. This sentiment set was previously sold with Aura Foil as the Glimmer Kit of the Month in June 2021 but both items are now available for purchase individually. As with all card kit subscriptions, you can cancel anytime and there is no long-term obligation!


The dimensions of this card are for a 3.25" x 6.5" mini slimline and I cut the card base from white linen cardstock which is my go-to for the majority of my cards.


All of the coloured cardstock is by Simon Says Stamp and the matte gold cardstock is by Sizzix. The colours are as follows: Burnt Orange, Orange Peel and Sunshine for the layered hexagons, Mint for the hexagon background, Peacock Teal for the outline mini slim die, Slate Gray for the foiled sentiment, and opulent matte gold for the rectangles.


It's so much fun to choose colours for these layering dies and see them come to life as the colours are stacked with Bearly Arts liquid glue. The fine nozzle on this glue makes it the perfect tool for all Spellbinders dies! Since the layered hexagons are three layers high, I stacked the hexagon outline to match their height. 


I love the Aura Foil I used to heat foil the sentiment from Sweet & Snarky Birthday Wishes. It matches the opulent matte gold cardstock perfectly! I stacked the sentiment strip two high to make it sturdy and more polished.


To finish, I attached all the layers and matching pearls to the mini slim card base using Bearly Arts liquid glue. The sentiment strip was attached using 1/4" Scor-Tape.

Here's a list of kits I share each month and some of the value kits:

Don't forget to check out the Clearance Sale with an additional 20% off at checkout!

Thanks so much for stopping by!

Sources

Friday, July 23, 2021

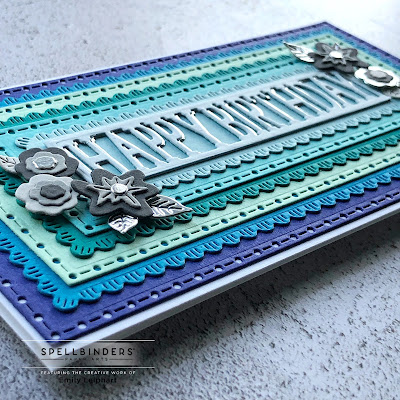
Spellbinders | July 2021 Large Die of the Month


Today's inspiration for Spellbinders features the July 2021 Large Die of the Month. Although I didn't feature it here, this month's kit also comes with three dies to create a custom envelope for this mini slim card design and the July 2021 Clear Stamp of the Month includes a shaped label that works with the envelope die. Most monthly kits work well together and you can find a list of all the value kits HERE. If you subscribe by July 24, 2021, you will receive this month's featured kits.


Just like my feature card for the July 2021 Small Die of the Month, I didn't do any stamping on this card. I simply used the dies included in the kit to create the birthday sentiment. There are eight dies alone just for the mini slim card and the patterns on the shapes alternate with each layer.


I used beautiful cardstock from Simon Says Stamp and the colours are, from largest to smallest: Blue Violet, Island Blue, Mint, Peacock Teal, Audrey Blue, Surf Blue and Sea Glass.


For the flowers, the greys are also from Simon Says Stamp and the colours are, from light to dark: Fog Gray, Smoke Gray and Slate Gray. The silver pieces behind the sentiment and in the flowers and leaves are from the Sizzix Silver Opulent Cardstock Pack.


I used a tape runner to stack all the layers on to a white linen card base. Then I used Bearly Arts liquid glue to assemble the flowers. I used foam tape to pop up the flowers and mini glue dots to attach the leaves.

Here's a list of kits I share each month and some of the value kits:

Thanks so much for stopping by!

Supplies

Thursday, June 24, 2021

Reverse Confetti | June 2021 Stock Your Stash Challenge: Hello or Just Because

Hello, crafty friends! This month's theme for the Stock Your Stash Challenge at Reverse Confetti is Hello and Just Because. Just Because, Encouragement and General Friendship cards are my favourite types of cards to make because I can send them any day for any reason! I chose to make a Just Because card, which is also an encouragement card for a friend. I'm literally covering all my bases. LOL I invite you all to play along for a chance to win. All you have to do is make a hello- or just because-themed card using Reverse Confetti and link up HERE. The winner will be chosen randomly from all entries to win a $20 gift certificate to shop at Reverse Confetti!


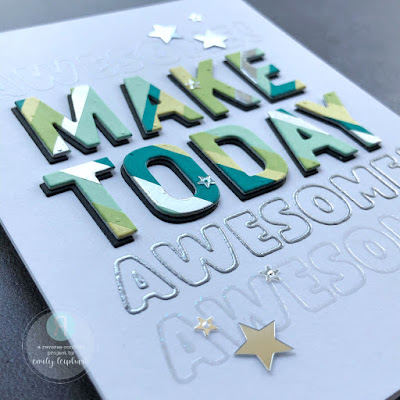
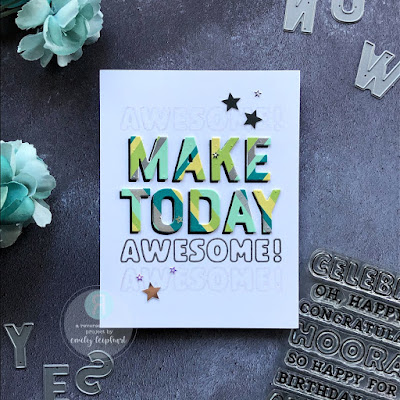
Lately, I've been obsessed with creating my own striped patterned paper and using it with the Letter Cuts. It's so easy to make your own colour combos with your favourite coloured cardstock and these ones are Lemon ChiffonGreen AppleMint and 
Peacock Teal by Simon Says Stamp. I also used strips of silver brushed metal cardstock by Sizzix.

First, I lined up the Letter Cuts and measured the size of the patterned paper I would need to cut these letters. Then I trimmed a piece of printer paper for the base. I covered it with adhesive and you can use anything you want, like a tape runner, liquid glue, Scor-Tape or adhesive sheets. I used a tape runner here since it was easiest for me.


Then I cut 1/8", 1/4" and 1/2" strips of Lemon ChiffonGreen AppleMintPeacock Teal cardstock and 1/8" and 1/4" strips of silver brushed metal cardstock. I decided on a colour order and but increased the width of the next colour, throwing in a strip of silver cardstock after every four strips. The stripes on the first word were angled up to the right and the stripes on the second word were angled down to the right to create an overall chevron effect. I added black die cut letters behind the striped letters to make them pop against the white background.


I used a word from the Hooray gift with purchase and silver heat embossed the middle one that completes the main sentiment. I sparkle heat embossed the other two to keep the cheer going along the length of the card and to add visual interest. To finish, I added silver star sequins in two sizes.

Thanks so much for stopping by and don't forget to play along HERE!

Supplies

Wednesday, June 23, 2021

Spellbinders | June 2021 Clear Stamp of the Month

Today's inspiration for Spellbinders combines the June 2021 Clear Stamp of the Month and the stunning Large Die of the Month (shared previously HERE). This month's Clear Stamp of the Month also works beautifully with the Small Die of the Month (shared previously HERE). Most monthly kits work well together and you can find a list of all the value kits HERE.

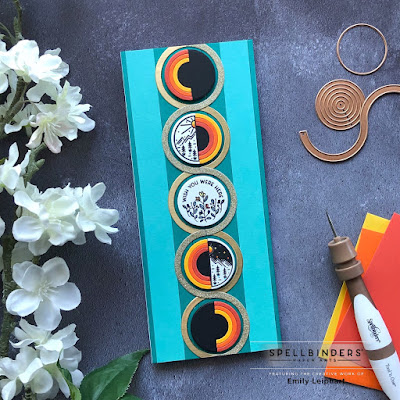
I started by choosing my colours for this full-sized slimline card and I can't seem to get enough of turquoises and oranges lately so I decided to do another take on these colours but adding teal, yellow and black. I used the largest die from the June 2021 Large Die of the Month and cut two sets of stripes from Audrey Blue and Peacock Teal cardstock.

I cut a piece of printer paper and adhered the stripes in a pattern using a tape runner. Once the pattern was complete, I trimmed it down to coordinate with the white linen card base. Next, I die cut die cut four swirls, two each from gold brushed metal and gold glitter cardstock. I adhered those down the centre of the card using liquid glue.

I stamped two of the images from the June 2021 Clear Stamp of the Month and carefully coloured them with Copic markers. I used black pigment ink because it's the best ink for fine lines but it's also very dark. It's not the right ink for Copic colouring so I waited for it to dry and then very carefully coloured the images, avoiding the edges as much as possible.

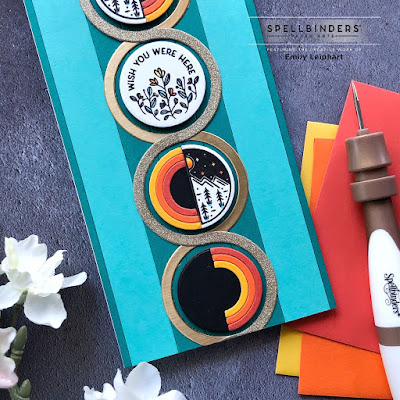
Then I used the solid circle die from the June 2021 Large Die of the Month to cut the images and five black circles. I stamped two of the day-and-night image since I wanted to feature each of the halves with the line down the middle and didn't want one of the images to lose the black line. By stamping two of them, I was able to preserve the black line for each of the images.

Next, I used the half-circles die to cut little rainbows from Burnt Orange, Orange Peel and Sunshine cardstock. I had to cut four sets of each colour to create the pattern shown. Once the rainbows were glued on to their black bases, I attached the images and popped them into their respective gold loops with foam tape.

Tomorrow is the last day to subscribe for this particular kit! I often get asked, 'Which kit should I get?' My favourite is definitely the Large Die of the Month because it's always so unique and versatile. Even when the dies are sized for a certain card size - full-sized slimline in this case - you can still create other card sizes (i.e. A2, square or mini slimline) with them. Here's a list of kits I share each month and some of the value kits:

Thanks so much for stopping by!

Supplies